There are lots of quick and easy, no-code ways to get blog up and running — such as Medium or Wordpress — but, whether it’s to customize, monetize, add security, or just learn, today, I’ll show you how to code your own blog from scratch.
When adding a blog to your existing website, or just starting out with a new blog, a static site generator can help you get started.
Static site generators such as GatsbyJS are primarily used to serve fixed content, but they can also be used for pretty much any web application, including blog and e-commerce web applications.
In this post, we are going to create a blog from scratch using GatsbyJS with ReactJS and GraphQL at its core.
What is GatsbyJS?
Gatsby is a simple, robust, and fast static site generator. It uses ReactJS to render static content on the web. The content in a Gatsby app is written in the same way as any other React app: through components. These components are rendered at build time to the DOM as static HTML, CSS, and JavaScript.
At a high level, Gatsby uses various source plugins to read data and make it available via a GraphQL interface. You write GraphQL queries to load this data and render React components. GraphQL can render content that is sourced from a large number of formats and sources such as Markdown, CSV, and CMS like Wordpress, Drupal, GraphCMS, and so on.
Why use Gatsby?
Gatsby takes care of a lot behind the scenes.
- Future proof JAMstack websites
- Gatsby has a rich plugin ecosystem that is easily extensible
- Pre-configured Webpack based build system (no need to break your head)
- Supports PWA (Progressive Web App) by default
- Optimized for speed. Gatsby loads only critical parts so that your site loads as fast as possible. Once loaded, Gatsby prefetches resources for other pages so that clicking on the site feels incredibly fast
Gatsby also has an ever-growing data plugin ecosystem, especially for data transformation. Overall, I think the points above should be enough to lure you into trying it out.
Pre-requisites
- Familiarity with HTML, JavaScript, ReactJS
- Nodejs with
npmoryarninstalled - Gatsby CLI (which we are going to install in next section)
Note: At the time of writing this tutorial, Gatsby v2 was officially launched.
Getting Started with Gatsby
To start, we need to install the command line utility provided by GatsbyJS to quickly scaffold projects. Open your terminal and type the following command.
npm install -g gatsby-cliTo verify that it has been installed, run the following command.
# Check the version
gatsby -v

# you will get a similar output
2.4.5
Once you successfully installed gatsby-cli, it is time to generate a new project.
gatsby new gatsby-blog-starterThis process will take a minute or two and, at the end of it, you will have a new directory. Traverse inside it. Gatsby’s default project structure looks like this:
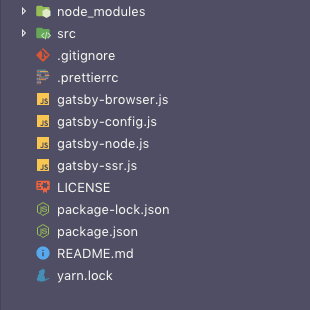
To see what we get by default, run gatsby develop. This will run the project without creating the official build directory on a development server through webpack (used by Gatsby internally). After the command runs successfully, you will be prompted by the following screen like below in your terminal.
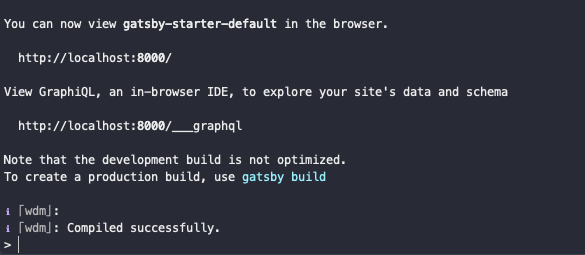
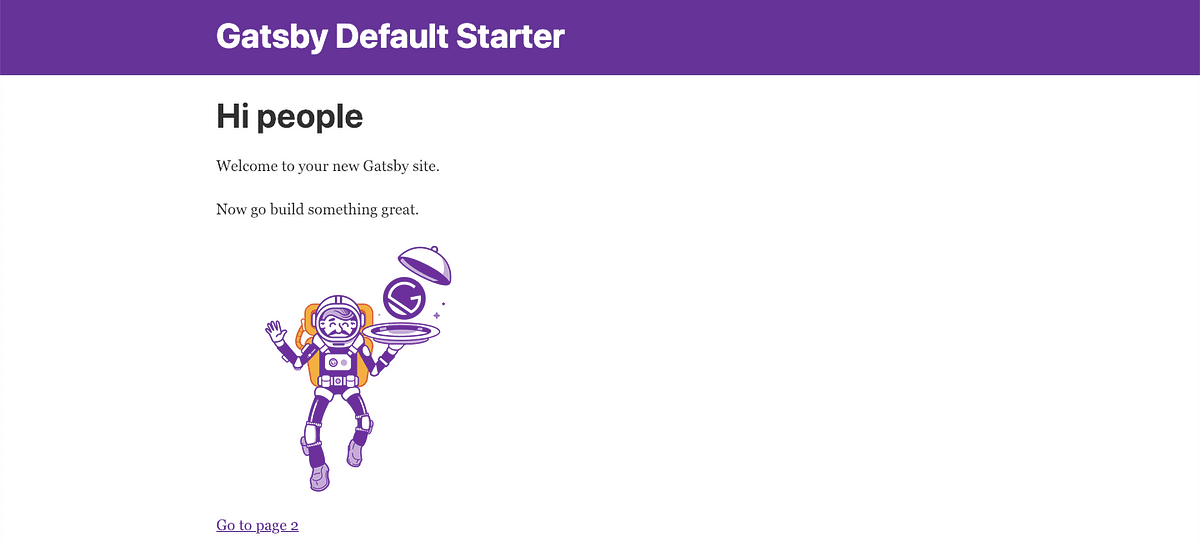
You can visit http://localhost:8000 to see the default site in action.
Running a GraphQL Query
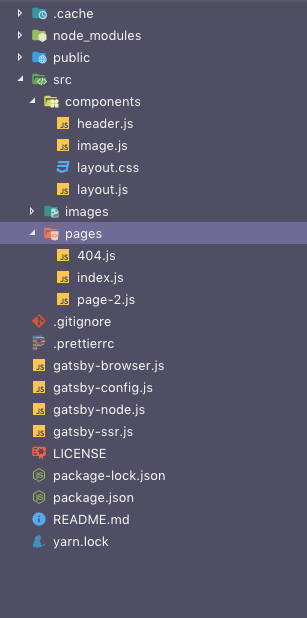
Every Gatsby project contains at least these files. You might be familiar with some of these such as node_modulesand public directory, which is served when deployed. It also contains package.json, which contains the metadata of any modern Javascript application.
Our main object of focus are in the directory src and files such as gatsby-config.js and gatsby-node.js.These contain the metadata and other essential information about our current application. Inside the src/ there are two sub-directories: components/ and pages/. The components/ contain further two files: layout.css and layout.js. These serve as the starting point of our application.
You have already seen what the default page that comes with Gatsby looks like. We have a title in the navigation bar. Let’s add a subtitle. Open gatsby-config.js and a new field description and change title like below.
siteMetadata: {
    title: 'Gatsby Blog',
    description: 'This is my personal blog.'
  },
Gatsby allows us to query metadata fields described in this file as a GraphQL query. In order to take a look at what kind of stuff we can query from Gatsby, run gatsby develop from the terminal. You will not see any changes at http://localhost:8000/ yet because we haven’t modified the component responsible for that. However, we can verify by running a simple GraphQL query. Open http://localhost:8000/___graphql in the browser.

We’ve got the GraphQL browser open and over on the side here, we can see the documentation explorer, which lets us go through our schema and look at what kind of stuff we can query for. Click on the query type on the right hand side to see what query fields we can access.
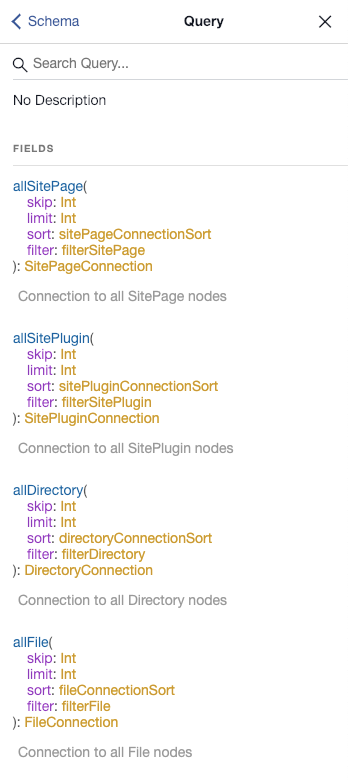
This gives us a list of all of the query types that we can look for. Take a look at the site and the siteMetadata. You can start typing a s, and you will see an autocomplete for the query type site. This is really helpful. Run the below query.

Great!
Now that you are familiar with the nitty-gritty of Gatsby and how it works, in the next section, we will start working on the blog.
Writing our first Markdown blog post
Gatsby makes use of various plugins for building static sites. In this section, we are going to install and configure in order to make use of gatsby-source-filesystem and gatsby-transformer-remark to work with locally stored Markdown files. Open your terminal and type.
I am using yarn because Gatsby uses it by default over npm as the package manager. Once both of these dependencies are installed, configure gatsby-config.js file like below.
plugins: [
  'gatsby-transformer-remark',
  {
    resolve: `gatsby-source-filesystem`,
    options: {
      name: `pages`,
      path: `${__dirname}/src/pages/`
    }
  }
];
The rest of the plugins remain same. gatsby-transformer-remark is used parse Markdown files in .md format into HTML. gatsby-source-filesystem helps us with reading those markdown files from the disk. Each post in our blog is going to be in markdown format.
To understand it better, let us add some posts. Traverse to src/pages directory and then add one or two posts in a year, month, and date format with a slug like below.
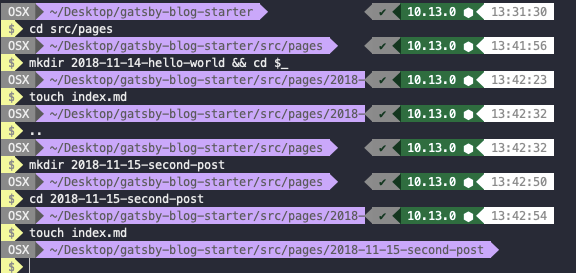
Each markdown file is supposed to have some frontmatter fields that are used to create and update our posts. Open the 2018-11-14-hello-world.md and the following content.
Similarly you can add the content to the second post.
The content of these two Markdown files will be our first two blog posts. The block surrounded in dashes is referred to as frontmatter, and the contents of the block can be used to inject React components with the specified data, such as path, date, title, tags, and so on.
One important note is that path will be used when we dynamically create our pages to specify the URL to each blog to render the file. We’ll do this later.
Creating the Blog Template
If you take a look at your blog in a browser, you will see that Gatsby is not yet displaying any blog posts that you have created. This is because Gatsby still does not know where these blog posts are or that you even want them to be displayed in the browser. However, if you try to query it in the GraphiQL browser tab, you can see that frontmatter data of blog post is available.

Each Markdown file is parsed into a node of type MarkdownRemark. To query all markdown files in on query, we are using allMarkdownRemark. All frontmatter fields are converted into GraphQL fields.
To display each post let us create a new template that will be consistent in style and getting frontmatter from GraphQL query we have just seen. Inside the src directory, create a new folder called templates and inside it, create a new file called blogPost.js.
import React from 'react';
import { graphql } from 'gatsby';

const Template = ({ data }) => {
  const title = data.markdownRemark.frontmatter.title;
  const date = data.markdownRemark.frontmatter.date;
  const html = data.markdownRemark.html;

  return (
    <div>
      <h1>{title}</h1>
      <div className="blogpost" dangerouslySetInnerHTML={{ __html: html }} />
    </div>
  );
};

export const postQuery = graphql`
  query ($pathSlug: String!) {
    markdownRemark(frontmatter: { path: { eq: $pathSlug } }) {
      html
      frontmatter {
        title
        date(formatString: "MMMM, DD, YYYY")
        path
        tags
        excerpt
      }
    }
  }
`;

export default Template;
In this component, notice the new query postQuery we are creating. This query will help us to display our blog posts into the template. This query puts all the frontmatter we require in order to display blog post in the component Template’s props.
const title = props.data.markdownRemark.frontmatter.title;
const html = props.data.markdownRemark.html;
In above, I am fetching the title for each post and the HTML content. While rendering the output we get from the query, I am using dangerouslySetInnerHTML which is a React’s replacement for using innerHTML in the browser DOM. In general, setting HTML from code is risky because it exposes a user to a cross-site scripting (XSS) attack if used with sensitive data. Since we do not have any users (no login/signup system), I am just using it for content that is rendered as HTML from markdown.
We now have a template of how our blog post will look but we still haven’t configured a way to render and convert a blog post into HTML. That’s next. Open gatsby-node.js in the root of your project and add the following code.
const path = require('path');

exports.createPages = ({ graphql, actions }) => {
  const { createPage } = actions;

  return new Promise((resolve, reject) => {
    const blogPostTemplate = path.resolve('src/templates/blogPost.js');
    // Query for markdown nodes to use in creating pages.
    resolve(
      graphql(`
        query {
          allMarkdownRemark(
            sort: { order: ASC, fields: [frontmatter___date] }
          ) {
            edges {
              node {
                frontmatter {
                  path
                  title
                  tags
                }
              }
            }
          }
        }
      `).then(result => {
        const posts = result.data.allMarkdownRemark.edges;

        posts.forEach(({ node }) => {
          const path = node.frontmatter.path;
          createPage({
            path,
            component: blogPostTemplate,
            context: {
              pathSlug: path
            }
          });
          resolve();
        });
      })
    );
  });
};
We start by requiring Node’s path in order to fetch the blog post template. Notice the actions along with graphql as parameters when we are exporting createPages. Gatsby uses Redux internally to manage state. That’s where actions come from. The object actions contain the functions and these can be individually extracted by using ES6 object de-structuring. It has pre-defined functions such as createPage, createRedirect, setWebpackConfig and so on. You can find all of them here.
We then make use createPage programmatically. There are two other ways other than the approach we are implementing. In our case, we need to read Markdown files.
Since our home page is still not done to display a list of blog posts you will have to visit each URL listed below in order to see the blog posts in action.
- For the first post, visit:
[http://localhost:8000/first-post](http://localhost:8000/first-post) - For the second post, visit:
[http://localhost:8000/second-post](http://localhost:8000/second-post)
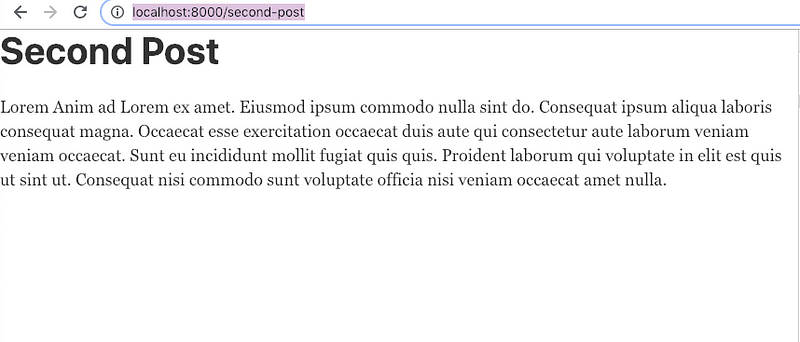
Try to modify the Template component and other fields from the frontmatter. Open src/blogPost.js.
const Template = ({ data }) => {
  const title = data.markdownRemark.frontmatter.title;
  const date = data.markdownRemark.frontmatter.date;
  const html = data.markdownRemark.html;
  return (
    <div>
      <h1>{title}</h1>
      <div>
        <em>{date}</em>
      </div>
      <br />
      <div className="blogpost" dangerouslySetInnerHTML={{ __html: html }} />
    </div>
  );
};
To represent the changes, I have added the date in italics just before the content of the blog post and after the title. Visit any post’s URL and see it in action.

Adding Previous and Next Blog Post Links
For this feature to work with our blog, we are going to make use Gatsby Link component. It is a wrapper around @reach/router’s Link component that adds enhancements specific to Gatsby and you can even use props such as activeStyle or activeClassName to add styling attributes to the rendered element when it matches the current URL. Just like how a normal routing component in React behaves. Open blogPost.js file and add this.
import React from 'react';
import { graphql, Link } from 'gatsby';

const Template = ({ data, pathContext }) => {
  const title = data.markdownRemark.frontmatter.title;
  const date = data.markdownRemark.frontmatter.date;
  const html = data.markdownRemark.html;
  const { next, prev } = pathContext;

  return (
    <div>
      <h1>{title}</h1>
      <div>
        <em>{date}</em>
      </div>
      <br />
      <div className="blogpost" dangerouslySetInnerHTML={{ __html: html }} />
      <p>
        {prev && (
          <Link to={prev.frontmatter.path}>
            {prev.frontmatter.title}{' '}
            <span role="img" aria-label="point-left">
              👈{' '}
            </span>
            Previous
          </Link>
        )}
      </p>
      <p>
        {next && (
          <Link to={next.frontmatter.path}>
            Next{' '}
            <span role="img" aria-label="point-right">
              👉
            </span>
            {next.frontmatter.title}
          </Link>
        )}
      </p>
    </div>
  );
};

// rest of the code remain sames
Notice how I am using span tags with attribute role to wrap emojis along with aria-label attribute. It is considered as good practice in Gatsby, React and you will definitely avoid any linting errors. Now to make the above code work, we need to modify the context in gatsby-node.js.
posts.forEach(({ node }, index) => {
  const path = node.frontmatter.path;
  createPage({
    path,
    component: blogPostTemplate,
    context: {
      pathSlug: path,
      prev: index === 0 ? null : posts[index - 1].node,
      next: index === posts.length - 1 ? null : posts[index + 1].node
    }
  });
  resolve();
});
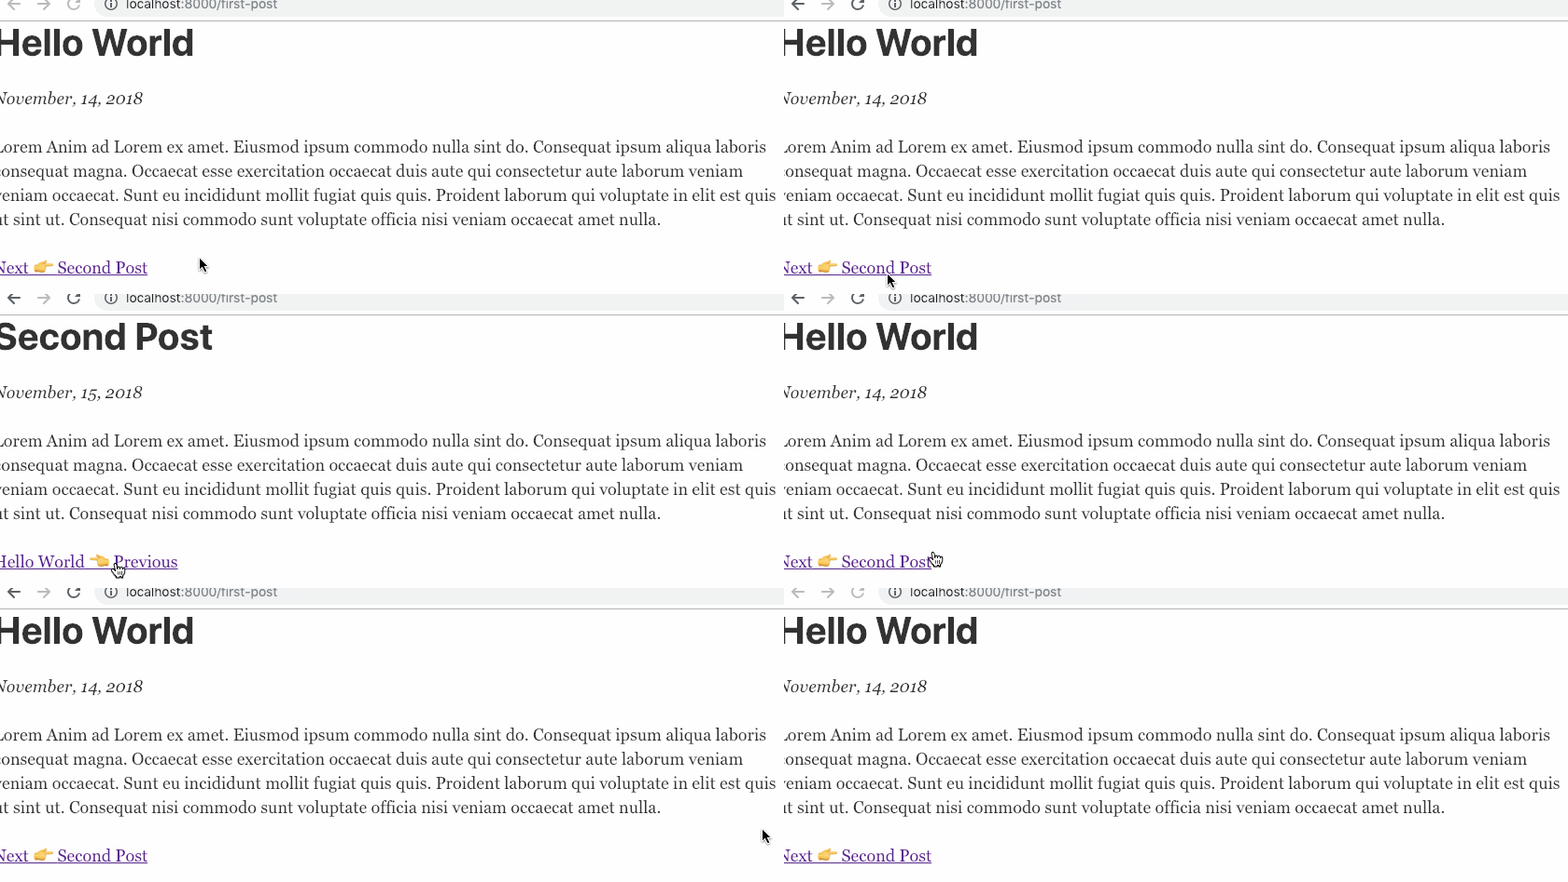
The context object now contains two keys called prev and next. We are also using index value of each post. If the index === 0, there is not going to be any previous post since it is the first one. You cannot go to a previous post here. We are then using these new context properties in blogPost.js using pathContext.
Visit the first post and you will get the following result.
Display all posts on Homepage
Since all of our markdown posts are getting rendered into HTML correctly, the next and previous post feature working too. So let us move ahead and display all the blog posts on the home page. Not the complete posts, but a link to each one.
import React from 'react';
import { graphql, Link } from 'gatsby';
import Layout from '../components/layout';
const IndexPage = ({ data }) => {
const { edges } = data.allMarkdownRemark;
return (
<Layout>
<div>
{edges.map(edge => {
const { frontmatter } = edge.node;
return (
<div key={frontmatter.path}>
<Link to={frontmatter.path}>{frontmatter.title}</Link>
<small>
{' '}
<em>published on</em> {frontmatter.date}
</small>
<p>{frontmatter.excerpt}</p>
<br />
</div>
);
})}
</div>
</Layout>
);
};
export const query = graphql`
query HomePageQuery {
allMarkdownRemark(sort: { order: DESC, fields: frontmatter___date }) {
totalCount
edges {
node {
id
frontmatter {
title
date(formatString: "MMMM DD, YYYY")
path
tags
excerpt
}
}
}
}
}
`;
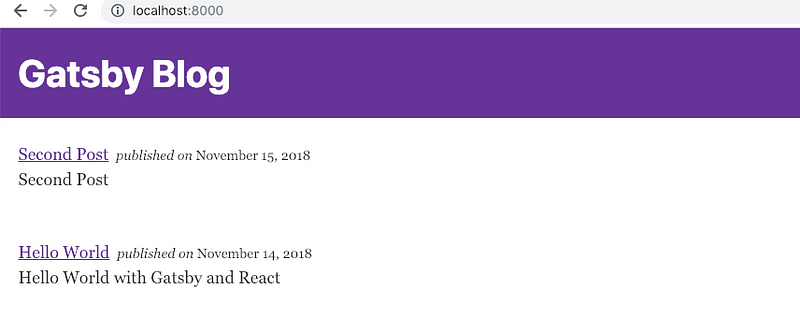
export default IndexPage;On visiting the Home page URL: http://localhost:8000/ you will get the following result.
Conclusion
We now have a functioning blog!
I challenge you to expand your own blog further by adding comments or tags functionalities. Gatsby has a lot to offer. You learn more about Gatsby at their official documentation.
The complete code for the tutorial at this Github repository