
Redux is an important part of the React Native ecosystem. If your world revolves around JavaScript, you’ve probably heard about Redux. Before reading the rest of the tutorial and going further, just try to remember that you are only learning about Redux because it will make things easier for you, and not more difficult. Now let us learn why you need Redux in your application.
Need for Redux
Building a React or React Native application in the real world can become complex if there is not a proper way to handle data. If at any point the data is not managed, things will get out of hand. If you are familiar with React or React Native, you know the default way of handling data is to keep it in a component state and pass it to children components as props.
State and Props are the only two ways to control data in a component. Props is short for properties. It is a simple rule to follow in the React world that we should not mutate or change the value of props. In React, the flow of data is unidirectional or one way. That is, the data can always be passed from a parent to a child component. Take a look below at this simple example:
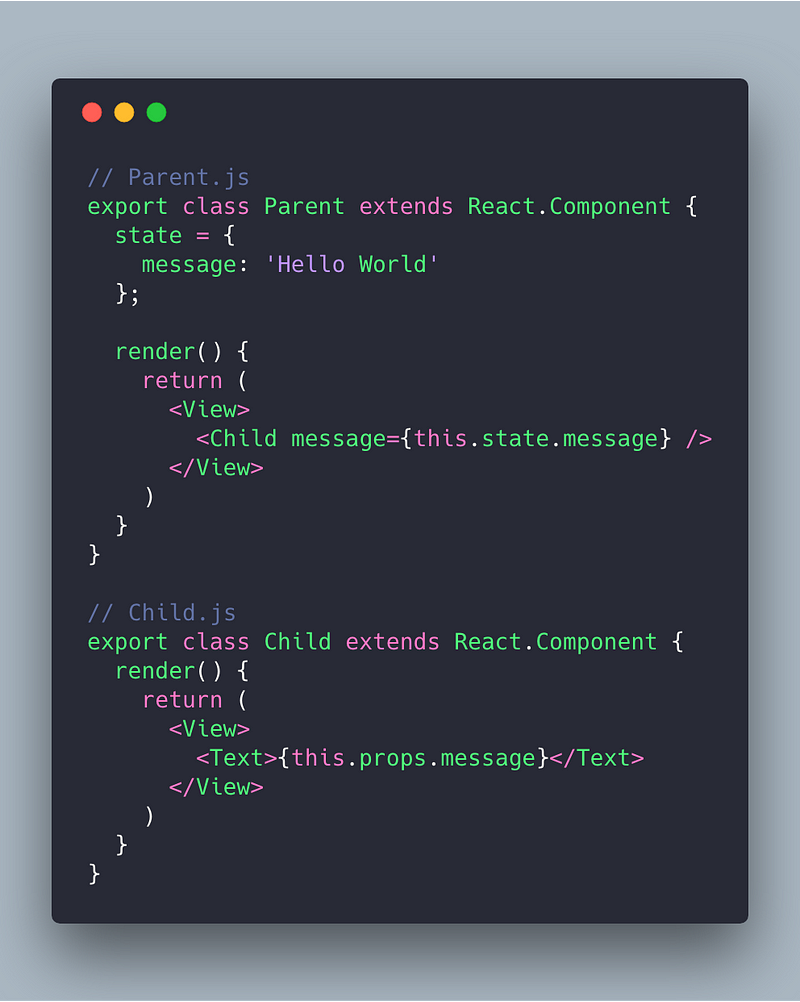
In the above example, we create two components (Parent and Child) in separate files. The Parent component consists of a view where the Child component is rendered. In the child component, the view renders a text message that is incoming from the props. The incoming message is available as the data in the state of the parent component.
This way, the child component can be reused with other parent components such that each parent component can have its own data to render. Do note that we are not modifying the value of this.props at any point.
The state is there to mutate data. This is the only reason that the state exists within each component. Whenever we want to change the state, we use this.setState() method within a component. This method re-renders the component and all of its child components to reflect the changes. This works both in React and React Native similarly, but the internals are different.

Since we can manage state and props so efficiently within a React Native app, why is Redux necessary? Well, the above example represents the bare minimum and not a real-time scenario. Imagine an application like Instagram or Twitter. You have different screens, and each screen may depend on a component or two like the Parent and the reusable Child components from our example. It would be hard to keep track of the state of each component.
Redux is one the most widely adopted ways of handling data. It enables the state to be shared as a global attribute that an entire React Native application can use and receive in the form of props. This is known as creating a store in Redux. Redux simplifies the state by moving it into one place.
Redux uses an underlying React Mechanism called context. We are not going to dwell what context is, since it is out of the scope of this article. I just wanted you to know that nothing magical is happening behind the scenes.
Just remember the following terms, since we are going to see them in action in the tutorial below:
- Actions
- Reducers
- Store
The key to learning Redux is practice. I don’t want to share too much information and overwhelm things right now. So let us begin by creating a demo application to learn Redux.
Building a Pomodoro application
Getting Started with Expo-CLI
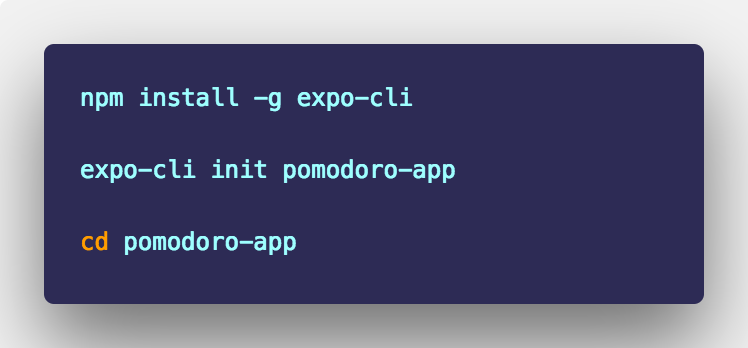
To build this application, I am going to use the latest tool introduced by the Expo team called expo-cli. Install it as a global dependency and then initialise a new React Native project using it.
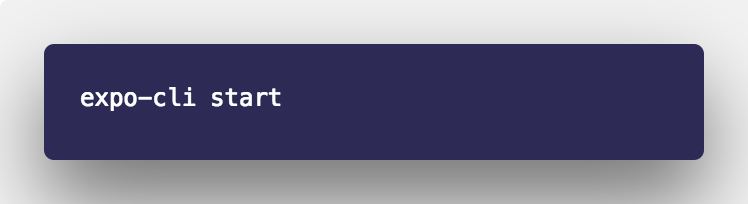
To see if everything is working correctly at this initial state, run the following command.
You will be prompted with the following interface. Take some time to go through it. If you have build applications using Expo XDE or Create-React-Native-App before, you will see that not much has changed, except that now Expo-CLI makes use of the Chrome browser.
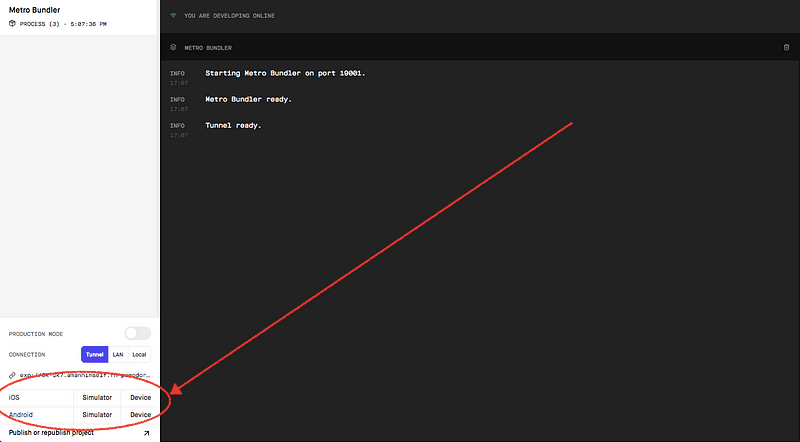
Choose a simulator or device that can run Expo Client as marked in the above image. If you get the below screen, that means our React Native project has been initialised without any difficulties.
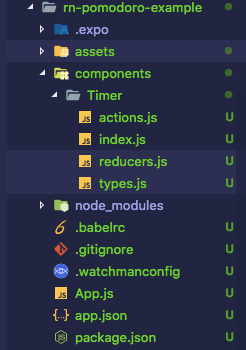
With that, create the following files and folders inside the components directory. I will discuss why we are following this directory structure later. For now, our initial setup is complete and we can start building our application.
Timer Component ⏱
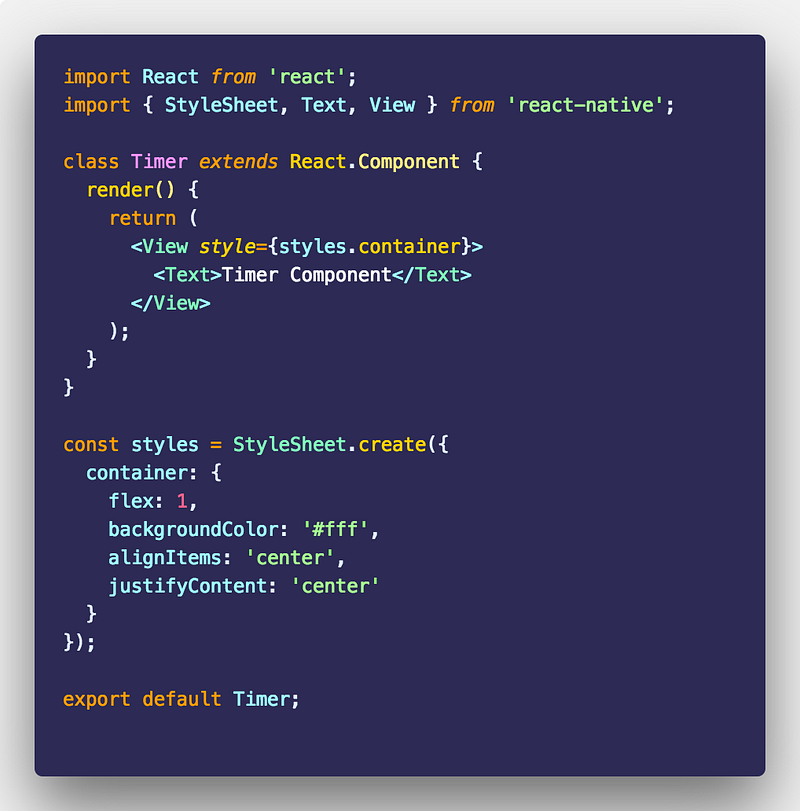
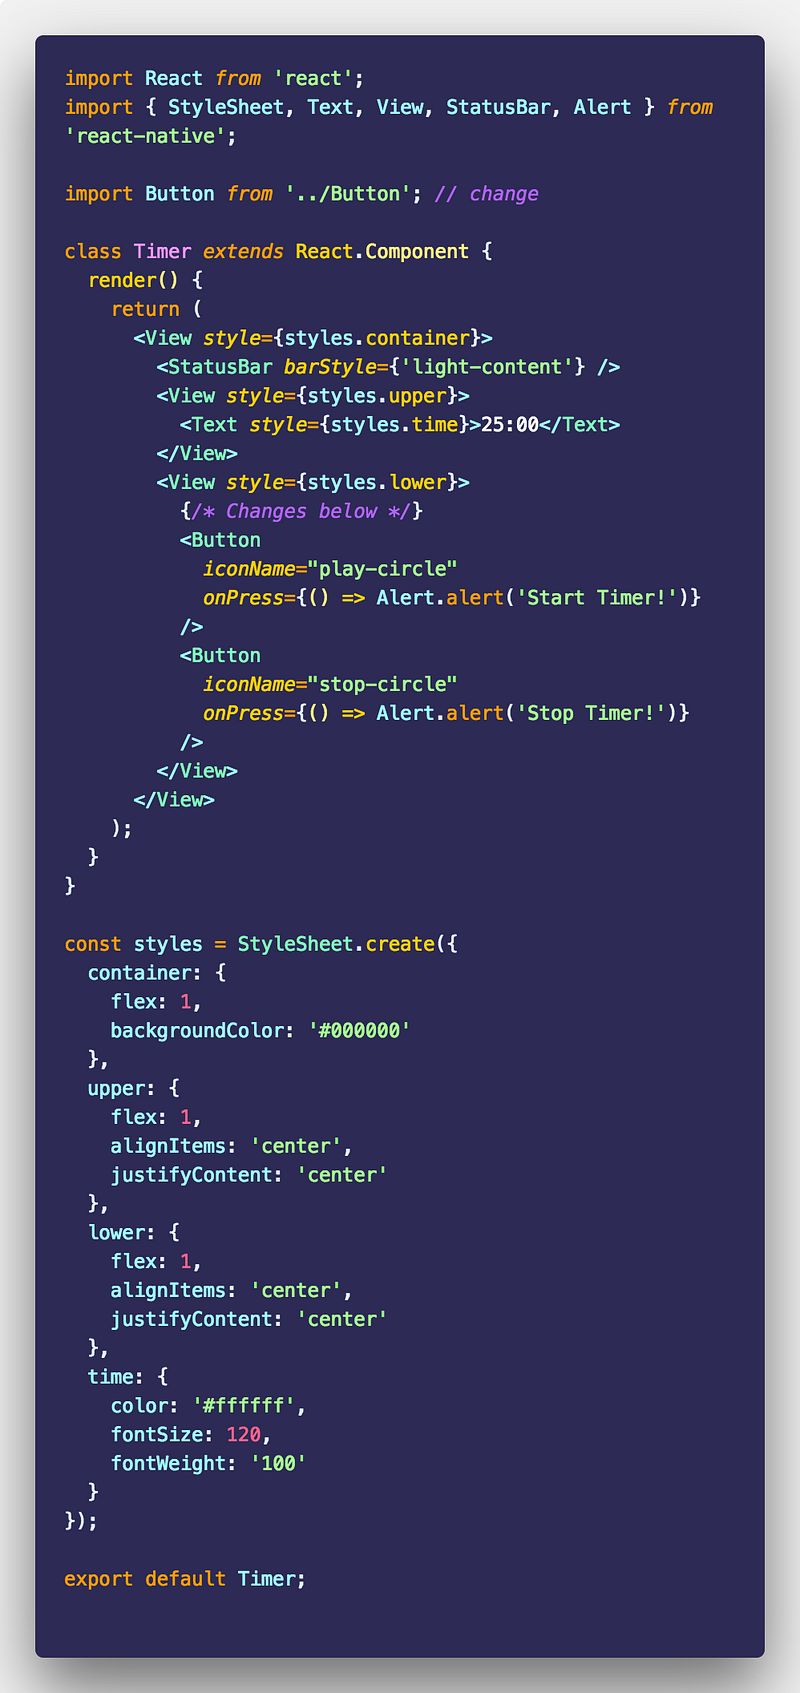
First, we will create a dumb Timer component and connect it with App.js. Add the following code to the Timer/index.js:
Next, modify the App.js file:
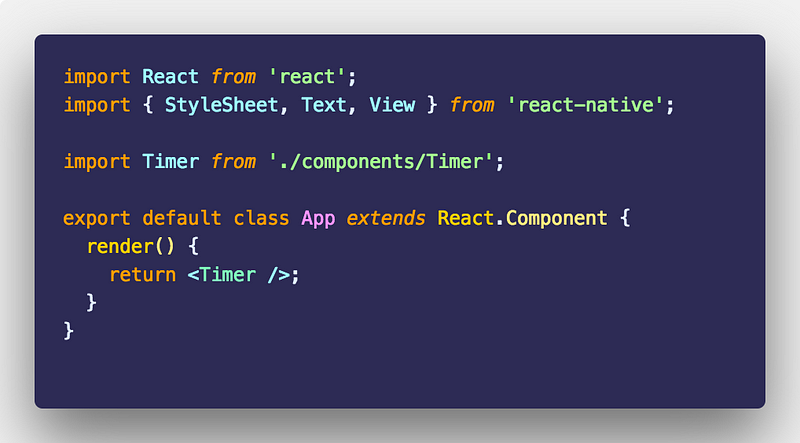
We will now make a static Timer component to see how things fit in. We’ll start by modifying the StatusBar. Then we define two Text elements from the react-native library to specify where the actual timer will be displayed and where the buttons for starting and stopping the timer will be displayed. For now, both are text fields.


Adding Buttons 🔘
In this section, we are going to replace the section that displays Start and Stop Buttons! with actual buttons. We will be using TouchableOpacity to make this work. A TouchableOpacity component acts as a wrapper for making views respond properly to touches. The opacity of the wrapped view (or the button in our case) gets decreased whenever a user touches it.
We create a reusable component since we need two buttons: Start and Stop.
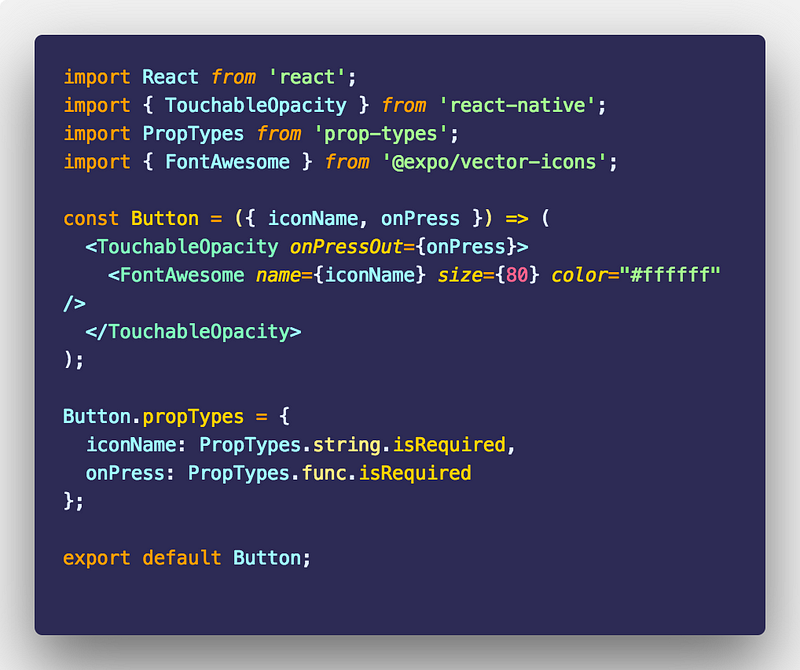
This is a stateless component, so it has no class — we only need it to represent the Button in the UI of our app. We also import FontAwesome icons from @expo/vector-icons, which is a fork of react-native-vector-icons and comes directly with the expo SDK. No need to install it as a separate dependency. To display an icon, we need to define its size.
Lastly, in the above stateless component, we define propTypes. I will be discussing how and why we should use PropTypes in a React Native application in another article.
In a mobile app, events are triggered by touch. To handle those events, we are going to use onPress. We will have only two events here, Start and Stop. Both the buttons in our app are going to make use of onPressOut which differs from onPress . The onPressOut is called whenever the touch is released by the user (when the user stops pressing the button). It is called before onPress and is more accurate in a situation like ours where we need to start or stop the timer by pressing the button as soon as the user is done.
We will now require this Button component in our Timer component.

Integrating Redux 😍
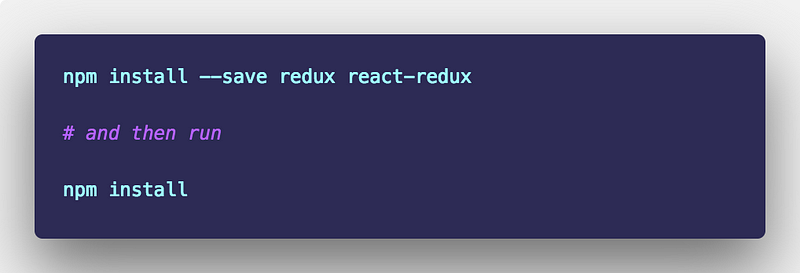
So far, our Timer application does not do anything other than display a bare minimum UI. To make it work, we start by adding some necessary Redux dependencies.
Now, let us start integrating Redux in our app.
Actions 🎬
In Redux, the state of the whole application is represented by one JavaScript object. Think of this object as read-only, since we cannot make changes to this state (which is represented in the form of a tree) directly. We need actions to do so.
Actions are like events in Redux. They can be triggered in the form of mouse clicks, key presses, timers or network requests. The nature of each event mentioned is mutable. An action is a JavaScript object. To define an action, there is one requirement: each action much have its own type property. We define these types in a file called types.js:
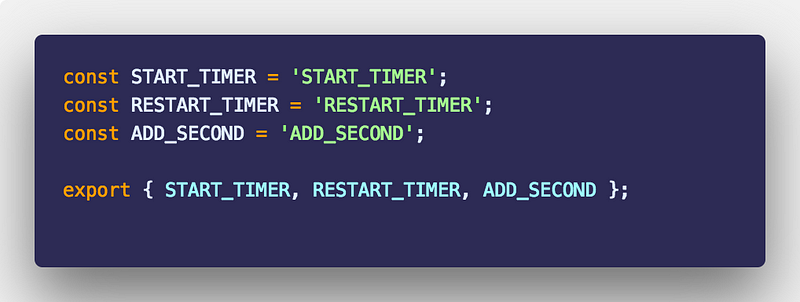
Our application needs only three actions so far. The type of any action is a string value and is defined as a constant.
In the file actions.js, we will require these types to define action creators. Action Creators are functions that create actions.

Reducers 🚜
The receiver of the action is known as a reducer. Whenever an action is triggered, the state of the application changes. The handling of the application’s state is done by the reducers.
A reducer is a pure function that calculates the next state based on the initial or previous state. It always produces the same output if the state is unchanged. It takes two inputs, and state and action must return the default state.
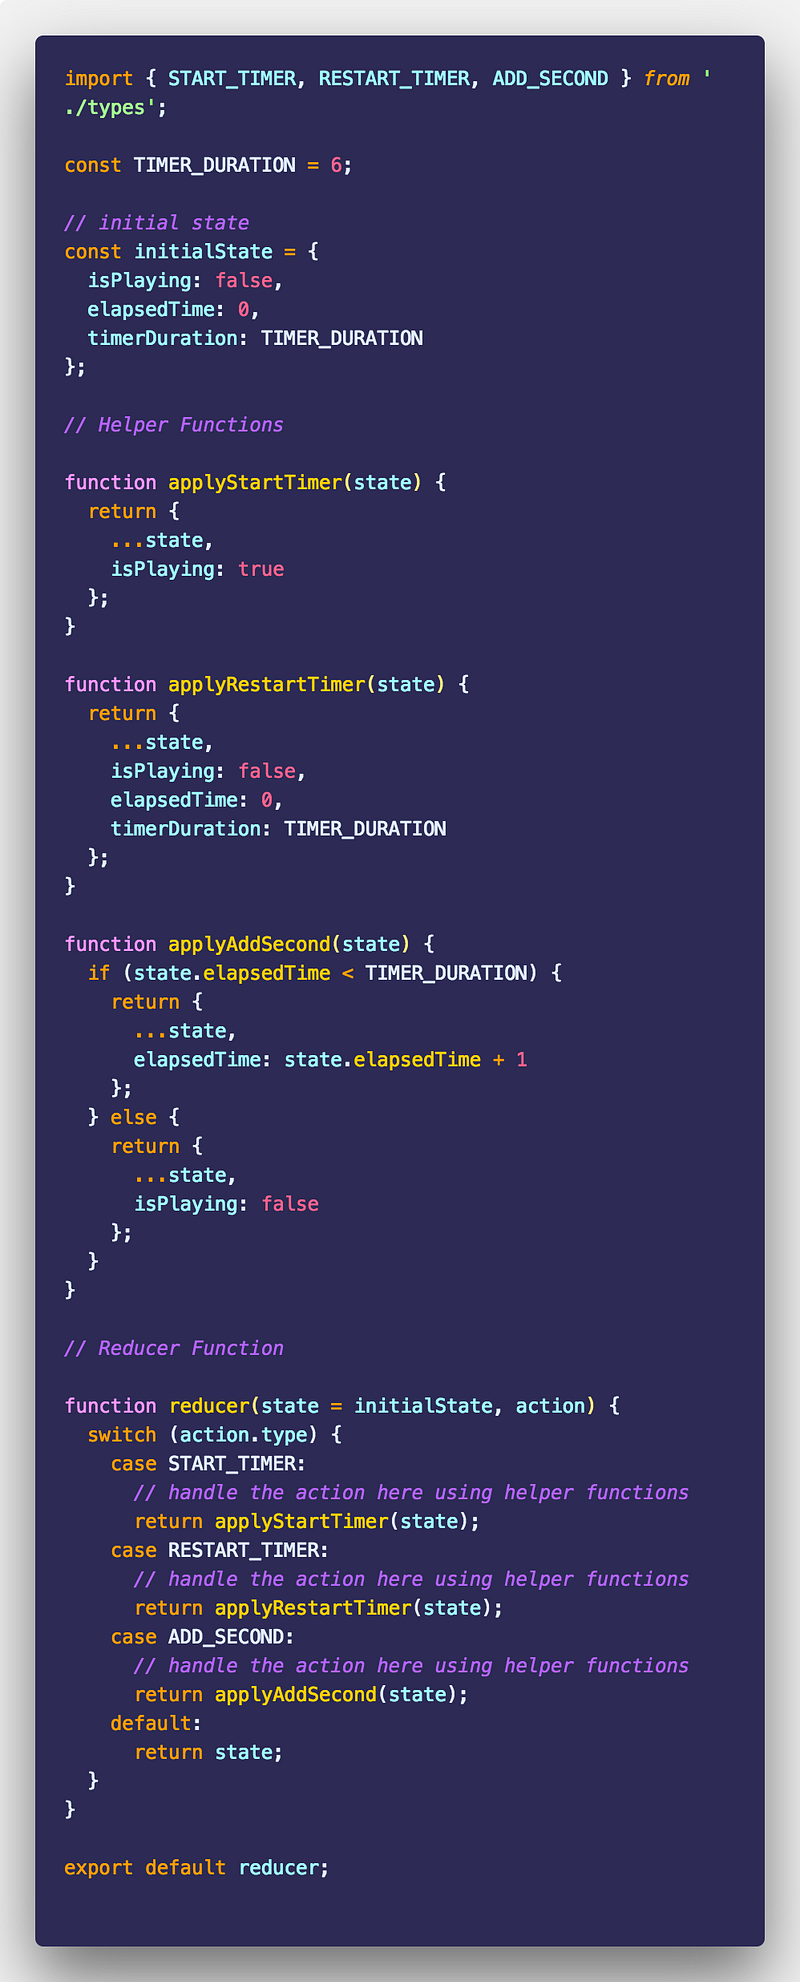
In our initial state, we define three attributes: isPlaying, elapsedTime and timerDuration. The timer currently has a default value of 6 (seconds) for testing purposes, but the actual value we are going to change later is 25 (or 1500 seconds).
Then there are three helper functions:
applyStartTimerwill start the timerapplyRestartTimerwill stop the timer function and set everything to default- and lastly,
applyAddSecondwill check if the time passed is less than the total timer’s duration. If so, it’ll add one more second to increase its value. If the not, it will return the default state and stop the timer function from running.
After that, we define our reducer function and export the same function. Observe how the reducer function is organised. This is a pattern followed by most community members I have seen on the internet.
This is a good resource to get started with Redux in general by Dan Abramov and it is FREE!
Creating Redux Store 🏬
With the help of the reducer and the initial state, we can create the store object.
A store is an object that brings and actions and reducers together. It provides and holds state at the application level instead of individual components. Redux is not an opinionated library in terms of which framework or library should use it or not.
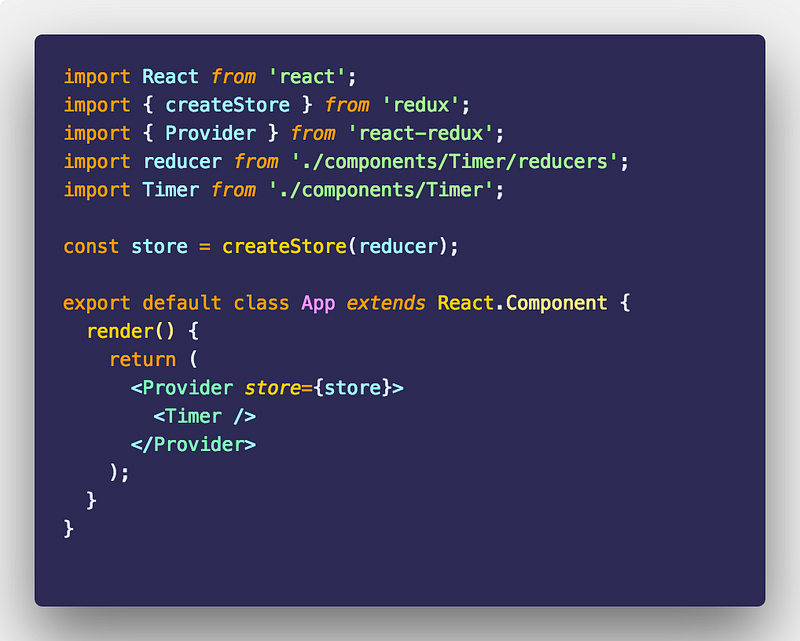
To bind a React or React Native application with Redux, you do it with react-redux module. This is done by using the high ordered component Provider. It basically passes the store down to the rest of the application.
We need to bind action creators with our Timer function in order to make it fully functional (so that it responds to the touchable events or the start or restart of the timer). We will do this in the Timer/index.js function.
First, we import the required dependencies to bind action creators.

bindActionCreators maps action functions to an object using the names of the action functions. These functions automatically dispatch the action to the store when the function is called. To change the data, we need to dispatch an action. To enable this, we need two things: mapStateToProps and mapDispatchToProps, and we need to connect both of them with our component. This is the boilerplate code that you will be re-writing.
We define these two functions and modify our export default statement after we define the styles for our React Native views.
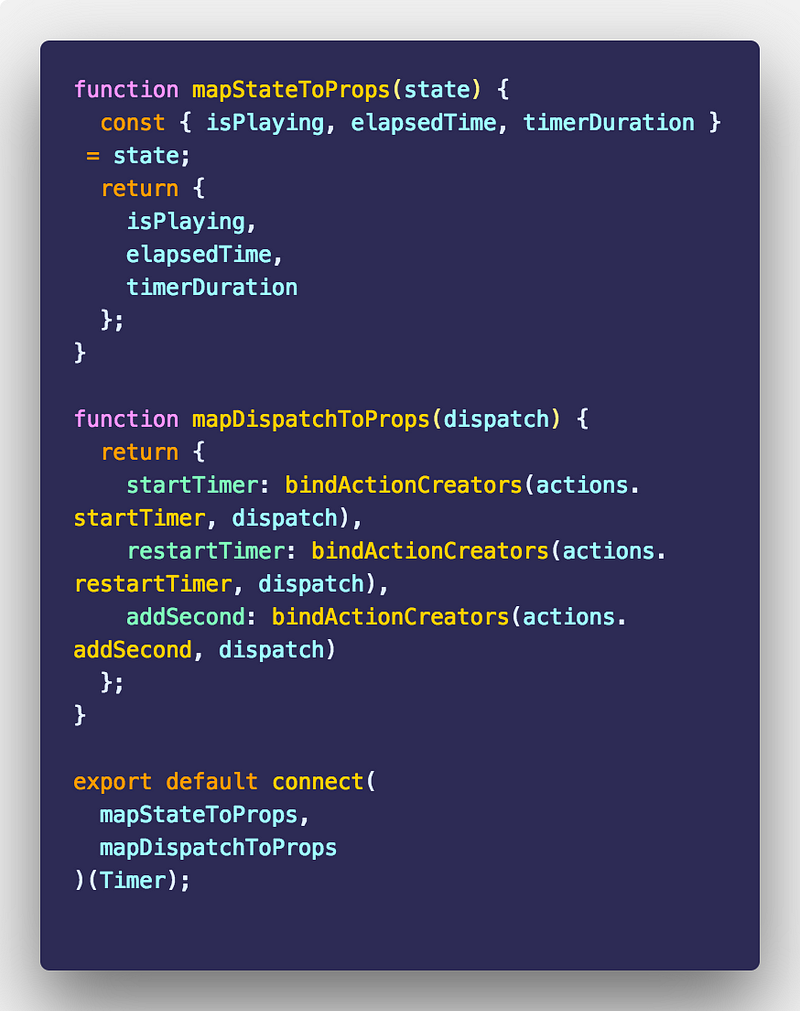
mapStateToProps is an object that lives in the store whose keys are passed down to the component as props. The below is the complete code for the Timer component.
Completing The App
 )
)
I have created a custom function called formatTime to display the time in the correct format, but you can make use of any timer library. Next, to increment the value of time, I use the React lifecycle method componentWillReceiveProps. I know it is going to deprecated soon, but for now it works. See our mini-app in action below:
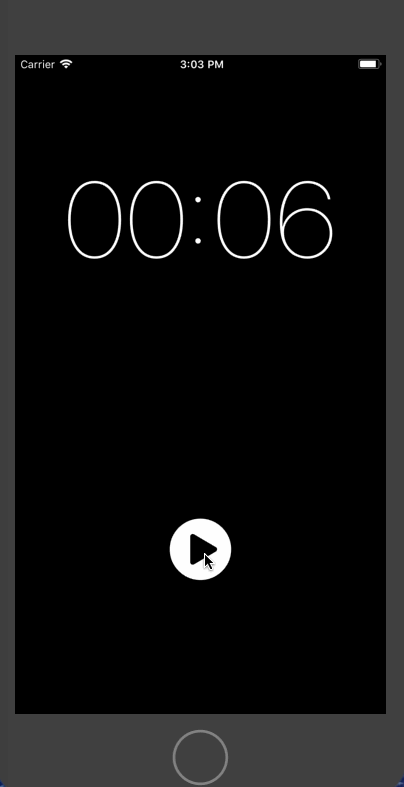
For the sake of brevity and this demo, I am using only seconds to display the timer. You can increase the value of the timer by editing the value of constant TIMER_DURATION in reducers.js.
We have reached the end of the article. Hopefully, you have had as much fun reading it as I did writing it. You can find the complete code for this article at this Github repo:
[amandeepmittal/rn-pomodoro-example]https://github.com/amandeepmittal/rn-pomodoro-example)
Do you remember me telling you about a particular file structure I followed in implementing Redux architecture? Well it is called re-ducks pattern and you can find more details in this informative article by Alex Moldovan: