Virtual Reality (VR) is an immersive technology that has intentions to improve the experience by providing a three-dimensional realistic environment rendered for the individual to feel real. The applications of this technology are boundless. You will find totally immersive and entertaining gaming applications as well as examples of healthcare simulations used to save lives.
For React Native developers, this technology is made accessible by a third party platform called ViroReact. This platform allows React Native developers to rapidly build cross-platform AR/VR applications. ViroReact currently supports ARKit, ARCore, VR Cardboard, Gear VR and Daydream. Viro Media
In this tutorial, we will be helping you go through the installation and setup process along with that create a small VR app and understand the basics behind it.
Overview
- Getting Started: Setup and Installation
- What is ViroReact?
- Building the app
- Scenes and Text in a VR App
- Adding a 3D effect to the Text
- Adding a 360 PhotoSphere
- Conclusion
Getting Started: Setup and Installation
To get started, we will be using a React Native project generated by Crowdbotics App Builder. All you need to generate a project with Crowdbotics is login access either using your personal email or through your Github profile (recommended).
Once logged in, on the Create Application page, choose React Native template under Mobile App.

Lastly, choose the name of your template at the bottom of this page and then click the button, Create my app!. After a few moments, your project will be generated. If you decided to access through Github, you will receive an invitation to the Github repository generated by the Crowdbotics service. Clone the repository at your dev machine for now.
To proceed further, you need to have the following already installed on your dev machine.
- Node.js
- watchman (OSX/Linux only)
- Python2, JDK (windows only)
- ngrok package installed as a global module
- react-native-cli
- react-viro-cli
To install both the command line tools, open up a terminal window and run the following command.
npm install -g react-native-cli react-viro-cliAfter the installation, make sure you have the latest version of react-viro-cli which is 2.13.0 at the time of writing this tutorial. To check the version installed, run react-viro-cli --version.
Traverse inside the cloned Github repository. When inside, delete all the contents except, the following files.
.gitdirectory.gitattributes.gitignore
The reason behind this is that integrating an already existing React Native app with Viro React does not work quite as well as it is intended too. So, we are going to take a different approach. After deleting the files, use the react-viro cli to create a new project that has integration support by default.
react-viro init [PROJECT_NAME] --verboseBy default, react-viro-cli uses yarn to install project dependencies. After this step, you will have your project directory structure similar to the following.
What is ViroReact?
ViroReact is a platform that helps you build AR (Augmented Reality) and VR (Virtual Reality) application experiences. It uses ARKit and ARCore to implement the developer platform for specific mobile platforms such as iOS and Android. Other than React Native there is a development option for both native platforms provided by ViroCore.
ViroReact API comes with a number of custom React components to render different scenes and objects in a three-dimensional environment. A good thing about ViroReact is that it is open source so you do not have to worry about paying the licensing fees. However, do note that, due to the limitation of supported devices by ARKit and ARCore, you cannot use an extremely old OS version for either iOS or Android.
Setting up Viro API and Testbed App
Viro provides you a testbed application that can be installed on a real device and test the application you build along with the way. It also contains a few samples of testbed applications that are build using ViroReact core.
To install on the Viro Media App iOS devices, go the app store here and for Android, there is an app on the Play store here. Note that it is a required step in order to proceed further.
To access Viro React core you need an API key. Login or create a new account at viromedia.com and you will get an API key on the registered email.
Once that is done, let us run the default sample testbed app that comes with every Viro project using its CLI tool. First, you are required to add the API key inside App.js file.
var sharedProps = {
  apiKey: 'API_KEY_HERE'
};
After that, open up a terminal window and a run npm start.
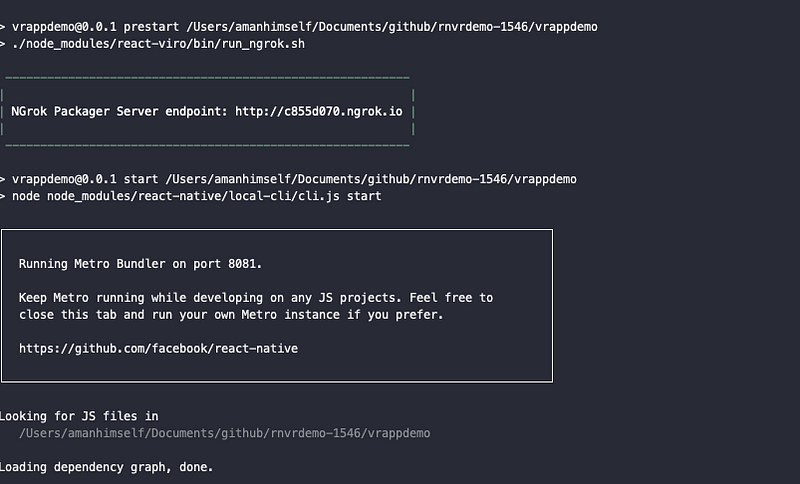
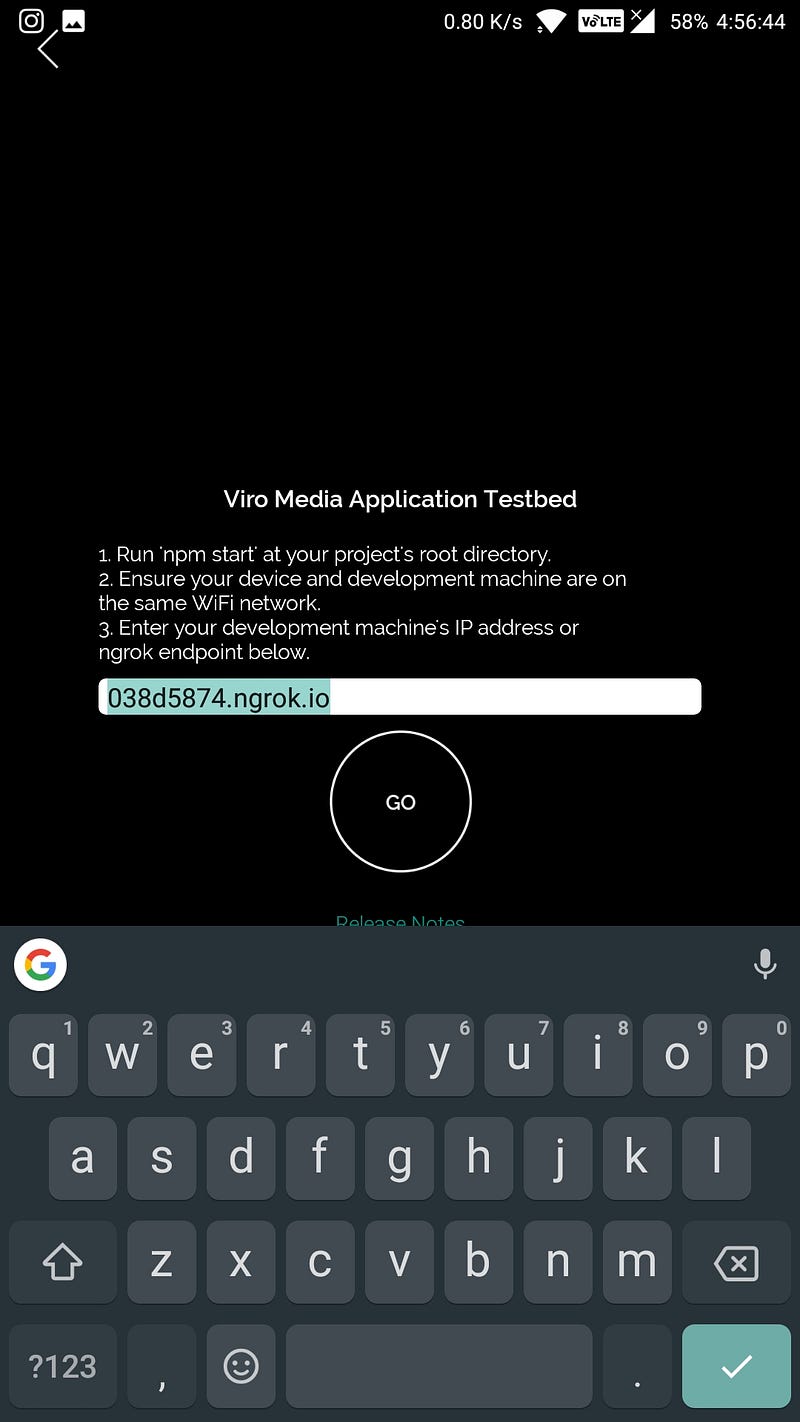
When you run a Viro project, you will always notice in the terminal window that apart from getting react-native-cliinterface that runs Metro bundler and loads the dependency graph, react-viro-cli uses ngrok packager service that provides an endpoint for you to run on the Viro Media app on a real device. You can see the endpoint reflected in the above screenshot.
When you open the application you are welcomed by the below screen.
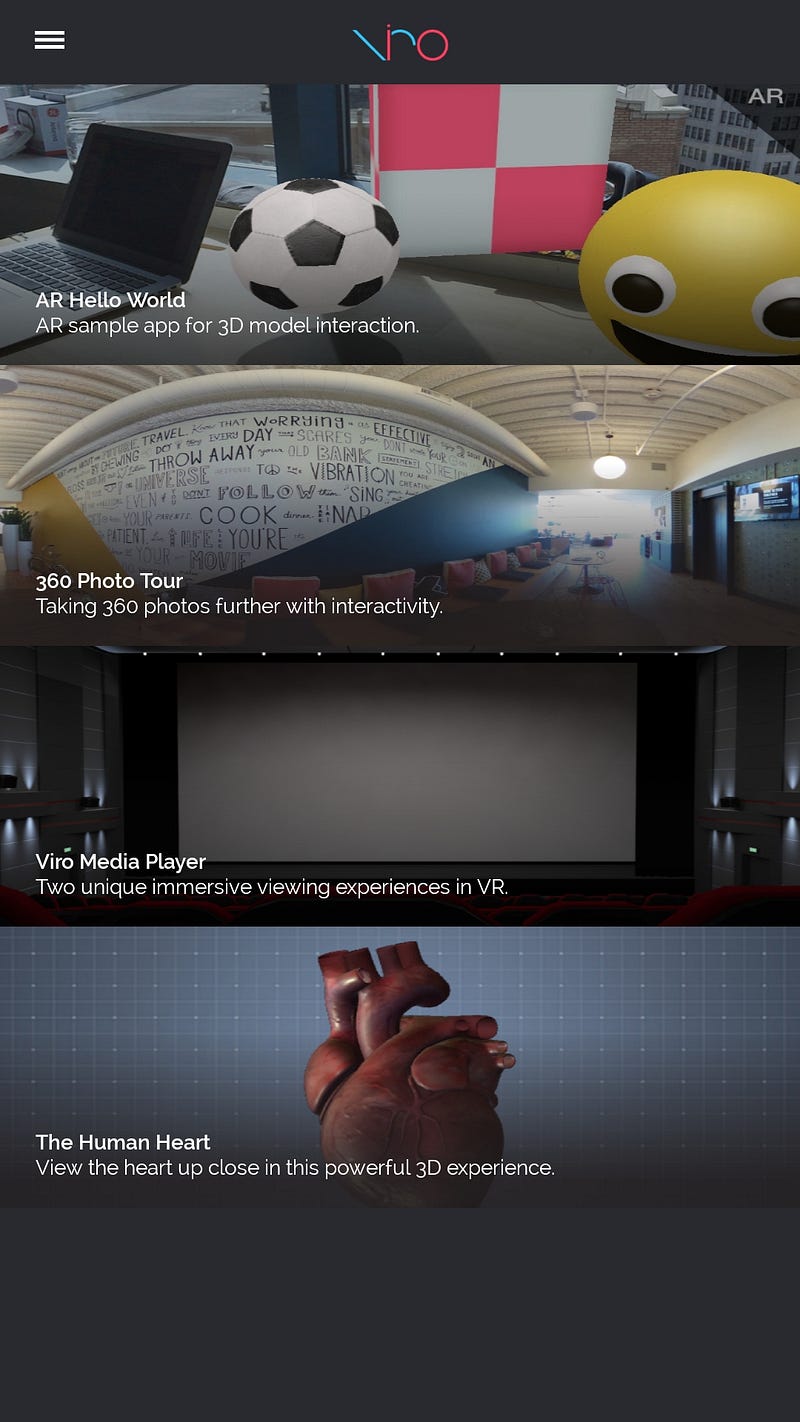
Next, click on the icon on the top left to access the menu bar.
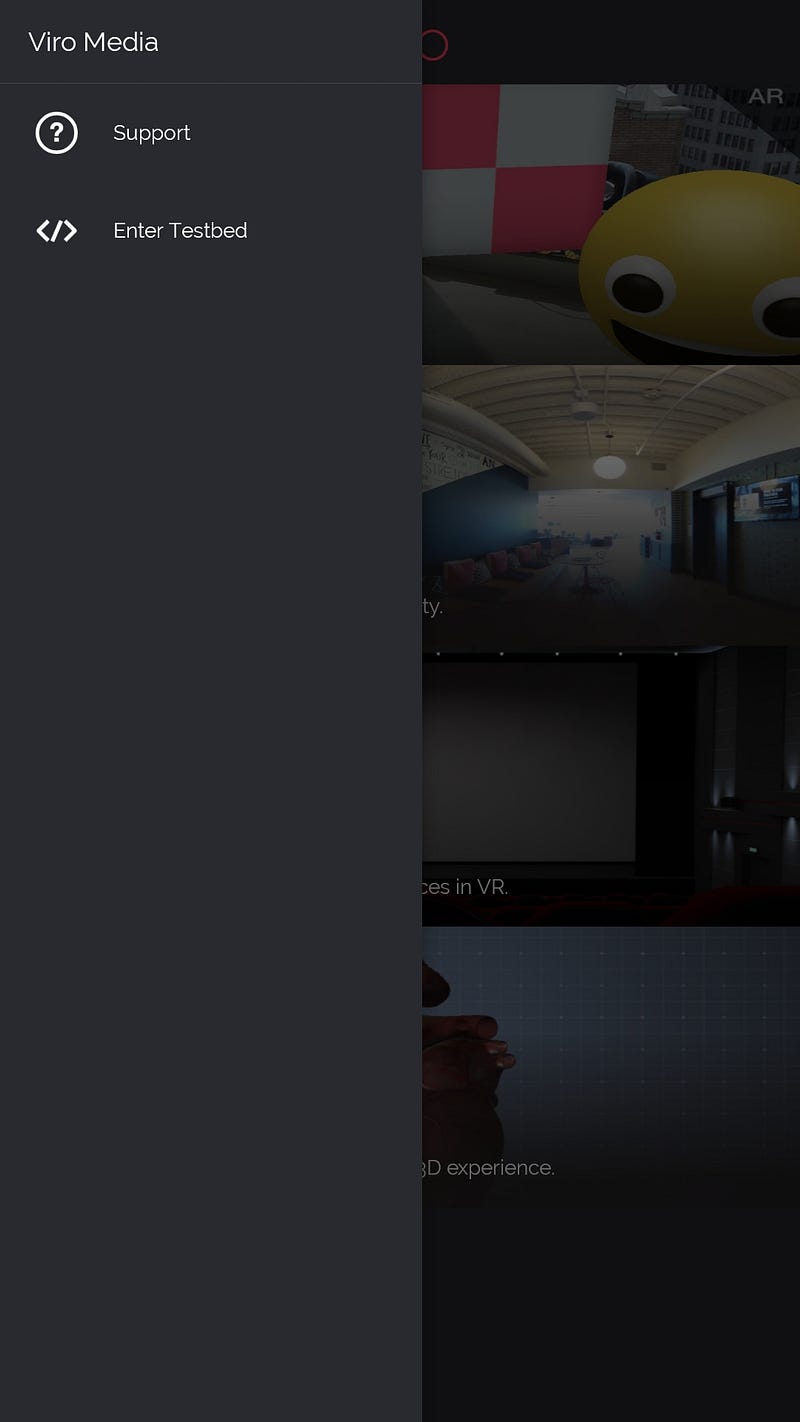
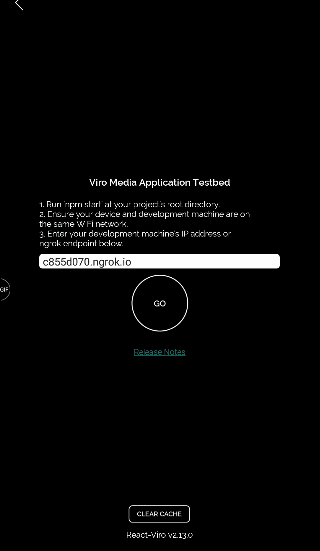
On the menu bar, click on Enter Testbed. Then, enter the ngrok endpoint generated in the terminal on running npm start.
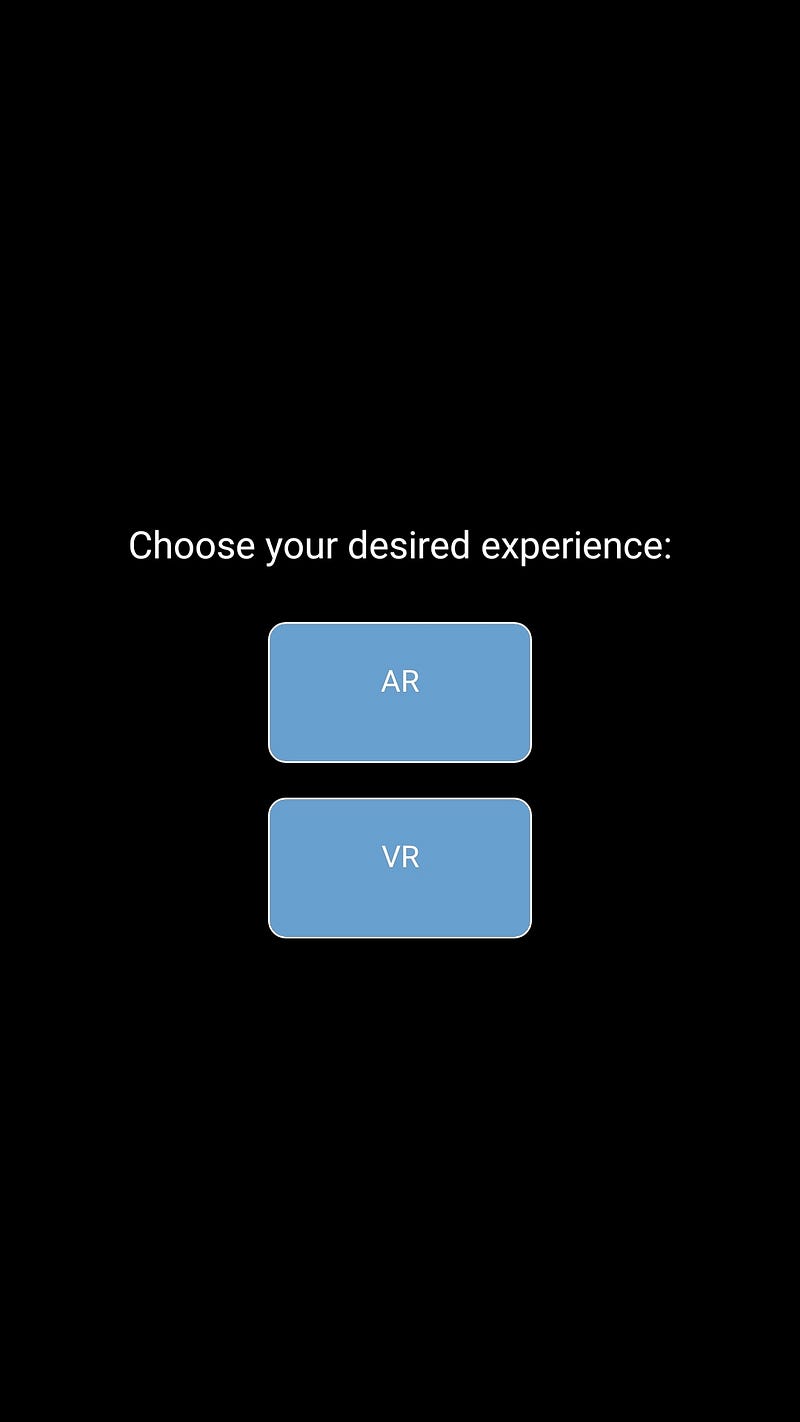
Once that is done, click the button Go and you will be prompted to choose an environment like below. Click on VR.
You will see the pre-installed application like below in action on your device.
Building the app
As everything is in order, you can now move ahead and continue working on your VR app. You have already experienced a Hello World application that comes pre-built with ViroReact CLI tool. In this section, we are going to edit it and customize it in our way to accomplish the desired result.
First, we are going to eliminate the screen where it prompts about choosing a rendering environment for either an AR or a VR test application. Since we are only working on a VR app, let us update the render() function inside App.js file as below.
render() {
		return this._getVRNavigator();
  }
The method _getVRNavigator() renders the scene navigator for the VR experience. The scene navigator is the entry point of any Viro application. For AR you will find, ViroARSceneNavigator and for VR you will find, ViroVRSceneNavigator. For any scene to render there are two required props by this component are the apiKey and an initialScene. In the file, App.js you will the currently rendered scene like below. The sharedProps part is the apiKey.
<ViroVRSceneNavigator
  {...this.state.sharedProps}
  initialScene={{ scene: InitialVRScene }}
  onExitViro={this._exitViro}
/>
The initialScene props have a value of InitialVRScene. This value is actually a component that gets displayed initially by the scene navigator. In our case, it is the component HelloWorldScene for now.
var InitialVRScene = require('./js/HelloWorldScene');Scenes and Text in a VR App
Applications in Viro React consists of scenes that are represented by ViroScene component. Each scene is an equivalent of the Views. To create a basic scene all you have to do is modify the<ViroScene> component. Open HelloWorldScene.js. You will notice that ViroScene is being already imported.
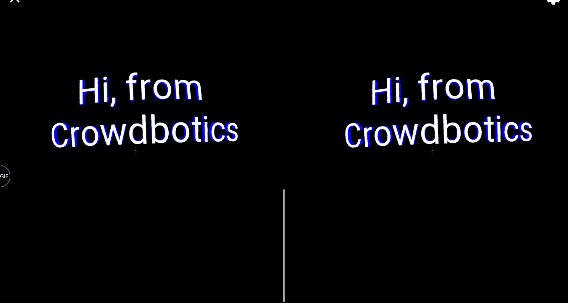
import { ViroScene, ViroText, Viro360Image } from 'react-viro';Next, let us modify the render function. Create a text-based scene of our own.
<ViroText>
  <ViroText
    fontSize={40}
    text='Hi, from Crowdbotics'
    width={2}
    height={2}
    position={[0, 0, -2]}
    textAlign='center'
    textAlignVertical='center'
    color='#ffffff'
  />
</ViroScene>
ViroText is a component that provides two-dimensional text functionality. It uses props such as the text itself, the textAlign, fontSize, width, position, and so on. The styling of the text can be done using a fontFamily but do note that not all platforms support all font families. You can also use styling objects created using StyleSheet from React Native core. The size of the text can be increased or decreased using fontSize property. See the result of the above snippet of code below.
To enable 3D text, there is a prop called extrusionDepth which is given a value greater than zero, enables 3D text. Let us add this property in ViroText component.
<ViroText
  fontSize={40}
  text="Hi, from Crowdbotics"
  width={2}
  height={2}
  position={[0, 0, -2]}
  textAlign="center"
  textAlignVertical="center"
  color="#ffffff"
  extrusionDepth={8}
  materials={['frontMaterial', 'backMaterial', 'sideMaterial']}
/>
Adding a 3D effect to the Text
If the value of extrusionDepth is greater than zero, you can apply three materials to the text: frontMaterial, backMaterial and sideMaterial. Let us add different colors to these materials to see the effect. You will have to import ViroMaterials from react-viro in order to proceed.
// import
import { ViroScene, ViroText, ViroMaterials } from 'react-viro';
// add props
<ViroText
{/*...*/}
extrusionDepth={8}
materials={['frontMaterial', 'backMaterial', 'sideMaterial']}
/>
// add materials
ViroMaterials.createMaterials({
frontMaterial: {
diffuseColor: '#FFFFFF'
},
backMaterial: {
diffuseColor: '#FF0000'
},
sideMaterial: {
diffuseColor: '#0000FF'
}
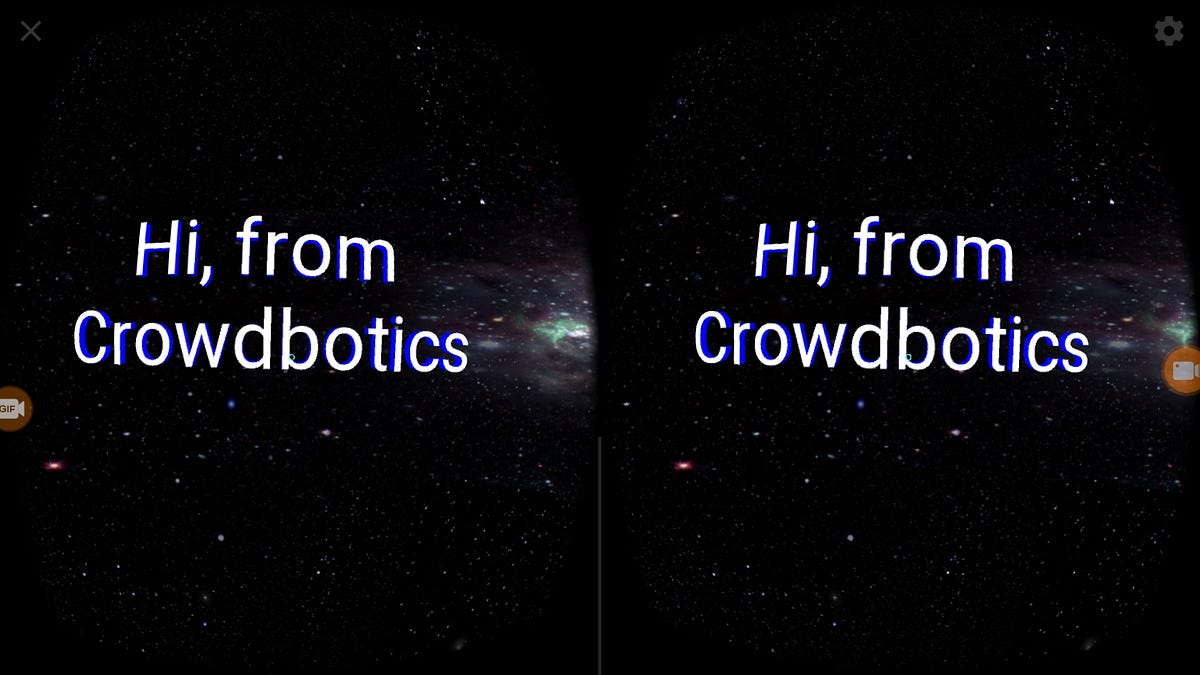
});Materials are the set of shading attributes that define the appearance of a geometry’s surfaces when rendered. To see this in action, take a look below.
Adding a 360 PhotoSphere
You may have noticed in the testbed app that we tested earlier, it had a background image that acted like a 360 sphere. You often find these 360 images in VR applications. To add one in our application right now, download any asset from this link and paste the file inside the projectname/js/res/ directory. These assets are free to use.
To add such an image, there is a component in Viro React API called Viro360Image. You can import it from react-viro.
// import
import { ViroScene, ViroText, Viro360Image, ViroMaterials } from 'react-viro';
This component uses a device’s gyroscope to display a 360 degrees view. Add the component inside ViroScene as below and before ViroText.
<ViroScene>
  <Viro360Image source={require('./res/360_space.jpg')} />
  <ViroText {/*...*/} />
</ViroScene>
The initial load of the image might take a few seconds but it will appear in the path is correct. See the results below.
Conclusion
ViroReact provides a great set of API components that you can use to extend your VR application. Did you notice, we never had to re-start the ngrok bundler after making changes in the app component? This is where the advantage of ViroReact lies. I hope you enjoyed this tutorial.
The complete code for this tutorial is available in the Github repository below.