Google Vision API is a great way to add image recognition capabilities to your app. It does a great job detecting a variety of categories such as labels, popular logos, faces, landmarks, and text. You can think of Google Vision API as a Google Image Search offered as an API interface that you can incorporate into your applications.
In this tutorial, you are going to build a React Native application that can identify a picture provided and detect the logo using Google’s Vision API in real time.
You are going to learn how to connect Google Vision API with React Native and Expo. React Native and Expo will be quickly set up using a predefined scaffold from Crowdbotics. We setup Google Vision API from scratch, and use Firebase cloud storage to store an image that a user uploads. That image is then analyzed before the output is generated.
Tldr
- Setting up Crowdbotics Project
- Installing dependencies
- Setting up Firebase
- Set up Google Cloud Vision API Key
- Logo Detection App
- Uploading Image to Firebase
- Image picker from Expo
- Analyzing the Logo
- Conclusion
Setting up Crowdbotics Project
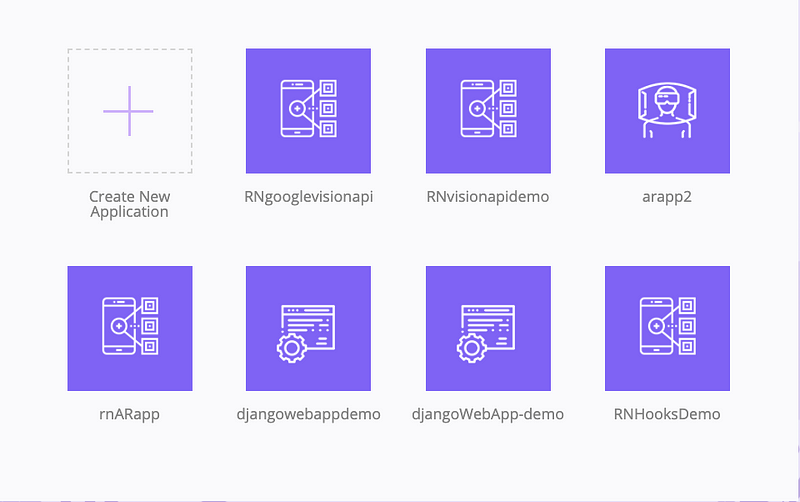
In this section, you will be setting up a Crowdbotics project that has React Native plus Expo pre-defined template with stable and latest dependencies for you to leverage. Setting up a new project using Crowdbotics app builder service is easy. Visit app.crowdbotics.com dashboard. Once you are logged in, choose Create a new application.
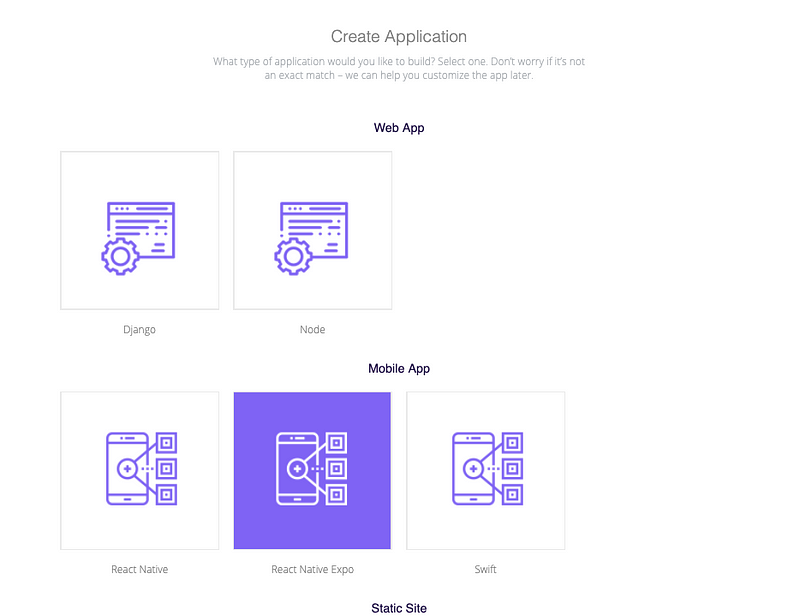
On the Create Application page, choose React Native Expo template under Mobile App.
Lastly, choose the name of your template at the bottom of this page and then click the button Create by app!. After a few moments, you will get a similar window like below.
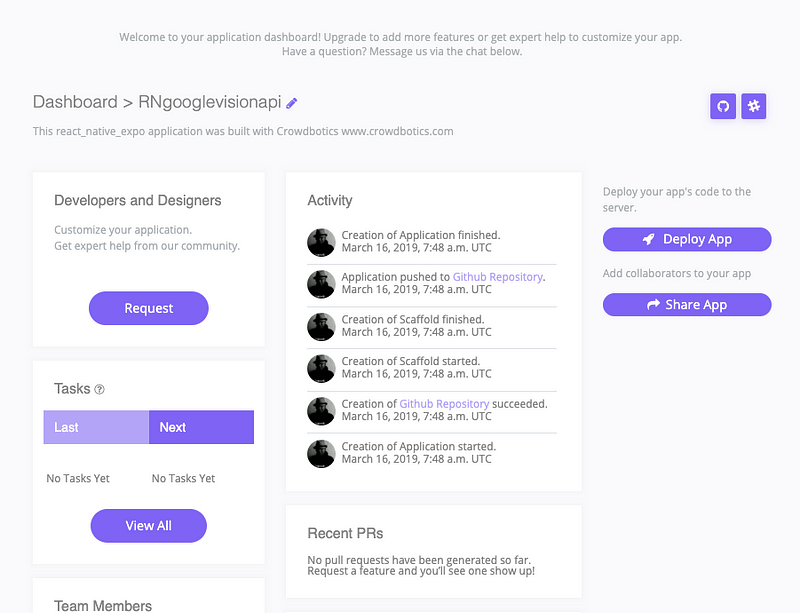
This will take you to the app dashboard, where you can see a link to GitHub, Heroku, and Slack. Once your project is created, you will get an invitation from Crowdbotics to download your project or clone the repository from Github either on them email you logged in or as a notification if you chose Github authentication.
Installing dependencies
Once you have cloned or downloaded the repository from Github, traverse inside it using command cd or similar from your terminal and install dependencies.
cd rngooglevisionapi-1400

cd frontend

# Install depenedencies

npm install
Installing dependencies might take a few minutes. Once the step is done — depending on the operating system you have — you can run the React Native application and verify if everything is working properly using either an iOS simulator or an Android emulator.
# for iOS
npm run ios

# for android
npm run android
Android users, note that you must have an Android virtual device already running in order to run the above command successfully.
Setting up Firebase
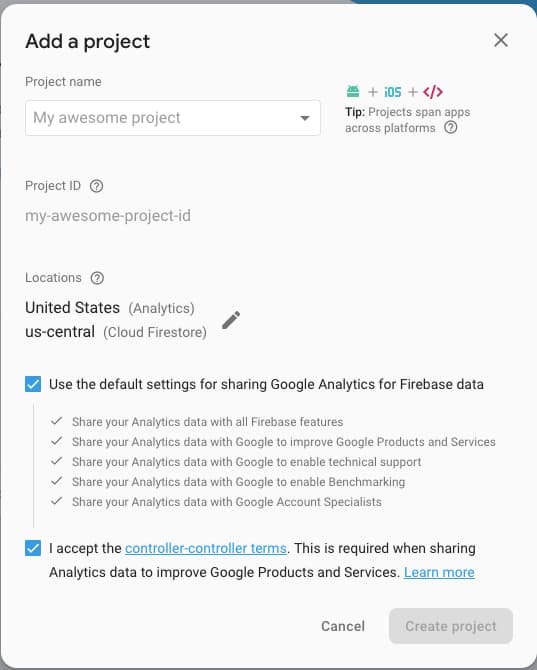
Using the Firebase project has a lot of advantages over a traditional server API model. It provides the database and the backend service and such that we do not have to write our own backend and host it. Visit Firebase.com and sign-in with your Google ID. Once logged in, click on a new project and enter a project name. Lastly, hit the Create Project button.
Make sure you set up Firebase real-time database rules to allow the app user to upload image files into the database. To change this setting a newly generated Firebase project, from the sidebar menu in the Firebase console, open Database tab and then choose Rules and modify them as below.
service cloud.firestore {
 match /databases/{database}/documents {
   match /{document=**} {
     allow read, write;
   }
 }
}
Next step is to install the Firebase SDK in the project.
npm install --save firebaseTo make sure that the required dependency is installed correctly, open package.json file. In the dependencies object you will find many other dependencies related to react, react native navigation, native-base UI kit, redux and so on. These libraries are helpful if you are working on a React Native project that requires feature like a custom and expandable UI kit, state management, navigation.
"dependencies": {
    "@expo/vector-icons": "^9.0.0",
    "expo": "^32.0.0",
    "expokit": "^32.0.3",
    "firebase": "^5.9.0",
    "lodash": "^4.17.11",
    "native-base": "^2.10.0",
    "prop-types": "^15.6.2",
    "react": "16.5.0",
    "react-native": "https://github.com/expo/react-native/archive/sdk-32.0.0.tar.gz",
    "react-navigation": "^3.0.9",
    "react-navigation-redux-helpers": "^2.0.9",
    "react-redux": "^6.0.0",
    "react-style-proptype": "^3.2.2",
    "redux": "^4.0.1",
    "redux-thunk": "^2.3.0"
  }
You are not going to use the majority of them in this tutorial, but the advantage of Crowdbotics App Builder is that it provides a pre-configured and hosted, optimum framework for React Native projects. The unwanted packages can be removed if you do not wish to use them.
After installing the Firebase SDK, create a folder called config and inside frontend/src, and then create a new file called environment.js. This file will contain all the keys required to bootstrap and hook Firebase SDK within our application.
var environments = {
  staging: {
    FIREBASE_API_KEY: 'XXXX',
    FIREBASE_AUTH_DOMAIN: 'XXXX',
    FIREBASE_DATABASE_URL: 'XXXX',
    FIREBASE_PROJECT_ID: 'XXXX',
    FIREBASE_STORAGE_BUCKET: 'XXXX',
    FIREBASE_MESSAGING_SENDER_ID: 'XXXX',
    GOOGLE_CLOUD_VISION_API_KEY: 'XXXX'
  },
  production: {
    // Warning: This file still gets included in
    // your native binary and is not a secure way
    // to store secrets if you build for the app stores.
    // Details: https://github.com/expo/expo/issues/83
  }
};

function getReleaseChannel() {
  let releaseChannel = Expo.Constants.manifest.releaseChannel;
  if (releaseChannel === undefined) {
    return 'staging';
  } else if (releaseChannel === 'staging') {
    return 'staging';
  } else {
    return 'staging';
  }
}
function getEnvironment(env) {
  console.log('Release Channel: ', getReleaseChannel());
  return environments[env];
}
var Environment = getEnvironment(getReleaseChannel());
export default Environment;
The Xs are the values of each key you have to fill in. Ignore the value for Key GOOGLE_CLOUD_VISION_API_KEY for now. Other values for their corresponding keys can be attained from the Firebase console. Visit the Firebase console and then click the gear icon next to Project Overview in the sidebar menu and lastly go to Project settings section.
Then create another file called firebase.js inside the config directory. You are going to use this file in the main application later to send requests to upload an image to the Firebase cloud storage. Import environment.jsin it to access Firebase keys. That’s it for this section.
Set up Google Cloud Vision API Key
You need a Gmail account to access the API key for any cloud service provided by Google. Go to cloud.google.com. After you are signed in visit Google Cloud Console and create a new project.
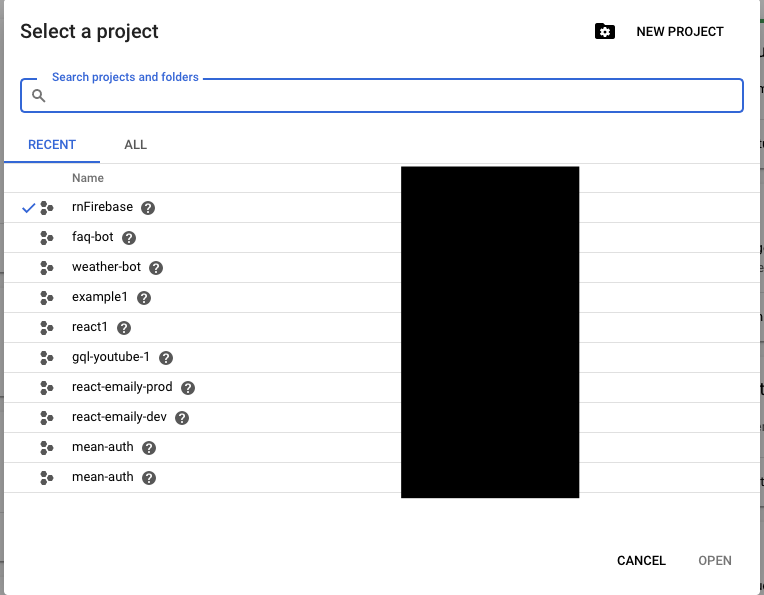
From the dropdown menu center, select a project. You can click the button New Project in the screen below but since we have already generated a Firebase project, select that from the list available.
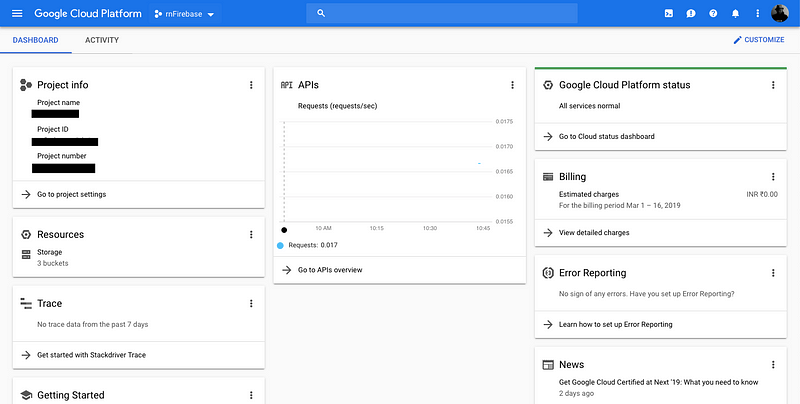
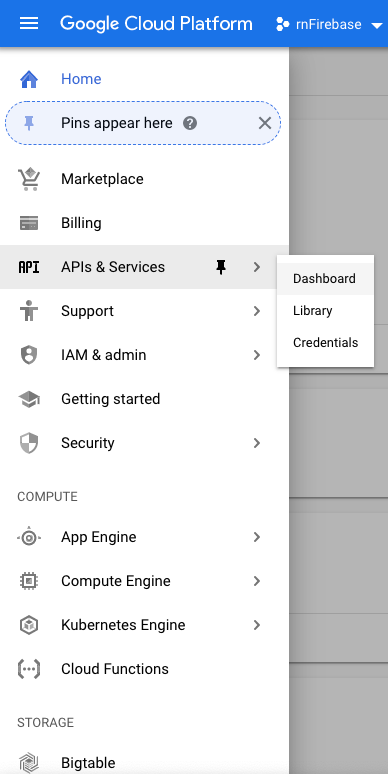
Once the project is created or selected, it will appear at the dropdown menu. Next step is to get the Vision API key. Right now you are at the screen called Dashboard inside the console. From the top left, click on the menu button and a sidebar menu will pop up. Select APIs & Services > Dashboard.
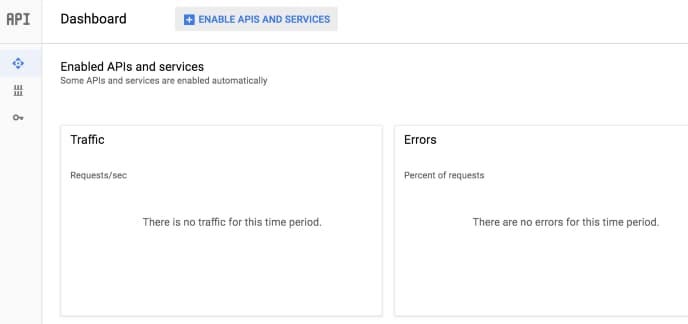
At the Dashboard, select the button Enable APIs and Services.
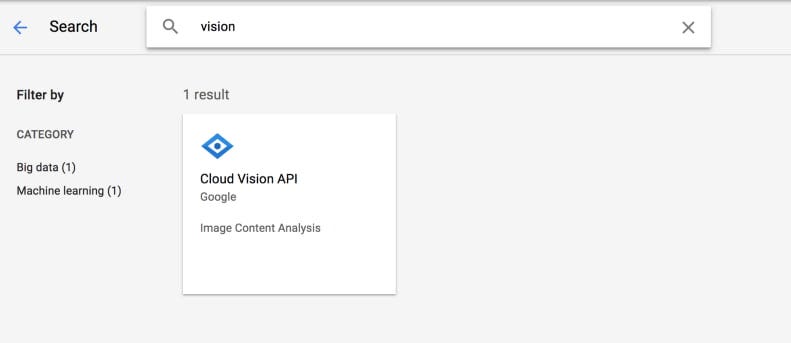
Then type vision in the search bar as shown below and then click Vision API.
Then, click the button Enable to enable the API. Note that in order to complete this step of getting the API key, you are required to add billing information to your Google Cloud Platform account.
The URL, in your case, on the dashboard will be similar to https://console.cloud.google.com/apis/dashboard?project=FIREBASE-PROJECT-ID&folder&organizationId. Click on the Credentials section from the left sidebar to create a new API key.
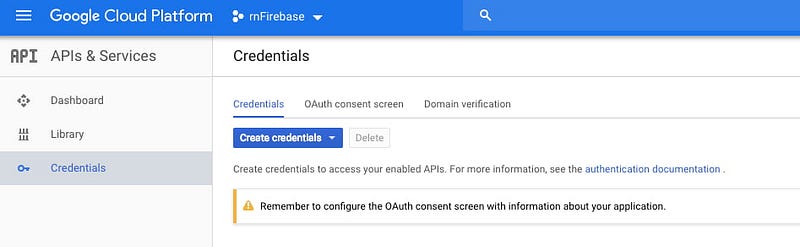
Click the button Create Credentials. Once you have created the API key, it is time to add it in the file environment.js in place of the key GOOGLE_CLOUD_VISION_API_KEY.
The setup is complete. Let us move to the next section and start building the application.
Logo Detection App
In order to continue building the app, there is another npm module it requires. Run the below command to install it.
npm install --save uuidThis package will help you create a blob for every image that is going to be used for analyzing in the app. A blob is a binary large object stored as a single entity in a database. It is common to use blob for multimedia objects such as an image or a video.
Let us start by importing the necessary libraries that we are going to use in our App component. Open App.js file and import the following.
import React, { Component } from 'react';
import {
  View,
  Text,
  StyleSheet,
  ScrollView,
  ActivityIndicator,
  Button,
  FlatList,
  Clipboard
} from 'react-native';
import { ImagePicker, Permissions } from 'expo';
import uuid from 'uuid';

import Environment from './src/config/environment';
import firebase from './src/config/firebase';
Next, inside the class component, define an initial state with three properties.
class App extends Component {

	state = {
		image: null,
		uploading: false,
		googleResponse: null
  };
Each property defined above in the state object has an important role in the app. For instance, image is initialized with a value of null since when the app starts, there isn’t any image URI available by default. The image will be later uploaded to the cloud service. The uploading is used when an image is being uploaded to the cloud service along with ActivityIndicator from React Native core. The last property, googleResponse is going to handle the response object coming back from the Google Vision API when analyzing the data.
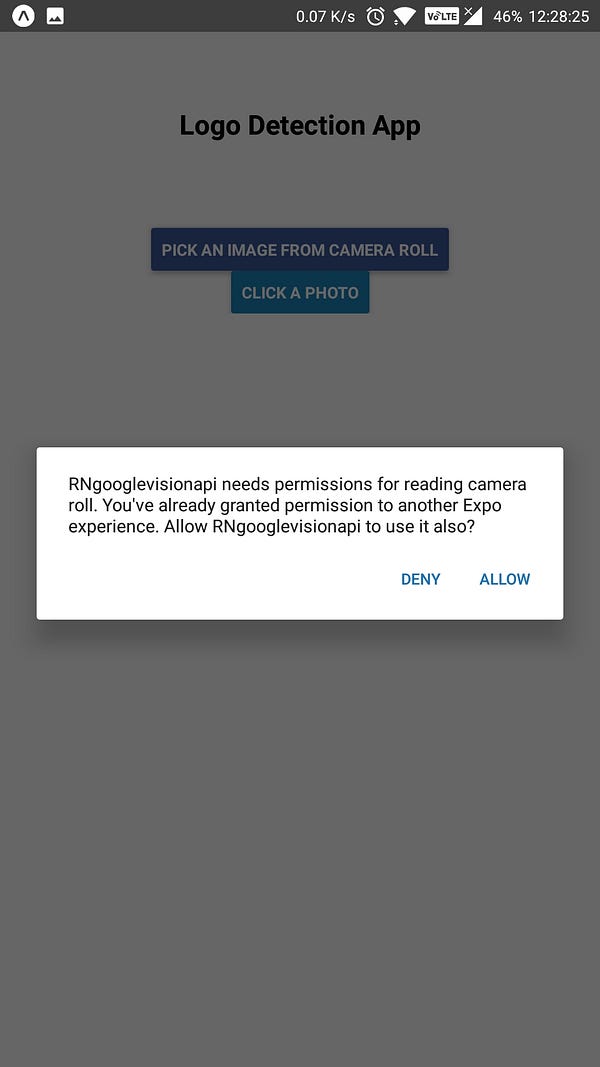
It is important to ask for user permissions. Any app functionality that implements features around sensitive information such as location, sending push notifications, taking a picture from the device’s camera, it needs to ask for permissions. Luckily, when using Expo, it is easier to implement this functionality. After you have initialized the state, use a lifecycle method componentDidMount() to ask for permission’s to use a device’s camera and camera roll (or gallery in case of Android).
async componentDidMount() {
await Permissions.askAsync(Permissions.CAMERA_ROLL);
await Permissions.askAsync(Permissions.CAMERA);
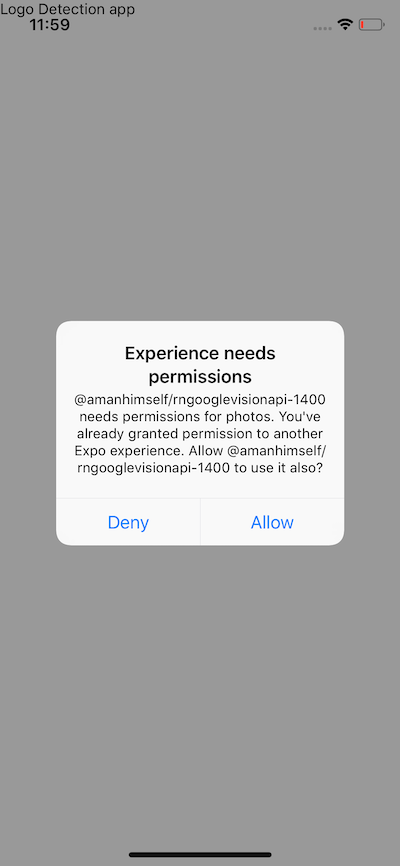
}For more information on Permissions with Expo, you should take a look at the official docs.
On iOS, asking permissions alert will look like below.
On Android:
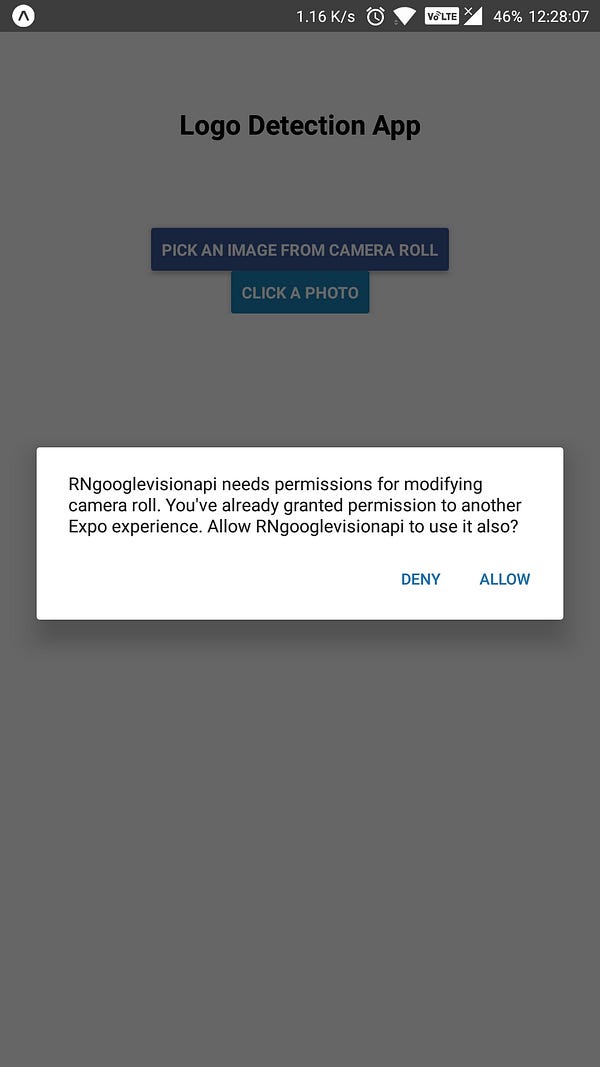
Uploading Images to Firebase
To upload file on Firebase cloud storage, you have to create a function outside the class called uploadImageAsync. This function will handle sending and receiving AJAX requests to the Cloud Storage server. This function is going to be asynchronous.
async function uploadImageAsync(uri) {
  const blob = await new Promise((resolve, reject) => {
    const xhr = new XMLHttpRequest();
    xhr.onload = function () {
      resolve(xhr.response);
    };
    xhr.onerror = function (e) {
      console.log(e);
      reject(new TypeError('Network request failed'));
    };
    xhr.responseType = 'blob';
    xhr.open('GET', uri, true);
    xhr.send(null);
  });

  const ref = firebase.storage().ref().child(uuid.v4());
  const snapshot = await ref.put(blob);

  blob.close();

  return await snapshot.ref.getDownloadURL();
}
This asynchronous function uploadImageAsync uploads the image by creating a unique image ID or blob with the help of uuid module. It also uses xhr to send a request to the Firebase Cloud storage to upload the image. It also takes the URI of the image that is going to be uploaded. In the next section, you will learn more about uploading the image.
Image picker from Expo
To access a device’s UI for selecting an image either from the mobile’s gallery or take a new picture with the camera, we need an interface for that. Some ready-made, configurable API that allows us to add it as functionality in the app. For this scenario, ImagePicker is available by Expo.
To use this API, Permissions.CAMERA_ROLL is required. Take a look below, how you are going to use it in App.js file.
_takePhoto = async () => {
  let pickerResult = await ImagePicker.launchCameraAsync({
    allowsEditing: true,
    aspect: [4, 3]
  });

  this._handleImagePicked(pickerResult);
};

_pickImage = async () => {
  let pickerResult = await ImagePicker.launchImageLibraryAsync({
    allowsEditing: true,
    aspect: [4, 3]
  });

  this._handleImagePicked(pickerResult);
};

_handleImagePicked = async pickerResult => {
  try {
    this.setState({ uploading: true });

    if (!pickerResult.cancelled) {
      uploadUrl = await uploadImageAsync(pickerResult.uri);
      this.setState({ image: uploadUrl });
    }
  } catch (e) {
    console.log(e);
    alert('Upload failed, sorry :(');
  } finally {
    this.setState({ uploading: false });
  }
};
From the above snippet, notice that there are two separate functions to either pick the image from the device’s file system: _pickImage and for taking a photo from the camera: _takePhoto. Whichever function runs, _handleImagePicked is invoked to upload the file to cloud storage by further calling the asynchronous uploadImageAsync function with the URI of the image as the only argument to that function.
Inside the render function you will add the two buttons calling their own separate methods when pressed.
<View style={{ margin: 20 }}>
	<Button
		onPress={this._pickImage}
		title="Pick an image from camera roll"
		color="#3b5998"
	/>
</View>
<Button
onPress={this._takePhoto}
title="Click a photo"
color="#1985bc"
/>
Analyzing the Logo
After the image has either been selected from the file system or clicked from the camera, it needs to be shared with Google’s Vision API SDK in order to fetch the result. This is done with the help of a Button component from React Native core in the render() method inside App.js.
<Button
  style={{ marginBottom: 10 }}
  onPress={() => this.submitToGoogle()}
  title="Analyze!"
/>
This Button publishes the image to Google’s Cloud Vision API. On pressing this button, it calls a separate function submitToGoogle() where most of the business logic happens in sending a request and fetching the desired response from the Vision API.
submitToGoogle = async () => {
  try {
    this.setState({ uploading: true });
    let { image } = this.state;
    let body = JSON.stringify({
      requests: [
        {
          features: [
            { type: 'LABEL_DETECTION', maxResults: 10 },
            { type: 'LANDMARK_DETECTION', maxResults: 5 },
            { type: 'FACE_DETECTION', maxResults: 5 },
            { type: 'LOGO_DETECTION', maxResults: 5 },
            { type: 'TEXT_DETECTION', maxResults: 5 },
            { type: 'DOCUMENT_TEXT_DETECTION', maxResults: 5 },
            { type: 'SAFE_SEARCH_DETECTION', maxResults: 5 },
            { type: 'IMAGE_PROPERTIES', maxResults: 5 },
            { type: 'CROP_HINTS', maxResults: 5 },
            { type: 'WEB_DETECTION', maxResults: 5 }
          ],
          image: {
            source: {
              imageUri: image
            }
          }
        }
      ]
    });
    let response = await fetch(
      'https://vision.googleapis.com/v1/images:annotate?key=' +
        Environment['GOOGLE_CLOUD_VISION_API_KEY'],
      {
        headers: {
          Accept: 'application/json',
          'Content-Type': 'application/json'
        },
        method: 'POST',
        body: body
      }
    );
    let responseJson = await response.json();
    console.log(responseJson);
    this.setState({
      googleResponse: responseJson,
      uploading: false
    });
  } catch (error) {
    console.log(error);
  }
};
The Vision API uses an HTTP Post request as a REST API endpoint. It performs data analysis on the image URI send with the request. This is done via the URL https://vision.googleapis.com/v1/images:annotate?key=[API_KEY]. To authenticate each request, we need the API key. The body of this POST request is in JSON format. This JSON request tells the Google Vision API which image to parse and which of its detection features to enable.
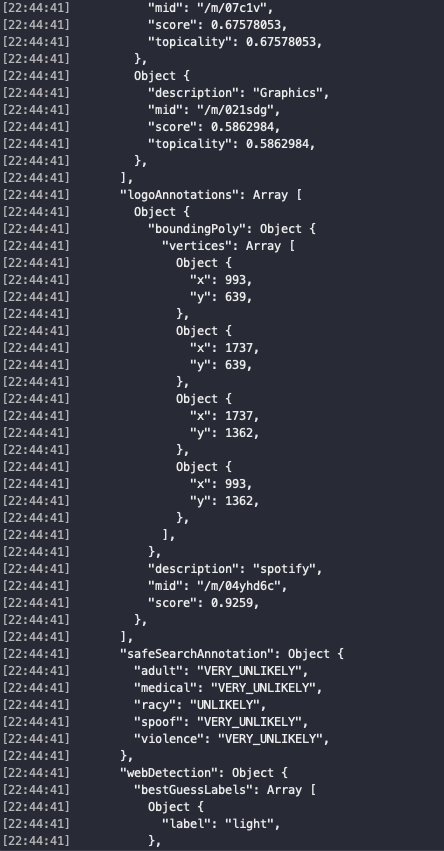
An example a POST body response in JSON format from the API is going to be similar like below.
"logoAnnotations": Array [
         Object {
           "boundingPoly": Object {
             "vertices": Array [
               Object {
                 "x": 993,
                 "y": 639,
               },
               Object {
                 "x": 1737,
                 "y": 639,
               },
               Object {
                 "x": 1737,
                 "y": 1362,
               },
               Object {
                 "x": 993,
                 "y": 1362,
               },
             ],
           },
           "description": "spotify",
           "mid": "/m/04yhd6c",
           "score": 0.9259,
         },
      ],
Notice that it gives us back the complete object with a description of the logo’s name searched for. This can be viewed in the terminal window from the logs generated while the Expo CLI command is active.
See the application in working below. A real android device was used to demonstrate this. If you want to test yourself one a real device, just download the Expo client for your mobile OS, scan the QR code generated after starting expo CLI command and then click the button Take a photo while the application is running.
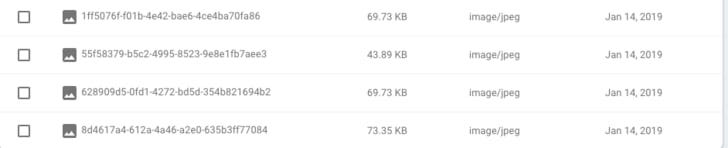
If you visit the storage section in Firebase, you can notice that each image is stored with a name of base64 binary string.
Conclusion
The possibilities of using Google’s Vision API are endless. As you can see above in the features array, it works with a variety of categories such as logos, landmarks, labels, documents, human faces and so on.
I hope you enjoyed this tutorial. Let me know if you have any questions.
You can find the complete code in the Github repository below.
