In React Native, there are many ways to display a collection of images in a gallery view. One form is commonly known as carousel. Using an open-source library such as react-native-swiper or more advance react-native-snap-carousel serves the purpose. But what if we want to create a custom gallery view with additional functionality?
In this tutorial, let’s create a custom gallery of images using react-native-snap-carousel and FlatList from React Native. The open-source library is going to display each image in a carousel view. The FlatList is what we will use to display the thumbnail view for each image below the carousel. The construction of the syncing part between the two is to add a functionality such that when an image in the carousel is scrolled either left or right, the thumb in the FlatList is also going to be scrolled along with it. Of course, to achieve this synchronization between the two, we are going to use React Hooks such that you will be able to implement such a pattern in your own React Native apps.
Pre-requisites
To follow this tutorial, please make sure you are familiarized with JavaScript/ES6 and meet the following requirements in your local dev environment:
- Node.js version >= 12.x.x installed.
- Have access to one package manager such as npm or yarn or npx.
- react-native-cli installed, or use npx.
Setup a React Native Project
To follow along with this tutorial, set up a new React Native project and install all the dependencies that are required to implement the example. Open up a terminal window and run each command as mentioned in the order:
npx react-native init rnPreviewImageGallery

cd rnPreviewImageGallery

yarn add react-native-snap-carousel
The reason I like to use react-native-snap-carousel is that it does not require any additional steps to configure to be used on native devices. Plus, it offers different layouts to configure the carousel view, out of the box.
After installing the dependencies, let’s bring in the image assets to use. I am using images from Unsplash to demonstrate. To follow along, the images are stored at this location in the example GitHub repo.
After setting up the source images to be used, open up the App.js file, and let’s initiate it with a title of the screen to display. Import the following statements, then create an IMAGES object by importing each image using Common JS require statements.
Using the useState React hook, create an array of images called images, with each image having a unique id to differentiate between each object in the array.
const [images, setImages] = useState([]);The useState hook returns two values in an array. The first value is the current value of the state object, and the second value in the array is the function to update the state value of the first. This why the second value starts with a conventional prefix of a set. You can technically name it anything, but following conventions that are commonly used in the React world is a good practice to follow.
Also, define some constants that will be used throughout the example such as the overall spacing between each thumbnail and the width and height of each thumbnail to represent in the FlatList.
To set up the carousel view of an image for different screen sizes, let’s use the Dimensions API from React Native.
Add the following code snippet to App.js and make sure to define state variables at the top of the App function. Hooks are always called at the top level of a functional component in React. When defining a state, they must be the first thing in the function, especially before returning a JSX.
import React, { useState, useRef } from 'react';
import {
  TouchableOpacity,
  View,
  Text,
  Image,
  FlatList,
  Dimensions
} from 'react-native';

const { width } = Dimensions.get('window');
const SPACING = 10;
const THUMB_SIZE = 80;

const IMAGES = {
  image1: require('./assets/images/1.jpeg'),
  image2: require('./assets/images/2.jpeg'),
  image3: require('./assets/images/3.jpeg'),
  image4: require('./assets/images/4.jpeg'),
  image5: require('./assets/images/5.jpeg'),
  image6: require('./assets/images/6.jpeg'),
  image7: require('./assets/images/7.jpeg')
};

const App = () => {
  const [images, setImages] = useState([
    { id: '1', image: IMAGES.image1 },
    { id: '2', image: IMAGES.image2 },
    { id: '3', image: IMAGES.image3 },
    { id: '4', image: IMAGES.image4 },
    { id: '5', image: IMAGES.image5 },
    { id: '6', image: IMAGES.image6 },
    { id: '7', image: IMAGES.image7 }
  ]);

  return (
    <View style={{ flex: 1, backgroundColor: 'black', alignItems: 'center' }}>
      <Text
        style={{
          color: 'white',
          fontSize: 32,
          marginTop: 50,
          marginBottom: 25
        }}
      >
        Custom Gallery
      </Text>
      {/* Carousel View */}
      {/* Thumbnail component using FlatList */}
    </View>
  );
};

export default App;
To initialize the development server for iOS, please execute the command npx react-native run-ios from a terminal window. Similarly, the build command for Android is npx react-native run-android.
Here is the app running after this step on an iOS simulator:

Add a carousel view with react-native-snap-carousel
The component library react-native-snap-carousel has a vast API of properties and different layout patterns that are plug-n-use and even allows you as a developer to implement custom interpolations and animations. You can find more information on how to customize it in the official documentation here.
For the current example, let’s stick to the default layout pattern to display a carousel. To create a carousel view, import the component from react-native-snap-carousel by adding the following import statement in the App.js file. Let’s also import the Pagination component offered separately by this library to display the dot indicator.
// after other import statements
import Carousel, { Pagination } from 'react-native-snap-carousel';
Then, add a View component after the title in the App.js file. It is going to wrap the Carousel component which takes a set of required props to work:
datathe array ofimagesor items to loop.layoutto define the way images are rendered and animated. We will use thedefaultvalue.sliderWidthto define the width in pixels for the carousel container.itemWidthto define the width in pixels for each item rendered inside the carousel.renderItemtakes an image item from thedataarray and renders it as a list. To render the image, theImagecomponent from React Native is used.
Add the following code snippet in App.js to see the carousel in action:
return (
  <View style={{ flex: 1, backgroundColor: 'black', alignItems: 'center' }}>
    {/* Title JSX Remains same */}
    {/* Carousel View */}
    <View style={{ flex: 1 / 2, marginTop: 20 }}>
      <Carousel
        layout="default"
        data={images}
        sliderWidth={width}
        itemWidth={width}
        renderItem={({ item, index }) => (
          <Image
            key={index}
            style={{ width: '100%', height: '100%' }}
            resizeMode="contain"
            source={item.image}
          />
        )}
      />
    </View>
  </View>
);
In the simulator you are going to get the following result:
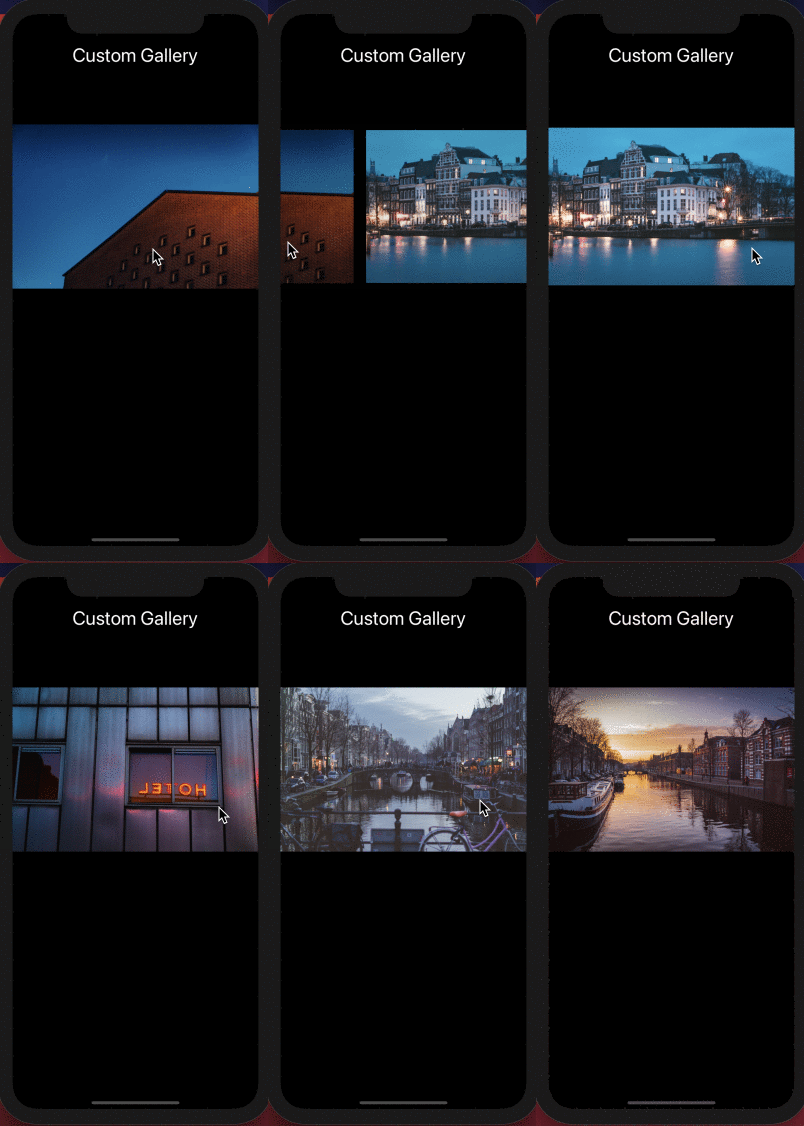
Add a dot indicator
The Pagination component from the react-native-snap-carousel is used to display a dot indicator. This dot indicator requires the following props:
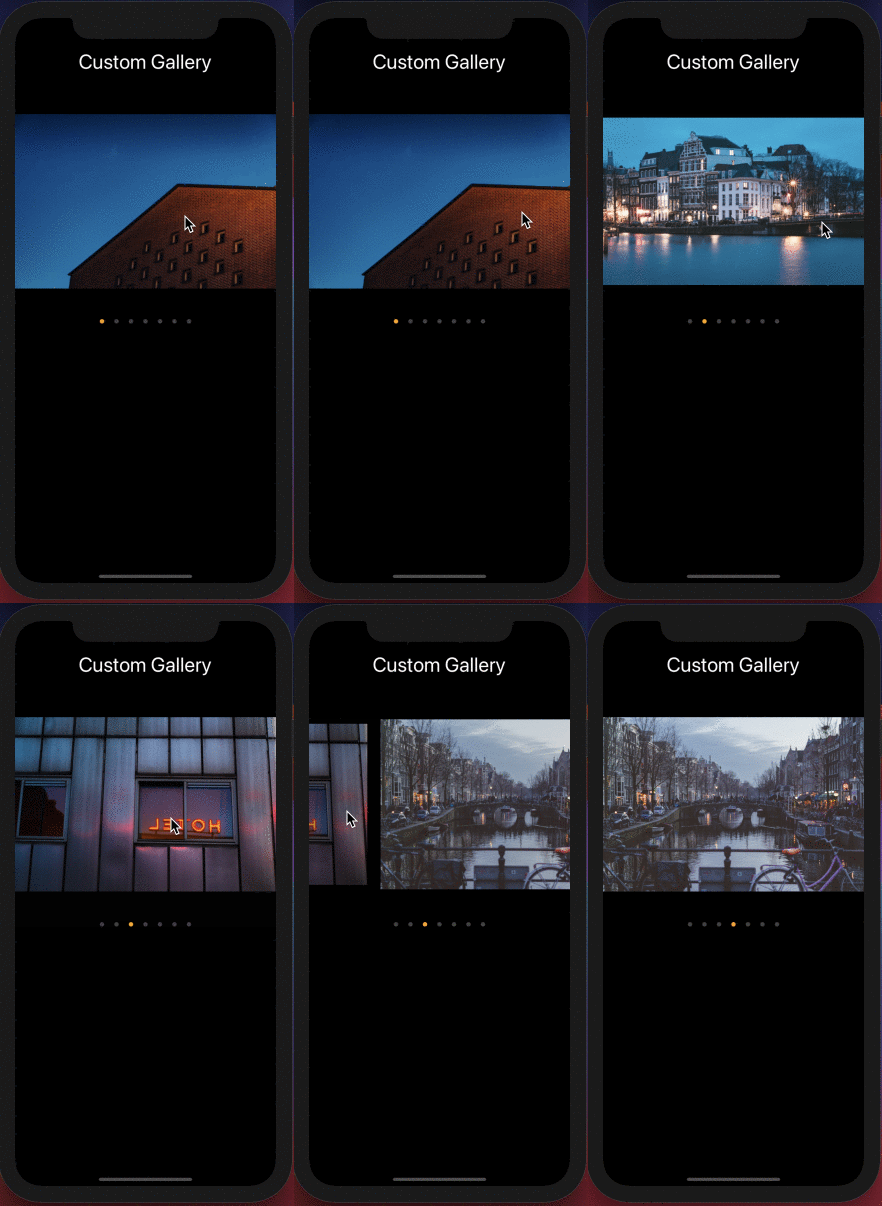
activeDotIndexto represent the current image shown in the carousel.dotsLengthto calculate how many dots to display based on the number of items or images in the carousel.inactiveDotColorto display the dot indicator color when it is inactive.dotColorto display the dot indicator color when it is active.inactiveDotScaleis used to set the value to scale the dot indicator when it’s inactive.animatedDurationis used to control the length of dot animation in milliseconds. The default value for it is250. It is not required, but to change the value, use this prop.
Add the following code snippet after the Carousel component in App.js file:
<View>
  {/* Carousel Component code remains same */}
  <Pagination
    inactiveDotColor="gray"
    dotColor={'orange'}
    activeDotIndex={indexSelected}
    dotsLength={images.length}
    animatedDuration={150}
    inactiveDotScale={1}
  />
</View>
The value of activeDotIndex is calculated based on the current index of the image item. Let’s add a state variable called indexSelected in the App component with a value of zero. It is going to update when the index value of the current image changes. The initial value of this state variable is going to be 0. Create a handler method called onSelect() which updates the value of the current index.
Add the following code snippet before rendering the JSX in App component:
const App = () => {
  // code remains same
  const [indexSelected, setIndexSelected] = useState(0);

  const onSelect = indexSelected => {
    setIndexSelected(indexSelected);
  };
};
Now, add a prop to the Carousel component called onSnapToItem. It accepts a callback as a value. This callback is fired every time the index of the image item changes, in other words, every time the user swipes to the next image. The only argument passed to this callback is the current index of the item which is updated with the help of the onSelect() handler method.
<Carousel
  // rest remains same
  onSnapToItem={index => onSelect(index)}
/>
In the simulator, you will get the following result. The dot indicator now syncs with the Carousel item.
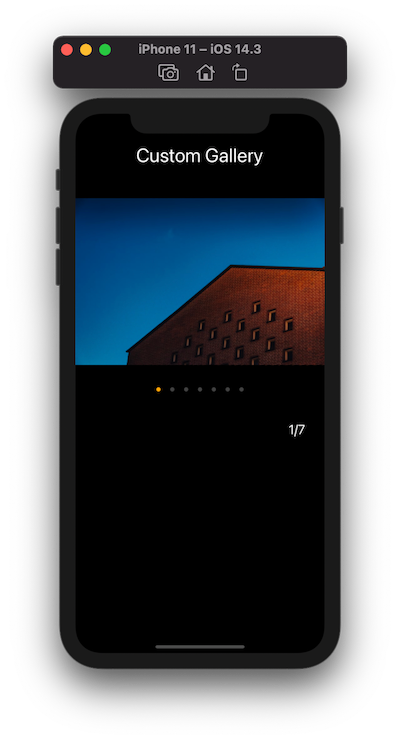
Let’s add another view component below the View that wraps the carousel to display the total number of images and the current image index number.
// Carousel View
<View
  style={{
    marginTop: 20,
    paddingHorizontal: 32,
    alignSelf: 'flex-end'
  }}
>
  <Text
    style={{
      color: 'white',
      fontSize: 22
    }}
  >
    {indexSelected + 1}/{images.length}
  </Text>
</View>
Here is the result after this step:
Awesome! The configuration for the Carousel component is now complete. Let’s see how to sync it with a custom FlatList component in the next section.
Create a list of thumbnails using FlatList
Let’s display a list of thumbnails using FlatList from React Native using the same array of images from the state variable. This list is going to be displayed at the bottom of the device’s screen and is a horizontal list. To achieve that, let’s set use position: absolute style property with a bottom of value 80.
Each thumbnail is composed of an Image component. It has the width and the height of the THUMB_SIZE variable we declared earlier. To show the selected thumbnail or the current thumbnail, using a ternary operator, let’s manipulate the style properties borderWidth and borderColor on this Image component.
It is going to be wrapped by a TouchableOpacity component because its onPress prop is going to fire a handler method we have yet to create, to allow a user to change the selected image by a tap.
Add the following code snippet after Carousel’s View:
<FlatList
  horizontal={true}
  data={images}
  style={{ position: 'absolute', bottom: 80 }}
  showsHorizontalScrollIndicator={false}
  contentContainerStyle={{
    paddingHorizontal: SPACING
  }}
  keyExtractor={item => item.id}
  renderItem={({ item, index }) => (
    <TouchableOpacity activeOpacity={0.9}>
      <Image
        style={{
          width: THUMB_SIZE,
          height: THUMB_SIZE,
          marginRight: SPACING,
          borderRadius: 16,
          borderWidth: index === indexSelected ? 4 : 0.75,
          borderColor: index === indexSelected ? 'orange' : 'white'
        }}
        source={item.image}
      />
    </TouchableOpacity>
  )}
/>
The list of thumbnails renders as shown below:
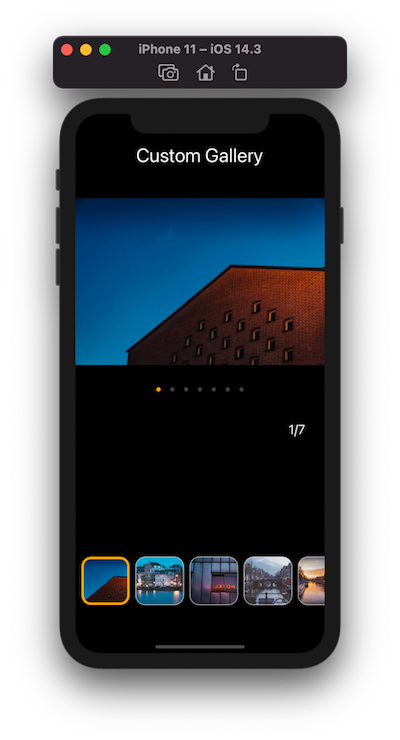
In the previous image, you will see that the first image is selected. You cannot change the currently selected image yet in the FlatList.
Syncing the Carousel view with the FlatList
The basic element that is going to allow us to sync the image change between both the Carousel view and the thumbnail is a React hook called useRef.
It is a function that returns a mutable ref object whose current property can be initialized to keep track of the current index value for each image. The index value here is the image selected. Initially, it is going to be the first thumbnail and the first image shown in the carousel.
Let’s create a ref that is going to be the reference of the current image from Carousel component and add it to the App.js file:
const App = () => {
  const carouselRef = useRef();
  // ...
};
Since the Carousel component keeps track of the change of the current index of the image component by triggering a callback called snapToItem(), we can use it to sync with the FlatList.
Start by adding a handler method called onTouchThumbnail() after defining the ref. It accepts one argument called touched which is the index value of the current image selected from the TouchableOpacity component or Carousel. If the value of the argument touched and indexSelected is the same, do nothing. Otherwise, when the value of the touched or indexSelected updates, change the current image in the Carousel and the FlatList at the same time.
const onTouchThumbnail = touched => {
  if (touched === indexSelected) return;

  carouselRef?.current?.snapToItem(touched);
};
Add the ref prop on Carousel component:
<Carousel
  ref={carouselRef}
  //...
/>
Next, add an onPress prop on the TouchableOpacity component:
<TouchableOpacity
  onPress={() => onTouchThumbnail(index)}
  activeOpacity={0.9}
>
Here is the output after this step:
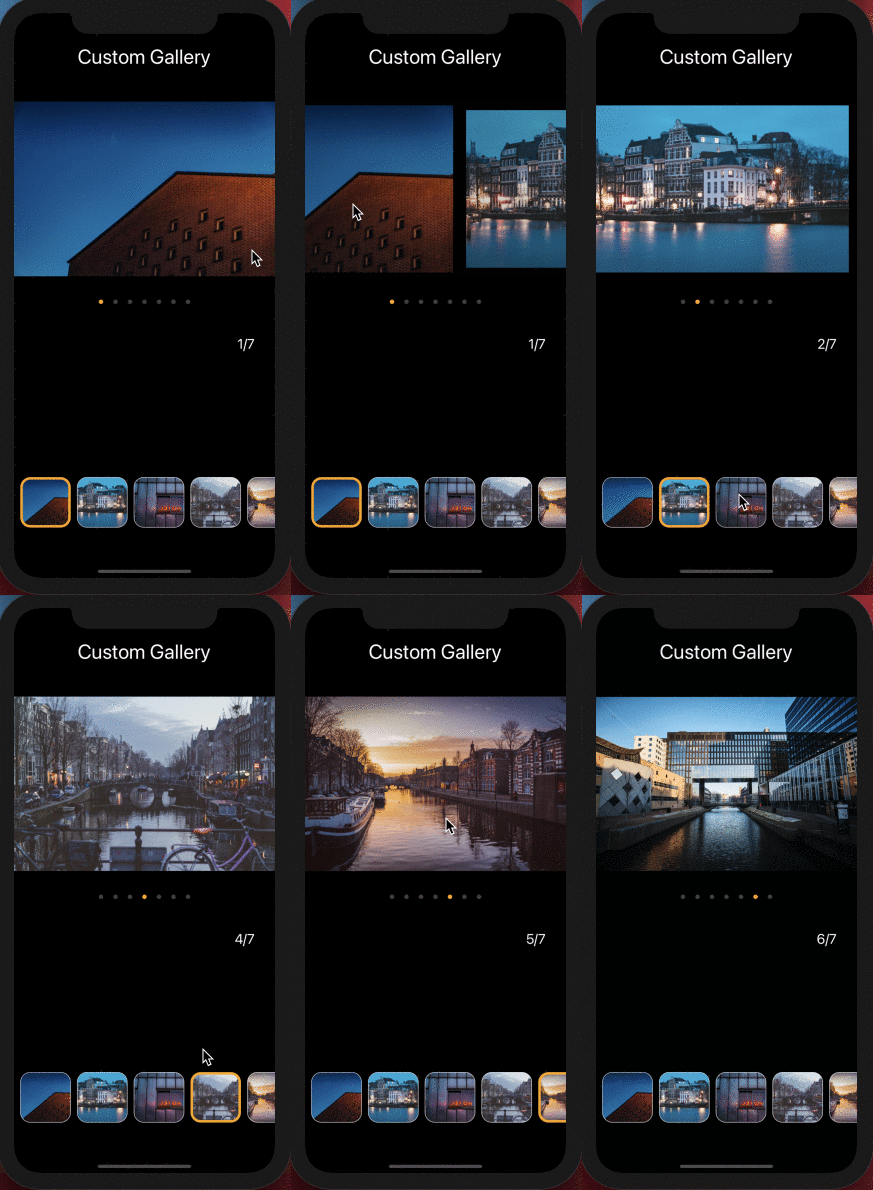
The selection sync works do you notice there is a problem with the FlatList component? It doesn’t scroll on its own when an image from the Carousel is selected that is not in the current view on the screen.
Scroll the FlatList using scrollToOffset
Start by creating a new ref called flatListRef in App.js and add the ref prop to FlatList component:
const App = () => {
  // ...
  const flatListRef = useRef();

  return (
    // ...
    <FlatList
      ref={flatListRef}
      // rest remains same
    />
  );
};
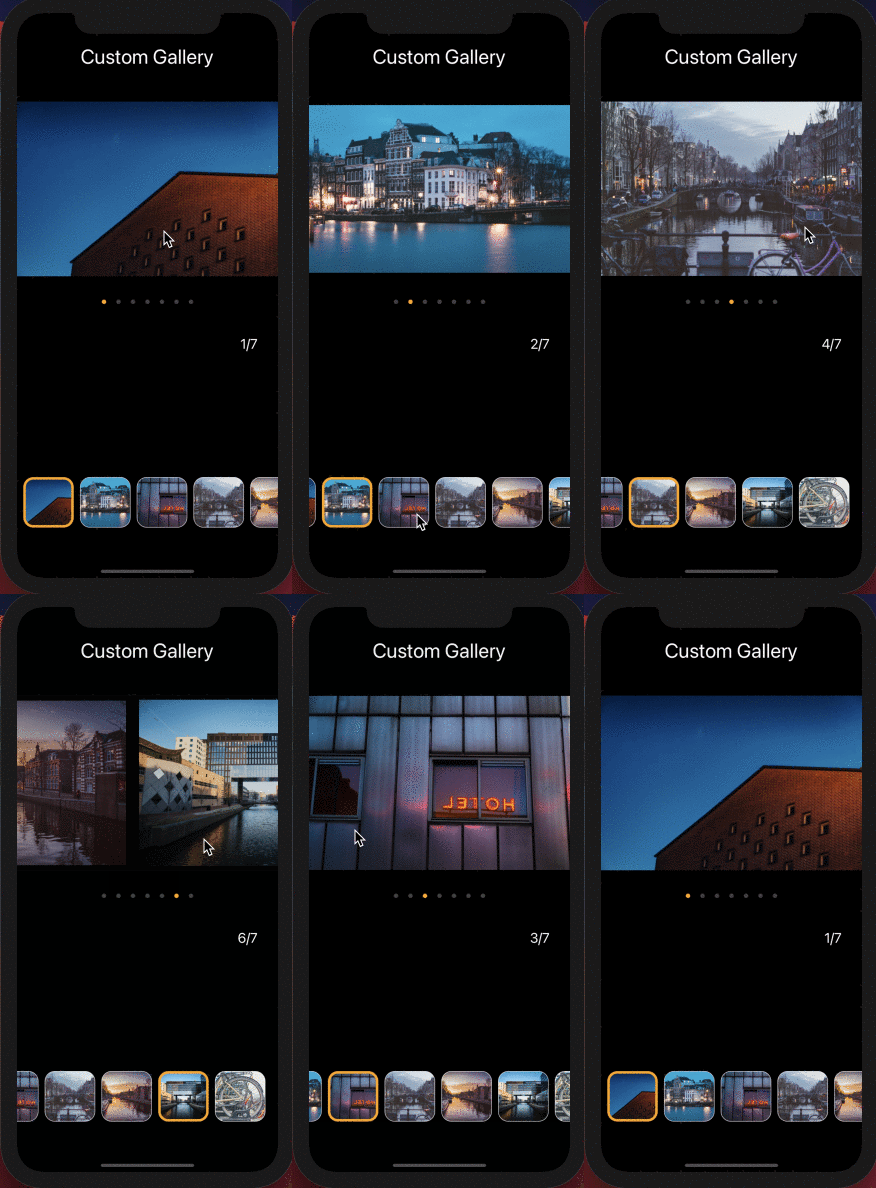
The scrollToOffset method available on FlatList can be used to scroll the thumbnails to a certain offset. This method accepts two arguments. The first is called offset which accepts a number as a value. The second argument is the animated property which determines whether the scroll to even should be animated or not.
The value for the offset is going to be indexSelected of the thumbnail multiplied by the size of the thumbnail. Let’s also set the value of animated to true.
Since the FlatList has to scroll on every selection, let’s add mutate the ref inside the handler method onSelect().
const onSelect = indexSelected => {
  setIndexSelected(indexSelected);

  flatListRef?.current?.scrollToOffset({
    offset: indexSelected * THUMB_SIZE,
    animated: true
  });
};
Here is the output after this step:
Conclusion
We have discussed only one scenario of creating a custom image gallery with FlatList. The main objective here is to get familiar with the use of react-native-snap-carousel, useRef hook, and scrollToOffset method in FlatList.
Further reading
- A complete list of FlatList methods available
- A complete list of props available on Carousel component from react-native-snap-carousel
- In detail guide on how to use Hooks in React & React Native apps
Originally Published at Crowdbotics’s Blog.