
In the first part of this tutorial series to build a chat-based app in React Native, we learned how to create reusable form elements using the react-native-paper UI library. Along with that, we learned how to install the navigation library react-navigation and configure a basic authentication stack navigator using two routes.
In this tutorial, let us start using a backend service to add real-time features to the Chat app. For backend services, I am going to use Firebase. You are going to learn how to install and configure Firebase SDK in a react native app with the help of react-native-firebase module as well as set up and configure Email authentication. In order to follow this tutorial and future posts, you are required to use a Firebase project.
Create a new Firebase project from console
To access the Firebase credentials for each mobile OS platform and configure them to use Firebase SDK, create a new Firebase project or use one if you have access already from Firebase console, you can skip this step.
Create a new project as shown below.

Complete the details of your Firebase project:
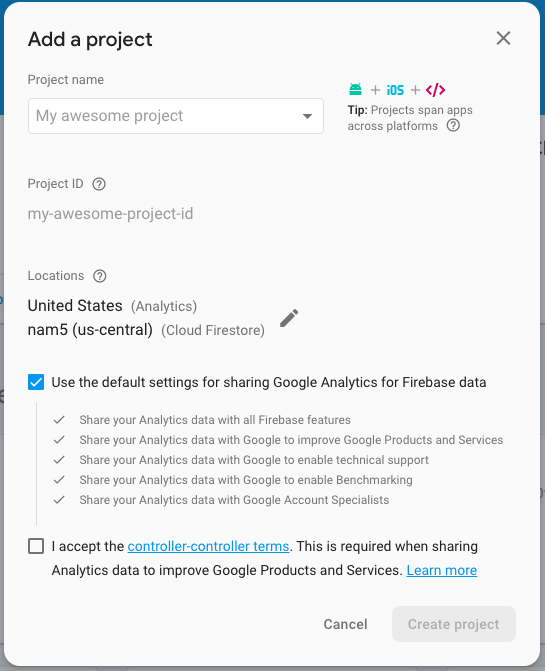
Click the button Create project and you are going to be redirected to the dashboard screen. That’s it. You have successfully created a new Firebase project.
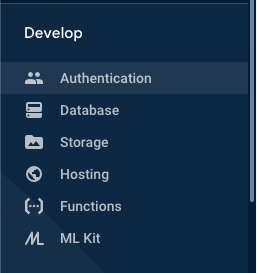
Now make sure that the Email Sign-in method is enabled. From the Firebase console and navigate to Authentication section from the side menu.
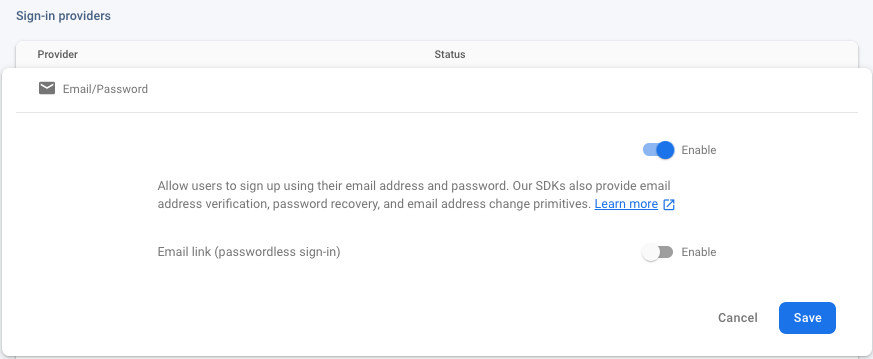
Go to the second tab Sign-in method and make sure to enable the Email sign-in provider.
Add Firebase SDK to React Native app
If you have used react-native-firebase version 5 or below, you must have noticed that it was a monorepo that used to manage all Firebase dependencies from one module.
Version 6 of this library wants you to only install those dependencies based on Firebase features that you want to use. For example, in the current app, to support the email authentication feature you are going to install the auth and core app package.
From the terminal window execute the following command.
yarn add @react-native-firebase/app @react-native-firebase/authAdd Firebase credentials to your iOS app
Firebase provides a file called GoogleService-Info.plist that contains all the API keys as well as other credentials for iOS devices to authenticate the correct Firebase project.
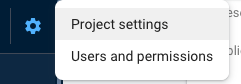
To get these credentials, go to back to the Firebase console in a browser window. From the dashboard screen of your Firebase project, open Project settings from the side menu.
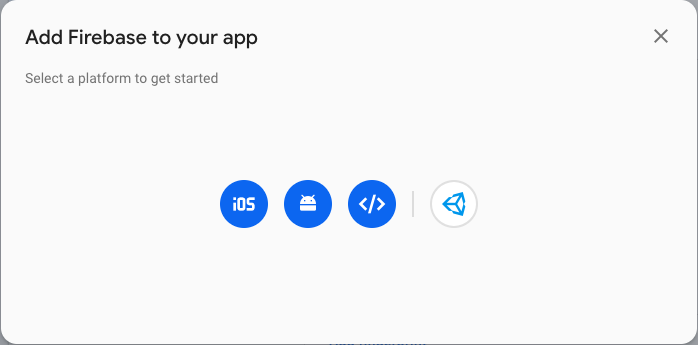
Go to Your apps section and click on the icon iOS to select the platform.
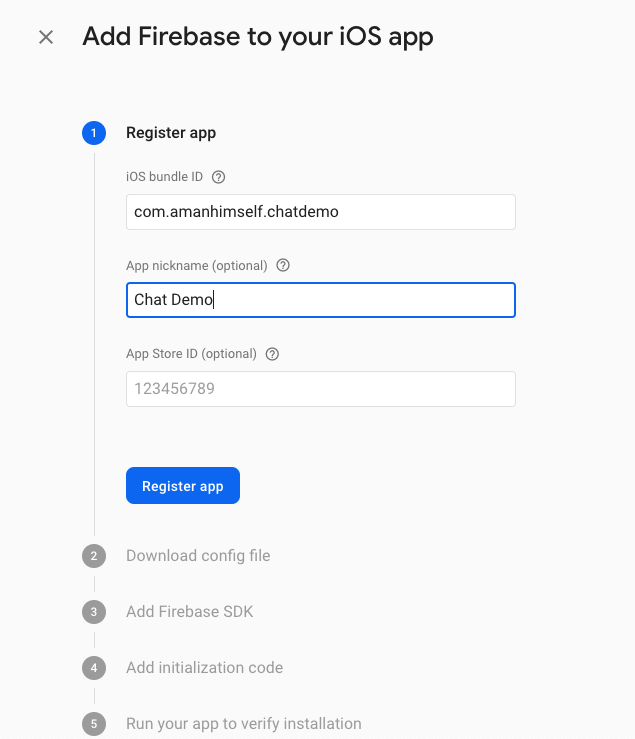
Enter the application details and click on Register app.
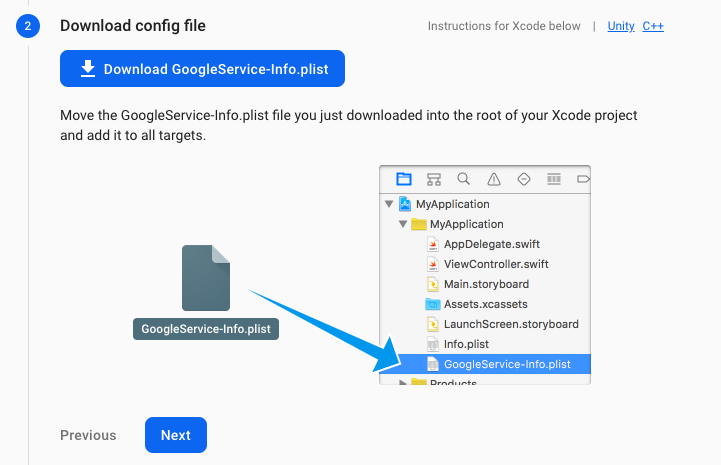
Then download the GoogleService-Info.plist file as shown below.
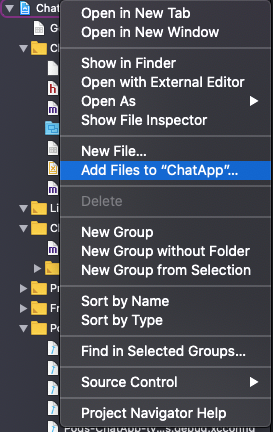
Open Xcode, then open the file /ios/ChatApp.xcodeproj file. Right-click on the project name and Add Files option, then select the file to add to this project.
Then open ios/ChatApp/AppDelegate.m and add the following header.
#import <Firebase.h>In the same file, within the didFinishLaunchingWithOptions method, add the following configure method.
- (BOOL)application:(UIApplication *)application didFinishLaunchingWithOptions:(NSDictionary *)launchOptions {
    if ([FIRApp defaultApp] == nil) {
      [FIRApp configure];
    }
Lastly, go back to the terminal window to install pods.
cd ios/ && pod install
# after pods are installed
cd ..
Make sure you build the iOS app.
npx react-native run-iosThat’s it. The configuration to set up a Firebase SDK and credentials in a React Native app is complete.
Create a home screen
In the previous post, you have successfully configured an Auth stack that displays those screens when the end-user is not authorized or logged in inside the app. There are a set of screens that are only going to be accessible to the user when they are logged in. Let us call the group of screens that are visible after login, home stack.
One such screen is going to be a home screen where all the chat rooms are going to be listed. In this section, let us start by creating a basic home screen such that you can complete navigational flow between the home stack and the auth stack.
Create a new screen component called HomeScreen.js inside src/screens/ directory with the following code snippet.
import React from 'react';
import { View, StyleSheet } from 'react-native';
import { Title } from 'react-native-paper';

export default function HomeScreen() {
  return (
    <View style={styles.container}>
      <Title>Home Screen</Title>
      <Title>All chat rooms will be listed here</Title>
      <FormButton modeValue="contained" title="Logout" />
    </View>
  );
}

const styles = StyleSheet.create({
  container: {
    backgroundColor: '#f5f5f5',
    flex: 1,
    justifyContent: 'center',
    alignItems: 'center'
  }
});
Create home stack navigator
Create a new stack navigator file called HomeStack.js inside src/navigation.js that is going to have those routes which are only available after logging in. You can think of these routes as protected routes.
Open this file and add the following code snippet. Nothing new is going in terms of creating a stack navigator as shown below.
import React from 'react';
import { createStackNavigator } from '@react-navigation/stack';
import HomeScreen from '../screens/HomeScreen';

const Stack = createStackNavigator();

export default function HomeStack() {
  return (
    <Stack.Navigator>
      <Stack.Screen name="Home" component={HomeScreen} />
    </Stack.Navigator>
  );
}
Create an auth provider
In this section, you are going to create an authentication provider to check whether the user is logged in or not and access them if they are logged in.
Create a new file called AuthProvider.js inside src/navigation/. Start by importing the following statements.
import React, { createContext, useState } from 'react';
import auth from '@react-native-firebase/auth';
Then create an AuthContext and make sure to export it since you are going to use it on several different screens.
export const AuthContext = createContext({});In Reactjs, the Context API is designed to share data that is considered global for a tree of React components. When you are creating a context (like above), there is a requirement to pass a default value. This value is used when a component does not have a matching Provider.
The Provider allows the React components to subscribe to the context changes. To create an auth provider, export a function called AuthProvider. This provider is going to allow the screen components to access the current user in the application. Define a state variable called user.
export const AuthProvider = ({ children }) => {
  const [user, setUser] = useState(null);

  return (
    <AuthContext.Provider
      value={{
        user,
        setUser,
        login: async (email, password) => {
          try {
            await auth().signInWithEmailAndPassword(email, password);
          } catch (e) {
            console.log(e);
          }
        },
        register: async (email, password) => {
          try {
            await auth().createUserWithEmailAndPassword(email, password);
          } catch (e) {
            console.log(e);
          }
        },
        logout: async () => {
          try {
            await auth().signOut();
          } catch (e) {
            console.error(e);
          }
        }
      }}
    >
      {children}
    </AuthContext.Provider>
  );
};
In the value prop above, also define some functions. These functions are now available to be used anywhere in the screens component tree using React Context.
Each of the functions is consuming Firebase methods to interact with real-time Firebase backend service. Both the login and register functions require the user’s email and password to verify/save credentials. The logout method invokes a simple signOut() method. All these Firebase methods are available from the @react-native-firebase/auth package. Do note that, all these functions are asynchronous actions and thus, using async await syntax helps.
Wrapping routes with auth provider
Now, that the provider is created, but how to use for a set of components in the current app tree? Well, you have to wrap this provider around the Routes such as to use the helper functions as well as the value of current user (as described above) in the screen components.
Open navigation/index.js file and modify it as follows.
import React from 'react';
import { Provider as PaperProvider } from 'react-native-paper';
import { AuthProvider } from './AuthProvider';
import Routes from './Routes';

/**
 * Wrap all providers here
 */

export default function Providers() {
  return (
    <PaperProvider>
      <AuthProvider>
        <Routes />
      </AuthProvider>
    </PaperProvider>
  );
}
Remember, from the previous post, we added that comment that to wrap all components using all providers in this file? Well, that’s what this file is for.
Check if the user is logged in or not
To check if the user is logged or not, let us modify the navigation/Routes.js file. Using the value of the user from the auth provider, you are going to switch between the stack navigators. To start, make sure you imported the following statements.
import React, { useContext, useState, useEffect } from 'react';
import { NavigationContainer } from '@react-navigation/native';
import auth from '@react-native-firebase/auth';
import AuthStack from './AuthStack';
import HomeStack from './HomeStack';
import { AuthContext } from './AuthProvider';
import Loading from '../components/Loading';
From the above snippet, ignore the Loading component for now. You are going to create it at the end of this section.
Now, inside the Routes function, you are two define two state variables initializing and loading to check whether the user’s state is logged in or not. Also, from the context value, fetch user and setUser.
Then, define a function called onAuthStateChanged which is going to handle user state changes. Using useEffect hook, you can subscribe to this state change function and make sure you unsubscribe it when the component unmounts. This method allows you to subscribe to real-time events when the user performs an action. The action here can be, logging in, signing out, and so on.
export default function Routes() {
  const { user, setUser } = useContext(AuthContext);
  const [loading, setLoading] = useState(true);
  const [initializing, setInitializing] = useState(true);

  // Handle user state changes
  function onAuthStateChanged(user) {
    setUser(user);
    if (initializing) setInitializing(false);
    setLoading(false);
  }

  useEffect(() => {
    const subscriber = auth().onAuthStateChanged(onAuthStateChanged);
    return subscriber; // unsubscribe on unmount
  }, []);

  if (loading) {
    return <Loading />;
  }

  return (
    <NavigationContainer>
      {user ? <HomeStack /> : <AuthStack />}
    </NavigationContainer>
  );
}
Lastly, create a new component file called Loading.js inside src/components/ directory. This component is going to be responsible to display a loading spinner.
import React from 'react';
import { View, ActivityIndicator, StyleSheet } from 'react-native';

export default function Loading() {
  return (
    <View style={styles.loadingContainer}>
      <ActivityIndicator size="large" color="#6646ee" />
    </View>
  );
}

const styles = StyleSheet.create({
  loadingContainer: {
    flex: 1,
    alignItems: 'center',
    justifyContent: 'center'
  }
});
Completing the app
In order for the user to perform auth actions in the app, you have to use the context in each of the screen components for different actions.
Start by opening LoginScreen.js. Import useContext from react and AuthContext from AuthProvider.
import React, { useState, useContext } from 'react';
// rest of the import statements remain same
import { AuthContext } from '../navigation/AuthProvider';

export default function LoginScreen({ navigation }) {
  const { login } = useContext(AuthContext);

  // rest remains statements
}
Inside the LoginScreen function, make sure to add an onPress prop as shown below.
<FormButton
  title="Login"
  modeValue="contained"
  labelStyle={styles.loginButtonLabel}
  onPress={() => login(email, password)}
/>
Similarly, you have to modify the SignupScreen.js file.
import React, { useState, useContext } from 'react';
// rest of the import statements remain same
import { AuthContext } from '../navigation/AuthProvider';

export default function SignupScreen({ navigation }) {
  const { register } = useContext(AuthContext);
  // rest remains statements
}

// Add the onPress prop to <FormButton />

<FormButton
  title="Signup"
  modeValue="contained"
  labelStyle={styles.loginButtonLabel}
  onPress={() => register(email, password)}
/>;
Lastly, modify the HomeScreen to add a sign out button and when the user is in the logged-in state, display their user uid (the unique identifier in Firebase to differentiate and store different users).
import React, { useContext } from 'react';
import { View, StyleSheet } from 'react-native';
import { Title } from 'react-native-paper';
import { AuthContext } from '../navigation/AuthProvider';
import FormButton from '../components/FormButton';

export default function HomeScreen() {
  const { user, logout } = useContext(AuthContext);

  return (
    <View style={styles.container}>
      <Title>Home Screen</Title>
      <Title>All chat rooms will be listed here</Title>
      <Title>{user.uid}</Title>
      <FormButton
        modeValue="contained"
        title="Logout"
        onPress={() => logout()}
      />
    </View>
  );
}

const styles = StyleSheet.create({
  container: {
    backgroundColor: '#f5f5f5',
    flex: 1,
    justifyContent: 'center',
    alignItems: 'center'
  }
});
Go to the simulator, and you are going to get similar results as shown below. Perform these steps. Try creating a new user from the sign-up screen, and you are going to get their uid on the home screen.
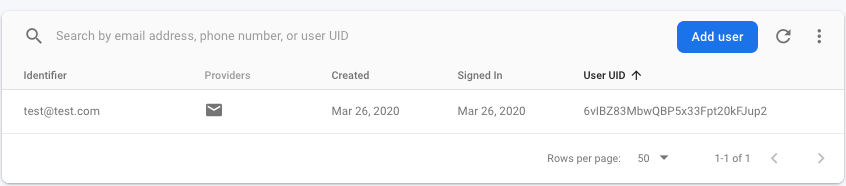
You can verify the uid of the current user by going to the dashboard screen from Firebase console.
Conclusion
Congratulations! You’ve completed this tutorial and successfully added an authentication flow between the two stack navigators. In the next part of this series, we’ll explore more features such as creating and storing chat rooms in a collection in Firestore, as well as displaying all chat rooms on the home screen. To create a new chat room, we’ll create a new modal screen and make changes to the current home stack accordingly.
What’s Next?
In the next post of this series, we are going to explore how to create a modal screen using react-navigation stack navigator. This modal screen is going to have separate navigator as well as to be used to create a new chat room.
Then, we are going to add Firebase NoSQL database Firestore and add a query to store the name of a chat room in a collection.
You can find the complete source code for this project at this Github repo.
👉 Here is a list of resources used in this tutorial:
- Reactjs Context API
- Firebase Authentication reference from
react-native-firebase - Getting started with stack navigator using
react-navigationv5 here
Originally published at Heartbeat.Fritz.Ai.