If you’re a fan of HBO’s Silicon Valley, you’ll remember when they launched a real AI-powered mobile app that classifies hotdogs from a given image (or not). Using Google’s Vision API, let’s try to recreate a working model of the application in React Native.
Google’s Vision API is a machine learning tool that classifies details from an image provided as an input. The process of these classifications is based on thousands of different categories that are included in pre-trained API models. The Vision API enables access to these pre-trained models via a REST API.
What are we building?

Table of Contents
Open Table of Contents
- Prerequisites
- Setup Firebase Project
- Integrate Firebase SDK with React Native app
- Generate a Google Vision API Key
- Setting Permissions for Camera & Camera Roll
- Create a Header component
- Adding an Overlay Spinner
- Access Camera and Camera Roll
- Add functionality to determine a Hotdog
- Display final results
- Conclusion
Prerequisites
To follow this tutorial, please make sure you have the following installed on your local development environment and have access to the services mentioned below:
- Node.js (>=
10.x.x) with npm/yarn installed. - expo-cli (>=
3.0.9), previously known as create-react-native-app. - a Google Cloud Platform account
- Firebase Storage setup
- Expo Client app for Android or iOS, used for testing the app
Setup Firebase Project
In this section, let us set up a new Firebase project. If you are already familiar with the process and know how to get a config keys from a Firebase project, you can skip this step.
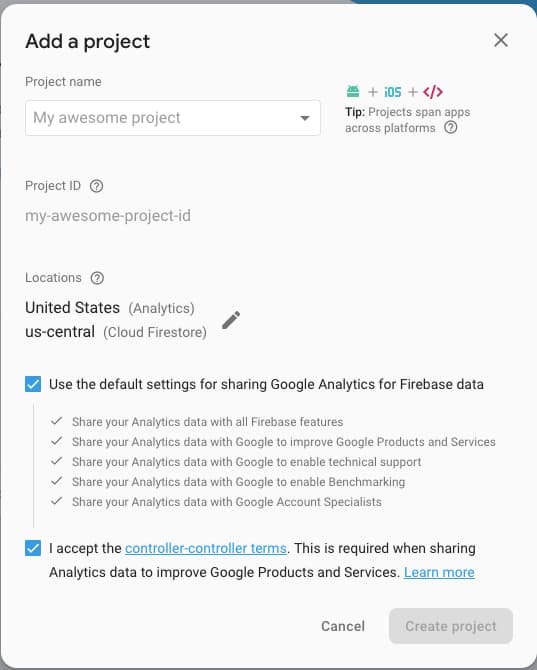
Visit Firebase and sign-in with your Google ID. Once signed in, click on a new project and enter a name. Lastly, hit the Create project button.
After creating the project and being redirected to the dashboard screen, on the left side menu, click the settings icon, and then go to Project settings.
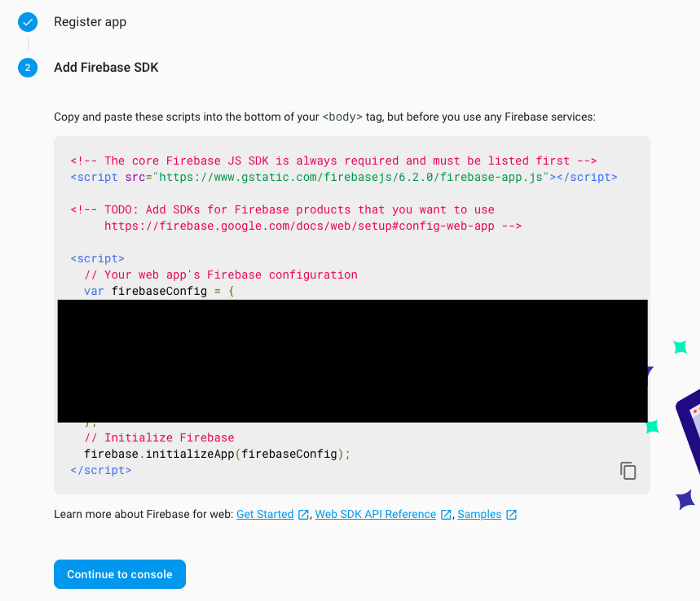
The whole the firebaseConfig object, as shown above, is required to integrate Firebase with a React Native or Expo app. Save them somewhere or make sure you know how to navigate to this page.
The next step is to setup Firebase storage rules such as to allow to upload image files through the app. From the left-hand side menu in the Firebase console, open Storage tab and then choose Rules. Modify them as follows.
service firebase.storage {
  match /b/{bucket}/o {
    match /{allPaths=**} {
      allow read, write
    }
  }
}
Firebase setup is complete.
Integrate Firebase SDK with React Native app
To get started, create a new React Native project. For this demonstration, let us use expo-cli, an awesome tool that helps to create React Native apps at a faster rate. Open a terminal window, and run the following series of commands.
# generate a new app
expo init not-hotdog-app

# navigate inside the app folder
cd not-hotdog-app

# install the firebase SDK & other dependencies
yarn add firebase@6.0.1 expo-permissions
expo-image-picker uuid react-native-elements
Also, this tutorial is using
yarnas the package manager but you are most welcome to usenpm.
Now that the project is generated open the directory in your favorite text editor. Then create a new folder called config and inside it, a new file called Firebase.js. This file will be responsible for integrating Firebase with the Expo app.
import * as firebase from 'firebase';

const firebaseConfig = {
  apiKey: 'XXXX',
  authDomain: 'XXXX',
  databaseURL: 'XXXX',
  projectId: 'XXXX',
  storageBucket: 'XXXX',
  messagingSenderId: 'XXXX',
  appId: 'XXXX'
};

// Initialize Firebase
firebase.initializeApp(firebaseConfig);

export default firebase;
All the Xs are values of each key in the firebaseConfig object from the previous section. This completes the step to integrate a Firebase Web SDK with an Expo app.
Generate a Google Vision API Key
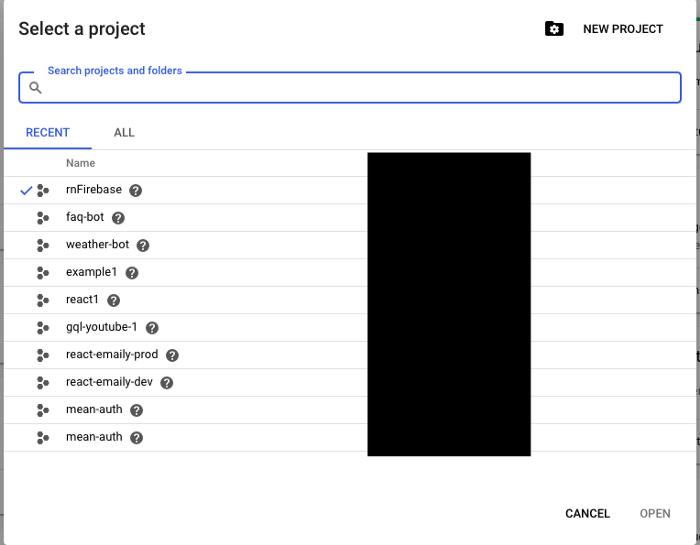
Once you are signed in to Google Cloud Platform, you can visit the Google Cloud Console, to create a new project.
From the dropdown menu center, select a project. Then click the button New Project in the screen below. Notice you have already generated a Firebase project, select that from the list available.
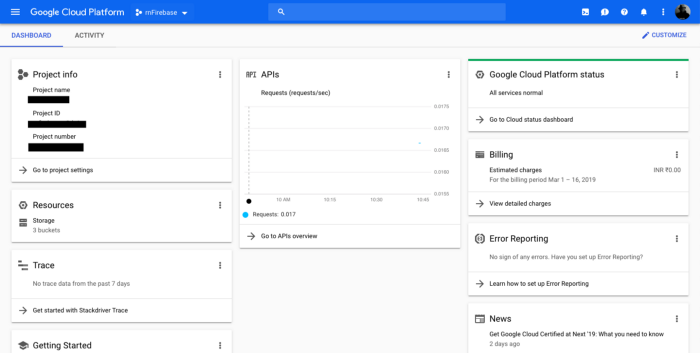
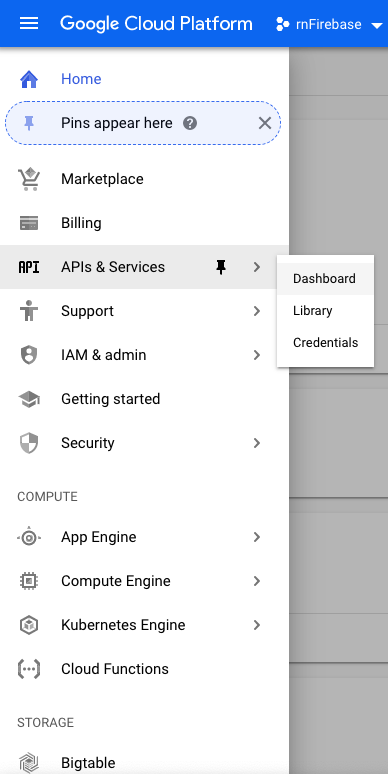
Right now you are at the screen called Dashboard inside the console. From the top left, click on the menu button and a sidebar menu will pop up. Select APIs & Services > Dashboard.
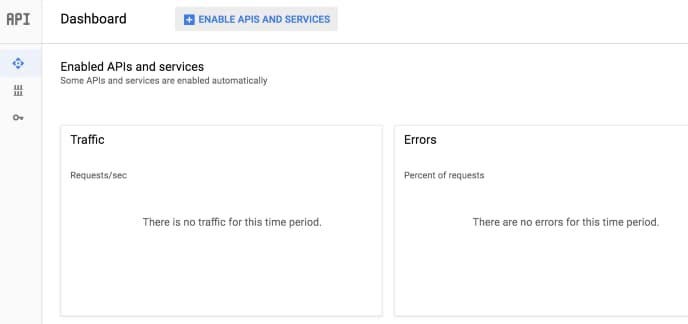
At the Dashboard, select the button Enable APIs and Services.
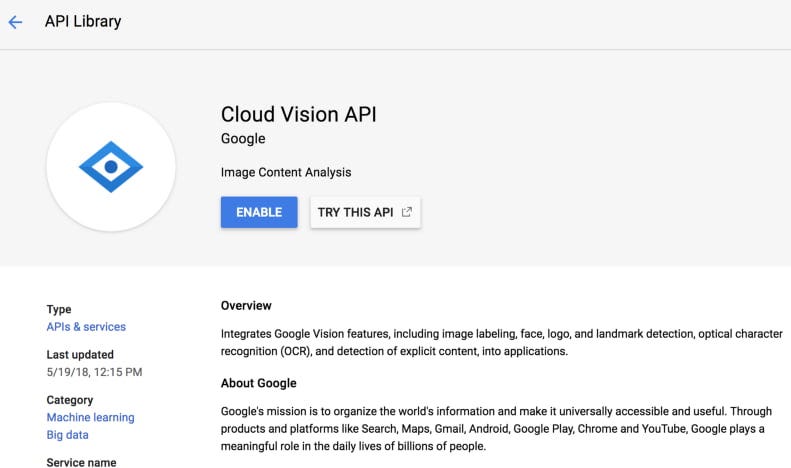
Then search for the Vision API and make sure to click the button Enable.
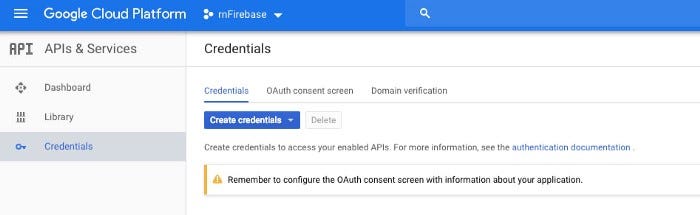
Now, go back to the Dashboard and go to Credentials to generate an API key. Click the button Create Credentials and you will undergo a small process to generate the API key.
Once it is done, save the API key in App.js file after all the import statements.
const VISION_API_KEY = 'XXXX';The setup is complete. Let us move to the next section and start building the application.
Setting Permissions for Camera & Camera Roll
To set permissions in any Expo app, all you need is to utilize an asynchronous method from the module expo-permissions. For this clone, there are two permissions that need to be set. The required permissions are for Camera and Camera Roll (or Photos of your device).
Camera roll is used in a case where the user wants to upload an image. For iOS simulator devs, you cannot access the camera so if you are not planning to use a real device until the end of this tutorial, but want to follow along. It is recommended to add Camera Roll functionality.
Import the permissions module in App.js file.
import * as Permissions from 'expo-permissions';Next step is to set an initial state that will control the View in the render method by determining whether the user has granted the permission to your app to use Camera and Camera roll or not.
class App extends Component {
  state = {
    hasGrantedCameraPermission: false,
    hasGrantedCameraRollPermission: false,
  }
Next, using a lifecycle method componentDidMount(), define a promise for each permission. In the below snippet, you will find two functions cameraRollAccess() and cameraAccess() performing this operation. Respectively, each of these permission component has a permission type:
- for Camera Roll:
Permissions.CAMERA_ROLL - for Camera:
Permissions.CAMERA
async componentDidMount() {
    this.cameraRollAccess()
    this.cameraAccess()
  }

  cameraRollAccess = async () => {
    const { status } = await Permissions.askAsync(Permissions.CAMERA_ROLL)

    if (status === 'granted') {
      this.setState({ hasGrantedCameraRollPermission: true })
    }
  }

  cameraAccess = async () => {
    const { status } = await Permissions.askAsync(Permissions.CAMERA)

    if (status === 'granted') {
      this.setState({ hasGrantedCameraPermission: true })
    }
  }
Each of the permission components returns a status value of granted or denied. In case of the permissions are granted, the value of state variables hasGrantedCameraRollPermission and hasGrantedCameraPermission are both set to true. The method Permissions.askAsync() to prompt the user for the type of permission.
Next, go to the render method of the App component and add condition using the two-state variables. If both are set to true, it will display the first screen of the application.
render() {
const {
hasGrantedCameraPermission,
hasGrantedCameraRollPermission,
} = this.state
if (
hasGrantedCameraPermission === false &&
hasGrantedCameraRollPermission === false
) {
return (
<View style={{ flex: 1, marginTop: 100 }}>
<Text>No access to Camera or Gallery!</Text>
</View>
)
} else {
return (
<View style={styles.container}>
{*/ Rest of the content in the next section*/ }
</View>
)
}
}
// Corresponding StyleSheet Object
const styles = StyleSheet.create({
container: {
flex: 1,
backgroundColor: '#fff'
}
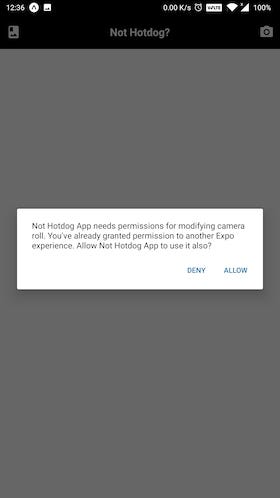
})If either or both are not granted, the app will display the message No access to Camera or Gallery!, also as shown below.

When tested on a real android device, it did ask for permissions.
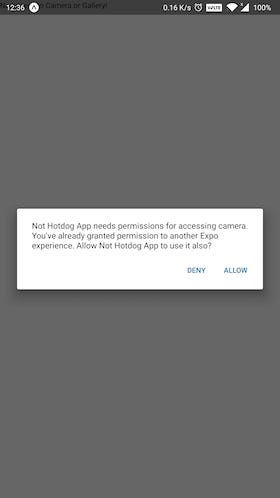
Similarly, to use camera:
Create a Header component
Using react-native-elements UI library for React Native, let us quickly create a useful header that will hold two buttons and the app’s title in text. The left button will be to open the phone’s gallery or camera roll consisting of user photos. The right button will be to open access the Camera on a real device.
Import the Header component from the react-native-elements library.
import { View, Text, StyleSheet, TouchableOpacity } from 'react-native';
import { Header, Icon } from 'react-native-elements';
The UI library has a pre-defined component called Header that you can use right away. This component accepts the icons on the left and right side. Since the app needs these icons to be clickable, use TouchableOpacity such that its prop can be later used to open the camera or the camera roll.
<View style={styles.container}>
<Header
statusBarProps={{ barStyle: 'light-content' }}
backgroundColor="black"
leftComponent={
<TouchableOpacity onPress={() => alert('soon')}>
<Icon name="photo-album" color="#fff" />
</TouchableOpacity>
}
centerComponent={{
text: 'Not Hotdog?',
style: { color: '#fff', fontSize: 20, fontWeight: 'bold' }
}}
rightComponent={
<TouchableOpacity onPress={() => alert('soon')}>
<Icon name="camera-alt" color="#fff" />
</TouchableOpacity>
}
/>
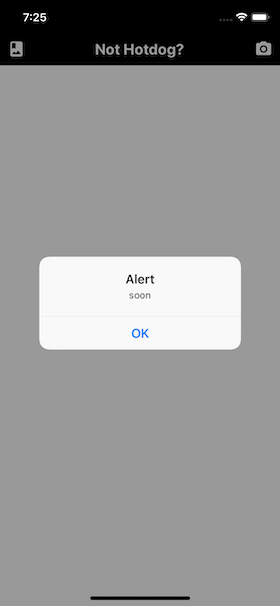
</View>The Header component also has a statusBarProps prop to change the color of the Status bar and works cross-platform. It will give the following output.

Both the icons are touchable, but right now they do not have an associated handler method except that a dummy alert message.
The react-native-elements library by default uses Material Icons and has a peer dependency of react-native-vector-icons.
Adding an Overlay Spinner
The next element to add in the initial state object is uploading with a value of false. This variable will be used in the app to display an animated spinner whenever an image is being uploaded from the Camera Roll or analyzed by the Vision API for the result.
state = {
  //... rest,
  uploading: false
};

// also make sure to include deconstruct the state inside render()
const {
  hasGrantedCameraPermission,
  hasGrantedCameraRollPermission,
  uploading
} = this.state;
Create a new file inside components/UploadingOverlay.js. This file is going to contain a presentational component with the same name as the filename. Using ActivityIndicator from react-native you can animate this component by using its prop called animating.
import React from 'react';
import { ActivityIndicator, StyleSheet, View } from 'react-native';

const UploadingOverlay = () => (
  <View style={[StyleSheet.absoluteFill, styles.overlay]}>
    <ActivityIndicator color="#000" animating size="large" />
  </View>
);

const styles = StyleSheet.create({
  overlay: {
    backgroundColor: 'rgba(255,255,255,0.9)',
    alignItems: 'center',
    justifyContent: 'center'
  }
});

export default UploadingOverlay;
Adding StyleSheet.absoluteFill to the style prop of the View component which holds the spinner, you can create an overlay screen. An overlay is just a screen or a View in terms of React Native that allows the current screen to appear on top of other screens. Using the backgroundColor property, you can add the opacity in the last after defining RBG values.
For example, when asking permission to access the Camera, a dialog box appeared on the app screen (as shown in the previous section). Notice how the box was position on top of the screen in the background.
Now, go back to App.js and add this component at the bottom of the render() section, just before the root View component is ending. Do not forget to import the component.
import UploadingOverlay from './components/UploadingOverlay';

// ... rest
{
  uploading ? <UploadingOverlay /> : null;
}
The above condition states that, if the value of this.state.uploading is true, it will show the overlay screen. To test it out, temporarily set the value of uploading in the state object to true.
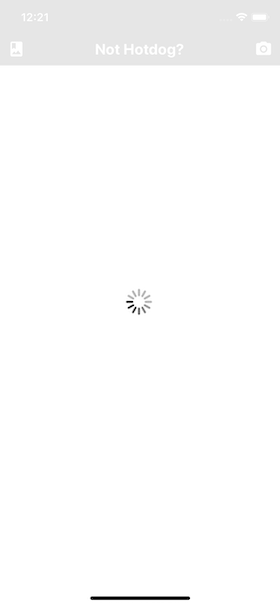
An endless spinner will continue to appear. Set the value of uploading back to false before proceeding.
Access Camera and Camera Roll
In this section, you are going to add the functionality of accessing Camera and Camera Roll by defining three different handler functions in App component. Make sure you are inside the file App.js. First, import the following statement since this section is going to make use of Firebase’s storage and uuid module to create a unique referent to each image.
import firebase from './config/Firebase';
import uuid from 'uuid';
Next, modify the initial state of the object to add the following for the final time.
state = {
  hasGrantedCameraPermission: false,
  hasGrantedCameraRollPermission: false,
  uploading: false,
  image: null,
  googleResponse: false
};
To enable both of these functionalities in the current app, let us leverage another Expo module called expo-image-picker. First, import the module after the rest of the import statements.
import * as ImagePicker from 'expo-image-picker';Expo documentation has the best definition of what this module is used for. Take a look.
[Image Picker] Provides access to the system’s UI for selecting images and videos from the phone’s library or taking a photo with the camera.
That’s all you need right now. Define the first function, takePhoto that is going to access the phone’s camera to click a photo.
takePhoto = async () => {
  let pickerResult = await ImagePicker.launchCameraAsync({
    allowsEditing: true,
    aspect: [4, 3]
  });

  this.handleImagePicked(pickerResult);
};
The asynchronous method ImagePicker.launchCameraAsync() accepts two arguments:
allowsEditingshows the UI to edit the image after it is clicked. Mostly used to crop images.aspectis an array to maintain a consistent aspect ratio if theallowsEditingis set to true.
Similarly, ImagePicker.launchImageLibraryAsync() is used with the same set of arguments to access Camera roll.
pickImage = async () => {
  let pickerResult = await ImagePicker.launchImageLibraryAsync({
    allowsEditing: true,
    aspect: [16, 9]
  });

  this.handleImagePicked(pickerResult);
};
Both of these asynchronous functions, return the uri of the image selected (among other arguments that you can view in the official docs here). Lastly, both of these methods are calling another callback handleImagePicked after their job is done. This method contains the business of logic of how to handle the image after it is picked from the camera roll or clicked.
handleImagePicked = async pickerResult => {
  try {
    this.setState({ uploading: true });

    if (!pickerResult.cancelled) {
      uploadUrl = await uploadImageAsync(pickerResult.uri);
      this.setState({ image: uploadUrl });
    }
  } catch (e) {
    console.log(e);
    alert('Image Upload failed');
  } finally {
    this.setState({ uploading: false });
  }
};
Initially, set the state of uploading to true. Then, if an image is selected, call the custom method uploadImageAsync (which will be defined at the end of this section) and pass the URI of the image selected. This will also set the value of the image from the state object to the URL of the uploaded image. Lastly, set the state of the uploading in the finally block back to false if the results are positive and the image has uploaded without any errors.
The custom method uploadImageAsync has to be defined outside the App component. It will upload the image by creating a unique image ID or blob with the help of uuid. It uses xhr to make an Ajax call to send a request to the Firebase storage to upload the image.
async function uploadImageAsync(uri) {
  const blob = await new Promise((resolve, reject) => {
    const xhr = new XMLHttpRequest();
    xhr.onload = function () {
      resolve(xhr.response);
    };
    xhr.onerror = function (e) {
      console.log(e);
      reject(new TypeError('Network request failed'));
    };
    xhr.responseType = 'blob';
    xhr.open('GET', uri, true);
    xhr.send(null);
  });

  const ref = firebase.storage().ref().child(uuid.v4());
  const snapshot = await ref.put(blob);

  blob.close();

  return await snapshot.ref.getDownloadURL();
}
Note that the source code for accessing and uploading an image to Firebase is taken from this example of using Expo with Firebase.
Now you can add both the functions, pickImage and takePhoto as the value of onPress props for the corresponding icons.
<Header
  statusBarProps={{ barStyle: 'light-content' }}
  backgroundColor="#000"
  leftComponent={
    <TouchableOpacity onPress={this.pickImage}>
      <Icon name="photo-album" color="#fff" />
    </TouchableOpacity>
  }
  centerComponent={{
    text: 'Not Hotdog?',
    style: styles.headerCenter
  }}
  rightComponent={
    <TouchableOpacity onPress={this.takePhoto}>
      <Icon name="camera-alt" color="#fff" />
    </TouchableOpacity>
  }
/>
Here is an example of accessing Camera roll.
Add functionality to determine a Hotdog
As most of the app is now set up, this section is going to be an interesting one. You are going to leverage the use of Google’s Vision API to analyze whether the image provided by the user is a hot dog or not.
Inside the App component, add a new method called submitToGoogle. It is going to send requests and communicate with the API to fetch the result when a button is pressed by the user after the image has been uploaded. Again, while analyzing and fetching results, this method is going to set the state variable uploading to true. Then, it will send the URI of the image from the state object’s image as the body of the request.
Along with the URI, the type of category you want to use is also defined along with a number of results it can fetch as a response. You can change the value of maxResults for the LABEL category. Currently, the value of the is set to 7. There are other detection categories provided by the Vision API other the one being used below, LABEL_DETECTION, such as a human face, logo, landmark, text, and so on.
submitToGoogle = async () => {
  try {
    this.setState({ uploading: true });
    let { image } = this.state;
    let body = JSON.stringify({
      requests: [
        {
          features: [{ type: 'LABEL_DETECTION', maxResults: 7 }],
          image: {
            source: {
              imageUri: image
            }
          }
        }
      ]
    });
    let response = await fetch(
      `https://vision.googleapis.com/v1/images:annotate?key=${VISION_API_KEY}`,
      {
        headers: {
          Accept: 'application/json',
          'Content-Type': 'application/json'
        },
        method: 'POST',
        body: body
      }
    );
    let responseJson = await response.json();
    const getLabel = responseJson.responses[0].labelAnnotations.map(
      obj => obj.description
    );

    let result =
      getLabel.includes('Hot dog') ||
      getLabel.includes('hot dog') ||
      getLabel.includes('Hot dog bun');

    this.setState({
      googleResponse: result,
      uploading: false
    });
  } catch (error) {
    console.log(error);
  }
};
In the above snippet, the result is fetched in an array. Each array, in the current scenario, will have seven different objects. Using JavaScript’s map let us extract the value of description from each object. All you need is to detect whether the description contains the word hotdog or not. This is done in the variable result. Lastly, the state of uploading overlay is set back to false, and the result of whether the uploaded image contains a hot dog or not is going to update googleResponse as boolean.
On a side note, the Vision API uses HTTP Post request as a REST API endpoint to perform data analysis on images you send in the request. This is done via the URL https://vision.googleapis.com/v1/images:annotate. To authenticate each request, you need the API key. The body of this POST request is in JSON format. For example:
{
  "requests": [
    {
      "image": {
        "content": "/9j/7QBEUGhvdG9...image contents...eYxxxzj/Coa6Bax//Z"
      },
      "features": [
        {
          "type": "LABEL_DETECTION",
          "maxResults": 1
        }
      ]
    }
  ]
}
Display final results
Using the boolean value from googleResponse, the end result is going to be output. The output will be displayed using renderImage.
renderImage = () => {
  let { image, googleResponse } = this.state;
  if (!image) {
    return (
      <View style={styles.renderImageContainer}>
        <Button
          buttonStyle={styles.button}
          onPress={() => this.submitToGoogle()}
          title="Check"
          titleStyle={styles.buttonTitle}
          disabled
        />
        <View style={styles.imageContainer}>
          <Text style={styles.title}>Upload an image to verify a hotdog!</Text>
          <Text style={styles.hotdogEmoji}>🌭</Text>
        </View>
      </View>
    );
  }
  return (
    <View style={styles.renderImageContainer}>
      <Button
        buttonStyle={styles.button}
        onPress={() => this.submitToGoogle()}
        title="Check"
        titleStyle={styles.buttonTitle}
      />

      <View style={styles.imageContainer}>
        <Image source={{ uri: image }} style={styles.imageDisplay} />
      </View>

      {googleResponse ? (
        <Text style={styles.hotdogEmoji}>🌭</Text>
      ) : (
        <Text style={styles.hotdogEmoji}>❌</Text>
      )}
    </View>
  );
};
The Button component used above is from react-native-elements library. It is going to be disabled until no image is selected. On its prop onPress the handle function submitToGoogle is called. The second view displays the image, and beneath it, an emoji is showcased whether the image has the desired result or not. Do note that by default the cross emoji will be showcased since the default value of googleResponse is set to false when defining the initial state. Only after clicking the button, the emoji displayed is the final result.
Lastly, do not forget to add renderImage inside App component’s render method, just before the UploadingOverlay component.
// inside the render method
{
  this.renderImage();
}
{
  uploading ? <UploadingOverlay /> : null;
}
Here is a short demo of how the app looks and works on a real android device using Expo client to run the app.
Here is complete source code for StyleSheet object.
const styles = StyleSheet.create({
  container: {
    flex: 1,
    backgroundColor: '#cafafe'
  },
  headerCenter: {
    color: '#fff',
    fontSize: 20,
    fontWeight: 'bold'
  },
  renderImageContainer: {
    marginTop: 20,
    alignItems: 'center'
  },
  button: {
    backgroundColor: '#97caef',
    borderRadius: 10,
    width: 150,
    height: 50
  },
  buttonTitle: {
    fontWeight: '600'
  },
  imageContainer: {
    margin: 25,
    alignItems: 'center'
  },
  imageDisplay: {
    width: 300,
    height: 300
  },
  title: {
    fontSize: 36
  },
  hotdogEmoji: {
    marginTop: 20,
    fontSize: 90
  }
});

export default App;
If you visit the storage section in Firebase, you can notice that each image is stored with a name of base64 binary string.

Conclusion
By integrating Firebase storage and using Google’s Vision API with React Native, you have completed this tutorial. The API is amazing with endless use cases. I hope you learned a thing or two by reading this post. The complete source code for this app is available at this Github repo. Some of the resources used in this post:
- react-native-elements UI component library
- expo-image-picker
- firebase-storage-upload-example with expo
