Ionic makes it easy to create multiple pages navigation using NavController as the genesis of navigation stack. In this little application, I will try to make the concept clear to you.
Generate Application and Pages
To start with, let’s create a new Ionic app for this showcase. Follow along with me. To get started, we have to scaffold a new project, my favorite one-to-go Ionic CLI command:
ionic start -a 'Multi Page Navigation'
-i app.multipage.nav ionic-multi-page-nav blank
cd in to the new project created by the above Ionic CLI command and run ionic serve to see the blank template with just a homepage available. We will create two new pages in this application to showcase our motive.
To read about the basic Navigation in an Ionic app, see this.
Now, with the help of Ionic CLI, let’s generate two new pages before diving into our code base.
$ ionic g page page1
$ ionic g page page2
I am naming the two new pages generic but you can name them anything you want. Just follow the convention when importing the modules. Inside the app/pages you can see, there are two new folders with the names we generated. Each have its own .ts, .html and .scss file, thus, completing a web component on which every Ionic and Angular apps are based on.
To proceed, we need to add both the pages in our app.module.ts:
import { BrowserModule } from '@angular/platform-browser';
import { ErrorHandler, NgModule } from '@angular/core';
import { IonicApp, IonicErrorHandler, IonicModule } from 'ionic-angular';
import { SplashScreen } from '@ionic-native/splash-screen';
import { StatusBar } from '@ionic-native/status-bar';

import { MyApp } from './app.component';
import { HomePage } from '../pages/home/home';

// new pages to be added in declarations and entryComponents
import { Page1Page } from '../pages/page1/page1';
import { Page2Page } from '../pages/page2/page2';

@NgModule({
  declarations: [MyApp, HomePage, Page1Page, Page2Page],
  imports: [BrowserModule, IonicModule.forRoot(MyApp)],
  bootstrap: [IonicApp],
  entryComponents: [MyApp, HomePage, Page1Page, Page2Page],
  providers: [
    StatusBar,
    SplashScreen,
    { provide: ErrorHandler, useClass: IonicErrorHandler }
  ]
})
export class AppModule {}
Setup Home Page for Basic Navigation
As the app.module.ts is updated with our changes, the scope of the whole application can now access these two new pages. To implement the navigation between them, we have to first update our home.html with buttons that will navigate to a specific page and business logic behind those events in home.ts.
<ion-header>
  <ion-navbar>
    <ion-title>Ionic Multi Page App</ion-title>
  </ion-navbar>
</ion-header>

<ion-content padding>
  <ion-card>
    <ion-card-header> Home Page </ion-card-header>
    <ion-card-content>
      <button ion-button (click)="goTo('page1')">Page1</button>
      <button ion-button color="secondary" (click)="goTo('page2')">
        Page2
      </button>
      <button ion-button color="light" (click)="back()">Back</button>
    </ion-card-content>
  </ion-card>
</ion-content>
Let’s update home.ts as well.
import { Component } from '@angular/core';
import { NavController } from 'ionic-angular';

import { Page1Page } from '../page1/page1';
import { Page2Page } from '../page2/page2';

@Component({
  selector: 'page-home',
  templateUrl: 'home.html'
})
export class HomePage {
  constructor(public navCtrl: NavController) {}

  goTo(page) {
    if (page === 'page1') {
      this.navCtrl.push(Page1Page);
    } else if (page === 'page2') {
      this.navCtrl.push(Page2Page);
    }
  }

  back() {
    if (this.navCtrl.length() >= 2) {
      this.navCtrl.pop();
    }
  }
}
The goTo() function will help us in navigating to the desired page and back button will bring us to the previous page in the navigation stack. This is important! I mentioned to the previous page, not the home page. If you are familiar with Ionic 1, this would how state will work.
Updating Page1 and Page2
To continue to develop our demo application, we need to update our Page1 and Page2 components.
<!--Page1-->
<ion-header>
  <ion-navbar>
    <ion-title>Ionic Multi Page App</ion-title>
  </ion-navbar>
</ion-header>

<ion-content padding>
  <ion-card>
    <ion-card-header> Page 1 </ion-card-header>
    <ion-card-content>
      <button ion-button color="secondary" (click)="goTo('page2')">
        Page2
      </button>
      <button ion-button color="light" (click)="back()">Back</button>
    </ion-card-content>
  </ion-card>
</ion-content>
import { Component } from '@angular/core';
import { IonicPage, NavController, NavParams } from 'ionic-angular';
import { Page2Page } from '../page2/page2';
@IonicPage()
@Component({
selector: 'page-page1',
templateUrl: 'page1.html'
})
export class Page1Page {
constructor(
public navCtrl: NavController,
public navParams: NavParams
) {}
goTo(page) {
if (page === 'page2') {
this.navCtrl.push(Page2Page);
}
}
back() {
if (this.navCtrl.length() >= 2) {
this.navCtrl.pop();
}
}
ionViewDidLoad() {
console.log('ionViewDidLoad Page1Page');
}
}Similar for the Page2:
<ion-header>
  <ion-navbar>
    <ion-title>Ionic Multi Page App</ion-title>
  </ion-navbar>
</ion-header>

<ion-content padding>
  <ion-card>
    <ion-card-header> Page 2 </ion-card-header>
    <ion-card-content>
      <button ion-button (click)="goTo('page1')">Page1</button>
      <button ion-button color="light" (click)="back()">Back</button>
    </ion-card-content>
  </ion-card>
</ion-content>
import { Component } from '@angular/core';
import { IonicPage, NavController, NavParams } from 'ionic-angular';
import { Page1Page } from '../page1/page1';
@IonicPage()
@Component({
selector: 'page-page2',
templateUrl: 'page2.html'
})
export class Page2Page {
constructor(
public navCtrl: NavController,
public navParams: NavParams
) {}
goTo(page) {
if (page === 'page1') {
this.navCtrl.push(Page1Page);
}
}
back() {
if (this.navCtrl.length() >= 2) {
this.navCtrl.pop();
}
}
ionViewDidLoad() {
console.log('ionViewDidLoad Page2Page');
}
}Running the App
If we save all the files and again from the terminal run:
$ ionic serve

# OR

$ ionic serve --lab
The output shown can be best described in these screenshots:
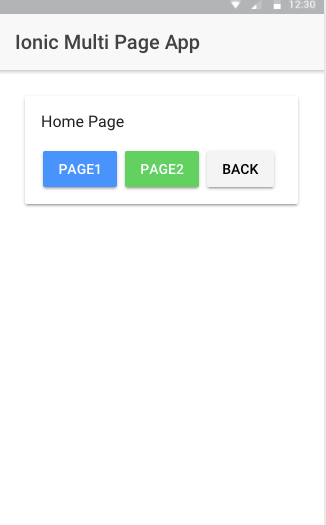
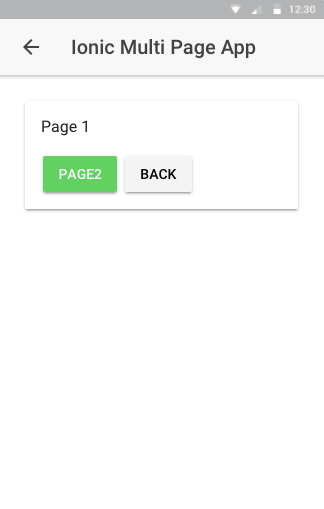
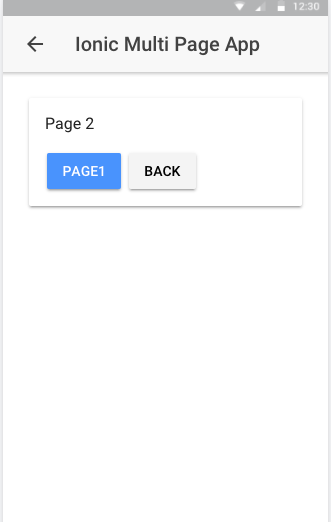
This is just a glimpse of how multi page navigation in Ionic might work that might help you to get started with development.
To get the full code, you can visit this Github Repository