React Native is a great platform to build cross-platform mobile applications for iOs and Android. While there are few other framework options available in the mobile app development space to build cross-platform applications, coming from JavaScript or web development background makes learning and using React Native as a framework easier.
In this tutorial, I am going to walk you through the process of building a React Native application from scratch. Along with that, we are going to cover many topics such as installing and using a third party library for fetching real-time data, using a Flatlist component (something you are going to use a lot in React Native), using a third party UI library for React Native and implement a feature like pull down to refresh content.
The content in this article is as followed:
- Getting Started with Requirements
- Getting NEWS API Key
- Fetching data from News API
- The Article Component
- Learn about react-native-elements in detail
- Writing the News Component
- FlatList Component in Detail
- Conclusion
Getting Started with Requirements
To continue reading this tutorial, you need a basic understanding of JavaScript as a programming language. If you have some experience working your way with Reactjs, you will have no problem following this tutorial. If you are a newbie to JavaScript or React ecosystem, I want to halt right here and go through this awesome resource that can help you with understanding the basic concepts in this tutorial. (Don’t spend too much time if you’re not interested in building web applications using Reactjs; just go through the main concepts.)
Please note that React Native is not a hybrid mobile app framework like others available. It uses a bridge between Javascript and native APIs of a specific platform. Do take a look at React Native Official Docs to read more about this.
Other requirements required in order to follow this tutorial:
- Nodejs above
8.x.xinstalled on your local machine - Know, how to run simple
npmcommands - JavaScript/ES6 basics
watchmanthe file watcher installedreact-native-cliinstalled through npm
For a complete walkthrough on how you can set up a development environment for React Native, you can go through official documentation here.
Once you installed react-native-cli you can begin by generating a React Native project. Run the below command to initialize a new React Native project. Also, note that you can name your React Native app anything. For demonstration purposes, I am going to call it newsApiDemo.
react-native init newsApiDemoOnce the project directory is generated, you can traverse inside it. Then, in two separate terminal windows or tabs, run two different commands to start your project.
cd newsApiDemo

# first terminal window
npm start

#second terminal window
react-native run-ios
Note that I am going to use iOS simulator for demonstrating this tutorial. You are on a Windows or a Linux machine, go ahead and replace run-ios in react native command with run-android. Android developers, also make sure that the Android Virtual Device has bootstrapped before running the previous command.
That’s all. Let us get going with the development process.
Getting News API Key
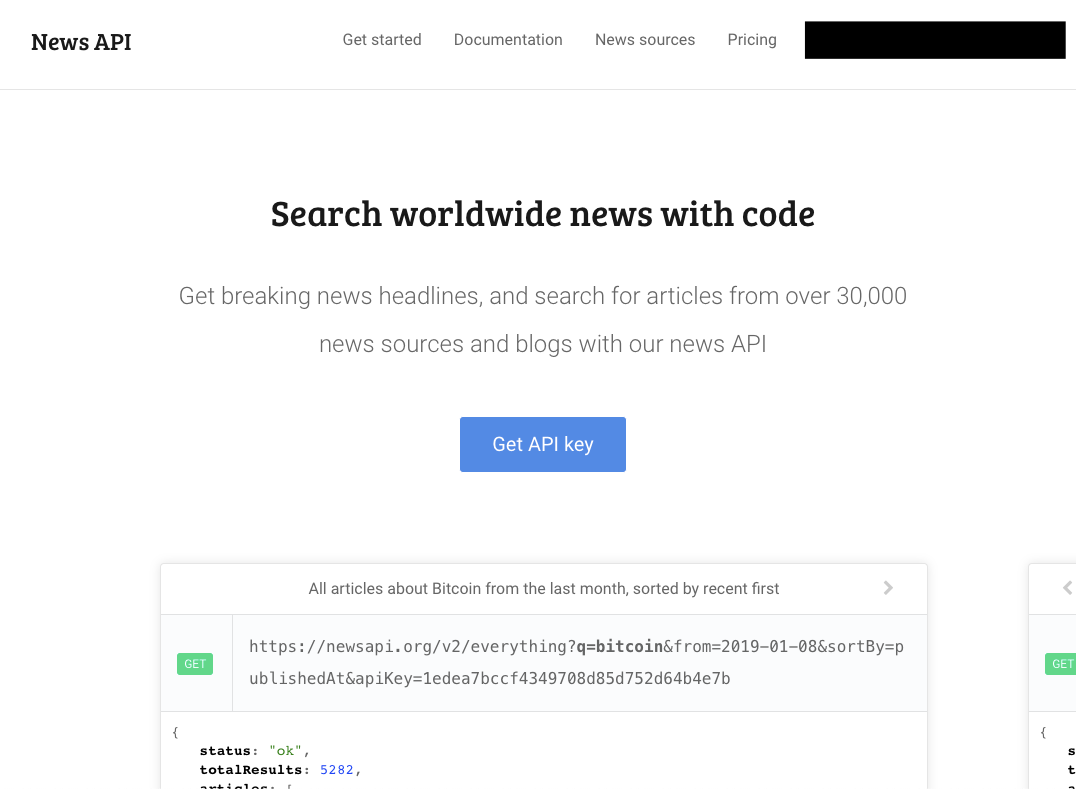
NewsAPI.org is simple and easy to use data API that returns JSON metadata for headlines and articles from the internet. It uses over 30,000 sources to fetch data from the web.
You are going to use NewsApi for this tutorial. So it is better to get the API key in the start before you start developing your application. To get the API key, proceed to newsapi.org and sign in with your email id. After logging in, you will receive an API key when you click the button Get API key.
To save this API key, create a new folder called src and inside create another new directory called config. Inside config create a new file called env.js and save the API key as below.
export const API_KEY = 'XXXXXXXXX';This API_KEY is going to help us authenticate as a user of NewsAPI and use the free plan.
Fetching data from News API
To fetch data from the news API using our recently you are going to use JavaScript’s fetch API. Let us write a function that will handle this process. Create a new file inside src/utils/fetchNews.js and then add the following snippet.
import { API_KEY } from '../config/env';

const url = `https://newsapi.org/v2/top-headlines?
country=us&apiKey=${API_KEY}`;

export async function getUSANews() {
  let result = await fetch(url).then((response = response.json()));

  return result.articles;
}
In the above file, we start by importing the API_KEY. Then we take the URL as a constant with the same name. It contains all the data we need. To verify that the URL is correct, visit the URL itself and replace of ${API_KEY} with your own API key. You will get similar results in form of articles.
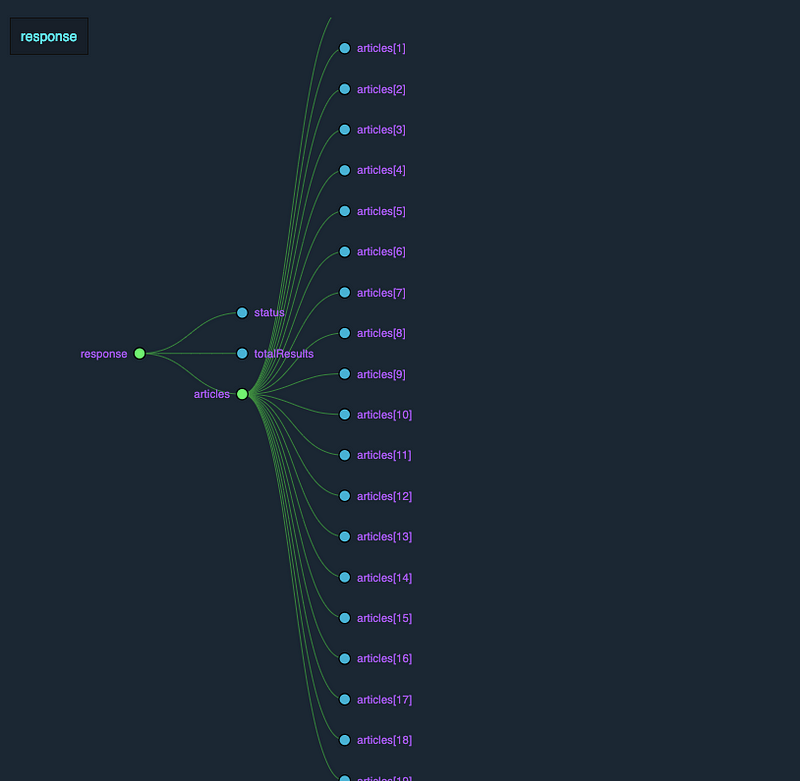
This is a data representation of what we are getting from hitting the API URL.
The function getUSANews() is returning only the array articles from above. We will consume this array by traversing it and displaying each article along with the headline, its image URL.
To get more information on the different data sources you can visit newsapi documentation.
Adding a Third Party UI Kit
Before we begin developing our UI components and display news articles, we are going to install a third party UI library that will provide us a lot of styling and pre-defined components, that with very little tweaks, we can make use of these components. You can think of this as a CSS framework (such as Bootstrap or Semantics or any other) in terms of Front-End Web Development.
Move ahead, stop the npm run command if it is still running the and in the same run the following set of commands to install [react-native-elements](https://react-native-training.github.io/react-native-elements/docs/getting_started.html) and react-native-vector-icons.
npm i -S react-native-elements

# then
npm i --save react-native-vector-icons

# then, last command: link it
react-native link react-native-vector-icons
To verify that dependencies have installed and their installed version of each dependency, you can always visit package.json file.
"dependencies": {
    "react": "16.6.3",
    "react-native": "0.58.4",
    "react-native-elements": "^1.0.0",
    "react-native-vector-icons": "^6.2.0"
	},
What about the **react-native link** command? Why did we have to run it and what does it do? Read the next short section if you do not know what is linking of libraries in React Native means. You can skip it if you already know about it and move onto the next section.
Side-note: You are also going to momentJS library to display each article’s published date and time. To install just run npm i -S moment, no linking required for this.
Link Libraries React Native
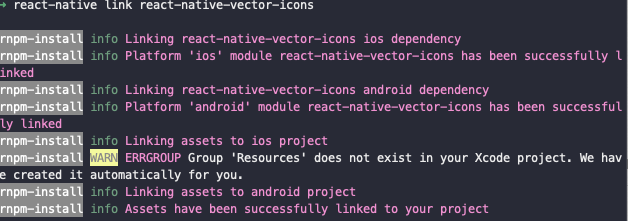
All third-party libraries in React Native have some native dependencies that use specific platform capabilities of iOS and Android. Linking these native dependencies with react-native link command indicates that a libraries’ native dependencies are linked successfully to your iOS/Android project.
Whenever you link a library, you will always get a prompt message informing you whether the library has been successfully linked or not like below.
The Article Component
To display the data we need a React Native component. Create a new file inside src/components/Article.js. You start by requiring dependencies in order to build this component. Then, also save one article data object from the news API URL we visited earlier. For now, we are going to show hard-coded data. Also, the Article component is going to represent one single article, so it will satisfy our need for now. Here is the code for the complete component as of now.
import React, { Component } from 'react';
import { View, TouchableHighlight } from 'react-native';
import { Text, Card, Divider } from 'react-native-elements';
import moment from 'moment';

const defaultJSONData = {
  source: {
    id: 'fox-news',
    name: 'Fox News'
  },
  author: null,
  title:
    "Jeff Bezos' investigator believes 'government
    entity' may have obtained texts: WashPo
    reporter - Fox News",
  description:
    'A security consultant for Amazon founder and
    Washington Post owner Jeff Bezos believes the
    CEO’s lurid intimate photos may have been
    acquired by a "government entity," a reporter
    at the paper said Thursday.',
  url:
    'https://www.foxnews.com/tech/
    jeff-bezos-investigator-believes-government-enti
    ty-obtained-texts-wapo-reporter',
  urlToImage:
    'https://media2.foxnews.com/BrightCove/
    694940094001/2019/02/08/
    694940094001_5999770984001_5999767526001-vs.jpg',
  publishedAt: '2019-02-08T07:52:57Z',
  content:
    'A security consultant for Amazon founder and
    Washington Post owner Jeff Bezos believes the
    CEO’s lurid intimate photos may have been
    acquired by a "government entity," a reporter
    at the paper said Thursday. Manuel
    Roig-Franzia, the reporter, told MSNBC that w… [+1410 chars]'
};

class Article extends Component {
  render() {
    const time = moment(defaultJSONData.publishedAt || moment.now()).fromNow();

    return (
      <TouchableHighlight>
        <Card
          featuredTitle={defaultJSONData.title}
          featuredTitleStyle={{
            marginHorizontal: 5,
            textShadowColor: '#00000f',
            textShadowOffset: { width: 3, height: 3 },
            textShadowRadius: 3
          }}
          image={{
            uri:
              'https://media2.foxnews.com/
              BrightCove/694940094001/2019/02/08/
              694940094001_5999770984001_59997675260
              01-vs.jpg'
          }}
        >
          <Text style={{ marginBottom: 10 }}>
            {defaultJSONData.description || 'Read more...'}
          </Text>
          <Divider style={{ backgroundColor: '#dfe6e9' }} />
          <View
            style={{ flexDirection: 'row', justifyContent: 'space-between' }}
          >
            <Text
              style={{
                margin: 5,
                fontStyle: 'italic',
                color: '#b2bec3',
                fontSize: 10
              }}
            >
              {defaultJSONData.source.name.toUpperCase()}
            </Text>
            <Text
              style={{
                margin: 5,
                fontStyle: 'italic',
                color: '#b2bec3',
                fontSize: 10
              }}
            >
              {time}
            </Text>
          </View>
        </Card>
      </TouchableHighlight>
    );
  }
}

export default Article;
The defaultJSONData is going to be the source of the data until we successfully display one article in the form of a card element on the device’s screen. Later on, we are going to fetch all the articles inside another component that will be using the Article component to display each article. The data to the Article component then, will be provided through props.
Inside the render method, we are using a combination of elements from both react-native and third party UI kit library, react-native-elements.
The TouchableHighlight component from react native is going to be useful to us. It is a wrapper that makes a normal view in React Native respond to touches properly on a mobile device.
These are the three UI elements from react-native-elements. A Card is helping us to display news article information. It contains content in the form of
- a news article’s headline:
defaultJSONData.title - the description:
defaultJSONData.description - the name source or the news provider:
defaultJSONData.source.name - the time article was published from the current time:
defaultJSONData.publishedAt - and the image of the article from the source:
defaultJSONData.urlToImage
The Card has some special props. Like when you want to use to display the content on the image (like we are doing), you can use a combination of props such as featuredTitle and image. The featuredTitleStyle is just used to provide some extra weight to the text on the image.
I am sure, you are not getting much of this. So let us first find a way to display this card and then talk about it in detail. Open up App.js and add the following.
import React, { Component } from 'react';
import { View, StyleSheet } from 'react-native';

import Article from './src/components/Article';

export default class App extends Component {
  render() {
    return (
      <View style={styles.container}>
        <Article />
      </View>
    );
  }
}

const styles = StyleSheet.create({
  container: {
    flex: 1,
    justifyContent: 'center',
    alignItems: 'center',
    backgroundColor: '#fff'
  }
});
We are importing the Article class component from its file inside /components/. If you refresh the iOS/android simulator, you will get the following result.
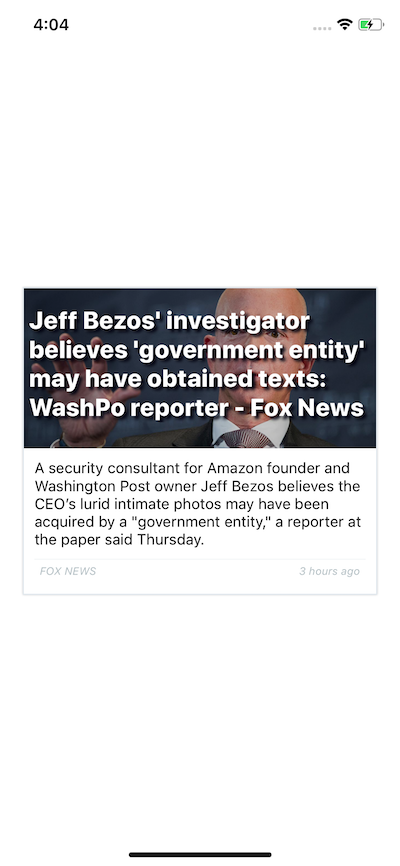
Now, you get it. Take a look at the whole Card. It adds the outer most border on its own. Inside the card, notice how the featuredTitle is working its charm over the image prop. If you had used the simple title, you won’t be getting similar result like above.
Also notice closely, the Divider between the description of the news article, and the source and the published time of the article. Below the Divider , we have a View that contains the source name and the time the article was published. We are using the divider element from react-native-elements and providing our own background color as the style. The news source provider has its own name converted to uppercase letters using JavaScript utility function toUpperCase().
<Text style={{ marginBottom: 10 }}>
  {defaultJSONData.description || 'Read more...'}
</Text>
In the description part, as in the above snippet, you will notice a default text Read more.... This is a placeholder text that will appear only in the scenario when the source in the API fails to provide a description for a news article.
News Component
In this section, we are going to learn how to use display multiple articles from the API as a list. Do note that, this list is going to be a scrollable list. Create a new file inside components/News.js with the following code.
import React, { Component } from 'react';
import { FlatList } from 'react-native';

import { getUSANews } from '../utils/fetchNews';
import Article from './Article';

class News extends Component {
  state = {
    articles: [],
    refreshing: true
  };

  componentDidMount = () => {
    this.fetchNews();
  };

  fetchNews = () => {
    getUSANews()
      .then(articles => {
        this.setState({ articles, refreshing: false });
      })
      .catch(() => this.setState({ refreshing: false }));
  };

  handleRefresh = () => {
    this.setState({ refreshing: true }, () => this.fetchNews());
  };

  render() {
    return (
      <FlatList
        data={this.state.articles}
        renderItem={({ item }) => <Article article={item} />}
        keyExtractor={item => item.url}
        refreshing={this.state.refreshing}
        onRefresh={this.handleRefresh}
      />
    );
  }
}

export default News;
We start by importing the usual React boilerplate code. From React Native, we are only going to use FlatList to render a list of news articles. We define an initial state object which has an array articles that will store all the articles after they are fetched from the API. The second property of the state is refreshing. This will be used with FlatList as props and accepts boolean value. This value when true triggers a refresh (spinner) animation. This animation is also visible at the starting of the application since the default value for refreshing is true.
You will notice the use of a lifecycle method called componentDidMount(). This gets invoked immediately after the News component is mounted. It further triggers the calling of another function called fetchNews.
The fetchNews calls the API function from the utils directory we created earlier in this tutorial. It returns a promise which further takes articles as an argument. If the data is fetched, we update the state object accordingly.
The last method is handleRefresh. It starts the spinner animation and invokes the fetchNews() method immediately after we update the component’s state.
FlatList
To render a list of items in React Native such that the user can scroll through them on their devices can be done through either using a FlatList, ScrollView or SectionList component. In this tutorial, we made use of FlatList component.
<FlatList
  data={this.state.articles}
  renderItem={({ item }) => <Article article={item} />}
  keyExtractor={item => item.url}
  refreshing={this.state.refreshing}
  onRefresh={this.handleRefresh}
/>
A FlatList component takes two primary props whenever you want to make scrollable list our of data available to you. They are data and renderItem. data is the array that is used to create a list of item and renderItem is the function that takes an individual element of data from the array and renders it.
In the code above, notice how we implement FlatList in the News.js.
The data is coming from the initial state object and an object of each item is getting passed through renderItem which is further send as props to Article component. Apart from data and renderItem, we are using three other props.
keyExtractor is another important and required prop when using FlatList. It should always contain the value that is unique to each object in the data array. For example, from the news API source, we are using the URL of each news article since it is always going to be unique as each article is going to have a unique URL on the Web.
The onRefresh prop provides the functionality of “Pull to Refresh”. It also requires the prop refreshing as we did in the News.js and always accepts a boolean value.
Rendering Articles List
To display its content on the screen, you have to modify App.js accordingly.
import React, { Component } from 'react';

import News from './src/components/News';

export default class App extends Component {
  render() {
    return <News />;
  }
}
In the App.js file, all we have to do is import News component to render its content. Check out the image below of how the data renders on the screen.

If you pull the list down, the spinner animation will appear and if there is new data, it will update the list on the mobile screen.
Conclusion
I hope you enjoyed reading this tutorial and hopefully, you learned something new out of it such as using third party API, using a UI toolkit and core React Native concepts such as react-native link, rendering a list using FlatList and implementing Pull To Refresh functionality with it.
If you have any questions, you can reach out to me on Twitter and you can find the complete code for this tutorial in the Github Repository 👇.
