
In this article, I will describe how to take an existing Web Application that is build using MongoDB, ExpressJS, Node.js, and React (often called as MERN stack) on a deployment service like Heroku. If you have an existing application built using the same tech stack, you can definitely skip the process in which I show you to quickly build a web application and go straight on to the deployment part. For the rest of you, please continue to read.
MERN Stack
MongoDB, ExpressJS, Node.js, and Reactjs are used together to build web applications. In this, Node.js and Express bind together to serve the backend, MongoDB provides a NoSQL database to store the data and the frontend is built using React that a user interacts with. All four of these technologies are open-source, cross-platform and JavaScript-based. Since they are JavaScript-based, one of the main reasons why they are often used together.
As JavaScript is used throughout to build a Fullstack application, developers do not need to learn and change the context of using different programming languages to build or work on different aspects of a web application.
To continue to follow this tutorial there are requirements that you will need to build the demo application and then deploy it on Heroku.
- Node.js/npm installed
- Heroku account
For MongoDB, we are going to use a cloud-based service like mLab which provides a database as a service. It has a free tier, and having an account there will be time-saving.
Building a Full-stack app using MERN
Building the Backend
I am going to take you through building a web application using MERN Stack. To start, please create an empty directory and type the following commands in the order they are specified.
# to generate package.json
npm init -y

# install following dependencies
npm install -S express mongoose

npm install -D nodemon
Create a server.js file inside the root of the directory. This file will server us the backend file for us.
// server.js
const express = require('express');
const app = express();

const PORT = process.env.PORT || 5000;

// configure body parser for AJAX requests
app.use(express.urlencoded({ extended: true }));
app.use(express.json());

// routes
app.get('/', (req, res) => {
  res.send('Hello from MERN');
});

// Bootstrap server
app.listen(PORT, () => {
  console.log(`Server listening on port ${PORT}.`);
});
Now, I made following changes in package.json for this program to work.
"main": "server.js",
"scripts": {
"server": "nodemon server.js",
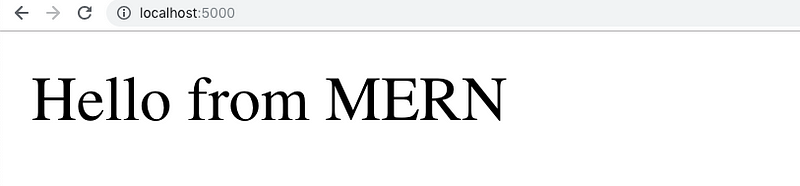
}To see if everything is working, run the command npm start server that we just defined in package.json as a script. If there are no errors, you will get the following result. Visit the following url: [http://localhost:5000](http://localhost:5000.).
Please note that onwards Express version 4.16.0 body parser middleware function is a built-in middleware and there is no need to import it as a separate dependency. Body parser middleware is required to handle incoming AJAX requests that come in the form of JSON payloads or urlencoded payloads.
Models with Mongoose
When I am not writing JavaScript, I am a bibliophile. Thus, for this demonstration, I am going to build a web application that tends to take care of all the books that I want to read. If you are into books, you can think of it is as your own personal TBR manager.
I will start by creating a database model called Book inside the file models/Books.js. This will resemble a schema of what to expect from the user when adding information to our application.
// Books.js
const mongoose = require('mongoose');
const Schema = mongoose.Schema;

const bookSchema = new Schema({
  title: {
    type: String,
    required: true
  },
  author: {
    type: String,
    required: true
  }
});

const Book = mongoose.model('Book', bookSchema);

module.exports = Book;
I am using mongoose to define the schema above. Mongoose is an ODM (Object Document Mapper). It allows you to define objects with a strongly typed schema that is mapped as a MongoDB collection. This schema architecture allows us to provide an organized shape to the document inside the MongoDB collection.
In our bookSchema we are defining two fields: a title which indicates the title of the book and an author representing the name of the author of the book. Both these fields are string type.
Defining Routes
Our application is going to need some routes that will help the client app to communicate with the server application and perform CRUD (Create, Read, Update, Delete) operations. I am defining all the business logic that works behind every route in a different file. Conventionally, named as controllers. Create a new file controllers/booksController.js.
// booksControllers.js
const Book = require('../models/Books');

// Defining all methods and business logic for routes

module.exports = {
  findAll: function (req, res) {
    Book.find(req.query)
      .then(books => res.json(books))
      .catch(err => res.status(422).json(err));
  },
  findById: function (req, res) {
    Book.findById(req.params.id)
      .then(book => res.json(book))
      .catch(err => res.status(422).json(err));
  },
  create: function (req, res) {
    Book.create(req.body)
      .then(newBook => res.json(newBook))
      .catch(err => res.status(422).json(err));
  },
  update: function (req, res) {
    Book.findOneAndUpdate({ _id: req.params.id }, req.body)
      .then(book => res.json(book))
      .catch(err => res.status(422).json(err));
  },
  remove: function (req, res) {
    Book.findById({ _id: req.params.id })
      .then(book => book.remove())
      .then(allbooks => res.json(allbooks))
      .catch(err => res.status(422).json(err));
  }
};
The business logic or you can say the controller logic behind the application is nothing but the methods that will work on a specific route. There are five functions in total. Each has its own use. I am requiring our Book model, previously created, as it provides functions for us to query CRUD operations to the database. A mongoose query can be executed in two ways, by providing a callback function or by using .then() function which also indicates that mongoose support promises. I am using the promising approach above to avoid the nuisance caused by nested callbacks (and commonly known as callback hell).
Next step is to use these methods in our routes inside routes/ directory. Create a new file called books.js.
// books.js

const router = require('express').Router();
const booksController = require('../controllers/booksController');

router.route('/').get(booksController.findAll).post(booksController.create);

router
  .route('/:id')
  .get(booksController.findById)
  .put(booksController.update)
  .delete(booksController.remove);

module.exports = router;
I have separated the concerned routes that match a specific URL. For example, routes that are starting with :id routing parameter are defined above together in the file. Open index.js in the same directory and add the following.
// index.js

const router = require('express').Router();
const bookRoutes = require('./books');

router.use('/api/books', bookRoutes);

module.exports = router;
I am adding a prefix /api/books before the routes. This way, you can only access them as http://localhost:5000/api/books.
For this to work, I am going to import book routes in the server.js file after every other middleware defined and before we have bootstrapped the server.
// server.js

const routes = require('./routes');

// after all middleware functions

app.use(routes);
Also remove the default route app.get('/')... that was previously created. We are soon going to serve the application’s front end here on the default route.
Connecting with Database using mLab
I am going to use mlab to host the database of our application on the cloud. Once you create an account, your dashboard will look similar to mine. I already have few sandboxes running, so do not mind them.
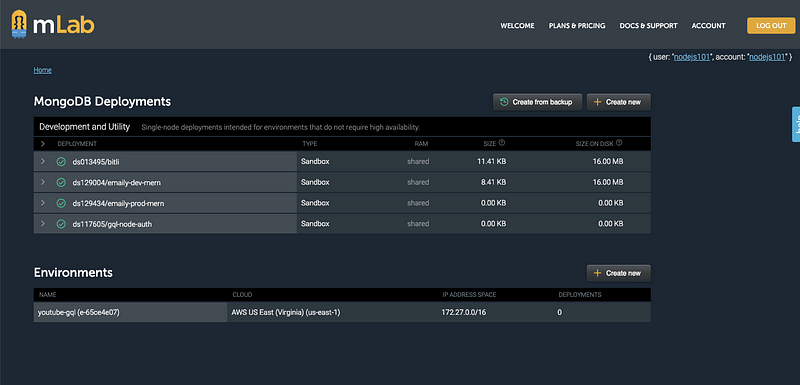
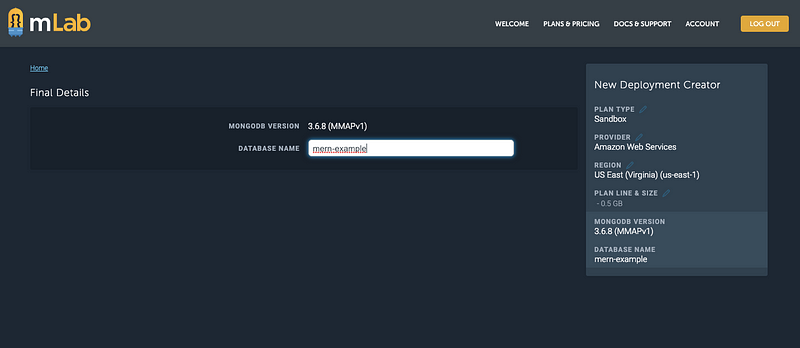
To create a new one, click on the button Create New under MongoDB deployments. After that, you select the plan type Sandbox which provides the free tier up to 500MB.
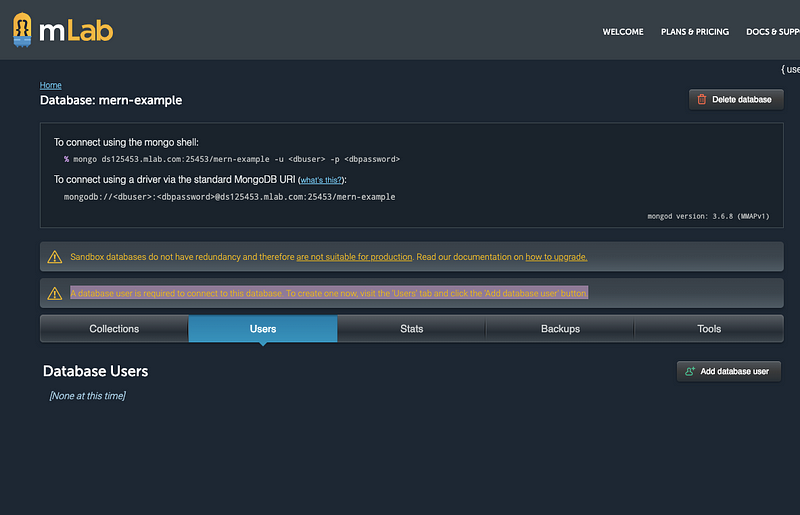
After the MongoDB deployment is created, a database user is required by the mlab to have you connect to this database. To create one now, visit the ‘Users’ tab and click the ‘Add database user’ button.
Now copy the string provided by mlab such as:
mongodb://<dbuser>:<dbpassword>@ds125453.mlab.com:25453/mern-example
and add the dbuser and dbpassword you just entered to create the new user. I am going to save these credentials as well as the string given by mlab to connect to the database inside a file called config/index.js.
// config/index.js
const dbuser = 'xxxxxxxxxx';
const dbpassword = 'xxxxxxxxx';

const MONGODB_URI = `mongodb://${dbuser}:${dbpassword}
@ds125453.mlab.com:25453/mern-example`;

module.exports = MONGODB_URI;
You can replace the x’s for dbuser and dbpassword. Now to define the connection with mlab string we are again going to use mongoose. Create a new file inside models/index.js.
// models/index.js

const mongoose = require('mongoose');
const URI = require('../config/index');

mongoose.connect(process.env.MONGODB_URI || URI);

// When successfully connected
mongoose.connection.on('connected', () => {
  console.log('Established Mongoose Default Connection');
});

// When connection throws an error
mongoose.connection.on('error', err => {
  console.log('Mongoose Default Connection Error : ' + err);
});
We are importing the same database URI string that we just exported in config. I am going to require this file inside our server.js before any middleware is defined.
// server.js
const express = require('express');
const app = express();

const routes = require('./routes');

const PORT = process.env.PORT || 5000;

// require db connection
require('./models');

// configure body parser for AJAX requests
app.use(express.urlencoded({ extended: true }));
app.use(express.json());

app.use(routes);

// Bootstrap server
app.listen(PORT, () => {
  console.log(`Server listening on port ${PORT}.`);
});
Now run the server again and if you get the following message, that means your database is gracefully connected to the web server.

Building the FrontEnd with React
To build the user interface of our application, I am going to create-react-app. Run the following command to generate a react application inside a directory called client.
create-react-app client/Once the scaffolding process is complete, run npm run start after traversing inside the client directory from your terminal, and see if everything works or not. If you get a screen like below that means everything is top-notch.
Install two dependencies from npm that we need to in order for the client to work.
yarn add axios react-router-dom@4.1.2You are going to need axios to make AJAX requests to the server. react-router-dom is for switching between navigation routes.
I am not going to walk you through every component and reusable component I have built in this application. I am only going to take you through what needs to be done connect the React app to Node.js server, the build process and then deploying it.
The main frontend file, App.js looks like this:
import React from 'react';
import { BrowserRouter as Router, Route, Switch } from 'react-router-dom';
import Books from './pages/Books';
import Detail from './pages/Detail';
import NoMatch from './pages/NoMatch';
import Nav from './components/Nav';

const App = () => (
  <Router>
    <div>
      <Nav />
      <Switch>
        <Route exact path="/" component={Books} />
        <Route exact path="/books" component={Books} />
        <Route exact path="/books/:id" component={Detail} />
        <Route component={NoMatch} />
      </Switch>
    </div>
  </Router>
);

export default App;
Next, I have created an API.js inside the utils directory which we handle all the requests and fetching data, in simple terms AJAX requests between our client and the server.
import axios from 'axios';

export default {
  // Gets all books
  getBooks: function () {
    return axios.get('/api/books');
  },
  // Gets the book with the given id
  getBook: function (id) {
    return axios.get('/api/books/' + id);
  },
  // Deletes the book with the given id
  deleteBook: function (id) {
    return axios.delete('/api/books/' + id);
  },
  // Saves a book to the database
  saveBook: function (bookData) {
    return axios.post('/api/books', bookData);
  }
};
We also have pages and a separate components directory. The pages contain those files that are going to display the content when we add a book and its author in our list using a form to submit the data to the backend. The form itself uses different reusable components which are built separately. The sole purpose of doing this is to follow best practices that are convenient to understand the source code and a common practice in the React community.
There are two pages Books and Details. Let us go through them.
// Books.js

import React, { Component } from 'react';
import DeleteBtn from '../../components/DeleteBtn';
import Jumbotron from '../../components/Jumbotron';
import API from '../../utils/API';
import { Link } from 'react-router-dom';
import { Col, Row, Container } from '../../components/Grid';
import { List, ListItem } from '../../components/List';
import { Input, FormBtn } from '../../components/Form';

class Books extends Component {
  state = {
    books: [],
    title: '',
    author: ''
  };

  componentDidMount() {
    this.loadBooks();
  }

  loadBooks = () => {
    API.getBooks()
      .then(res => this.setState({ books: res.data, title: '', author: '' }))
      .catch(err => console.log(err));
  };

  deleteBook = id => {
    API.deleteBook(id)
      .then(res => this.loadBooks())
      .catch(err => console.log(err));
  };

  handleInputChange = event => {
    const { name, value } = event.target;
    this.setState({
      [name]: value
    });
  };

  handleFormSubmit = event => {
    event.preventDefault();
    if (this.state.title && this.state.author) {
      API.saveBook({
        title: this.state.title,
        author: this.state.author
      })
        .then(res => this.loadBooks())
        .catch(err => console.log(err));
    }
  };

  render() {
    return (
      <Container fluid>
        <Row>
          <Col size="md-6">
            <Jumbotron>
              <h1>What Books Should I Read?</h1>
            </Jumbotron>
            <form>
              <Input
                value={this.state.title}
                onChange={this.handleInputChange}
                name="title"
                placeholder="Title (required)"
              />
              <Input
                value={this.state.author}
                onChange={this.handleInputChange}
                name="author"
                placeholder="Author (required)"
              />

              <FormBtn
                disabled={!(this.state.author && this.state.title)}
                onClick={this.handleFormSubmit}
              >
                Submit Book
              </FormBtn>
            </form>
          </Col>
          <Col size="md-6 sm-12">
            <Jumbotron>
              <h1>Books On My List</h1>
            </Jumbotron>
            {this.state.books.length ? (
              <List>
                {this.state.books.map(book => (
                  <ListItem key={book._id}>
                    <Link to={'/books/' + book._id}>
                      <strong>
                        {book.title} by {book.author}
                      </strong>
                    </Link>
                    <DeleteBtn onClick={() => this.deleteBook(book._id)} />
                  </ListItem>
                ))}
              </List>
            ) : (
              <h3>No Results to Display</h3>
            )}
          </Col>
        </Row>
      </Container>
    );
  }
}

export default Books;
We are defining a local state to manage data and pass it on to the API from the component. Methods like loadBooks are making AJAX requests through the API calls we defined inside utils/API.js. Next is the details page.
// Details.js
import React, { Component } from 'react';
import { Link } from 'react-router-dom';
import { Col, Row, Container } from '../../components/Grid';
import Jumbotron from '../../components/Jumbotron';
import API from '../../utils/API';

class Detail extends Component {
  state = {
    book: {}
  };

  componentDidMount() {
    API.getBook(this.props.match.params.id)
      .then(res => this.setState({ book: res.data }))
      .catch(err => console.log(err));
  }

  render() {
    return (
      <Container fluid>
        <Row>
          <Col size="md-12">
            <Jumbotron>
              <h1>
                {this.state.book.title} by {this.state.book.author}
              </h1>
            </Jumbotron>
          </Col>
        </Row>

        <Row>
          <Col size="md-2">
            <Link to="/">← Back to Authors</Link>
          </Col>
        </Row>
      </Container>
    );
  }
}

export default Detail;
It shows the books I have added in my list. To use it, first we are going to connect it with Node.js.
Connecting React and Node
There are two build steps we have to undergo through in making a connection between our client side and server side. First, open the package.json file inside the client directory and enter a proxy value that points to the same URL on which server is serving the API.
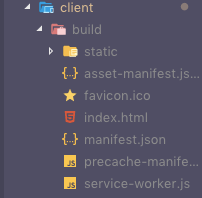
"proxy": "http://localhost:5000"Next step is to run the command yarn build inside the client directory such that it builds up the project. If you haven’t run this command before in this project, you will notice a new directory suddenly appears.
We also need to make two changes to our backend, to serve this build directory. The reason we are doing this is to deploy our full stack application later on Heroku as one. Of course, you can two deployment servers where one is serving the REST API such as our backend and the other serves the client end, the build folder we just created.
Open routes/index.js and add the following line.
// routes/index.js
const router = require('express').Router();
const bookRoutes = require('./books');
const path = require('path');

// API routes
router.use('/api/books', bookRoutes);

// If no API routes are hit, send the React app
router.use(function (req, res) {
  res.sendFile(path.join(__dirname, '../client/build/index.html'));
});

module.exports = router;
Next, open the server.js to in which we add another line using Express built-in middleware that serves static assets.
// server.js
const express = require('express');
const app = express();

const routes = require('./routes');

const PORT = process.env.PORT || 5000;

// require db connection
require('./models');

// configure body parser for AJAX requests
app.use(express.urlencoded({ extended: true }));
app.use(express.json());

// ADD THIS LINE
app.use(express.static('client/build'));

app.use(routes);

// Bootstrap server
app.listen(PORT, () => {
  console.log(`Server listening on port ${PORT}.`);
});
Now you can open your terminal and run the following command.
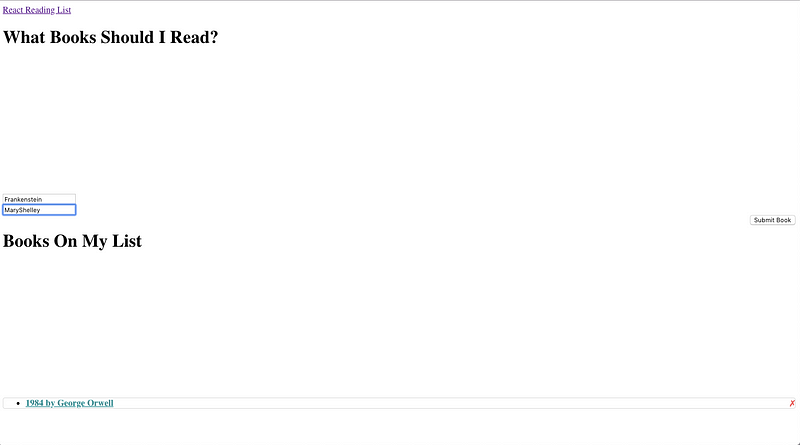
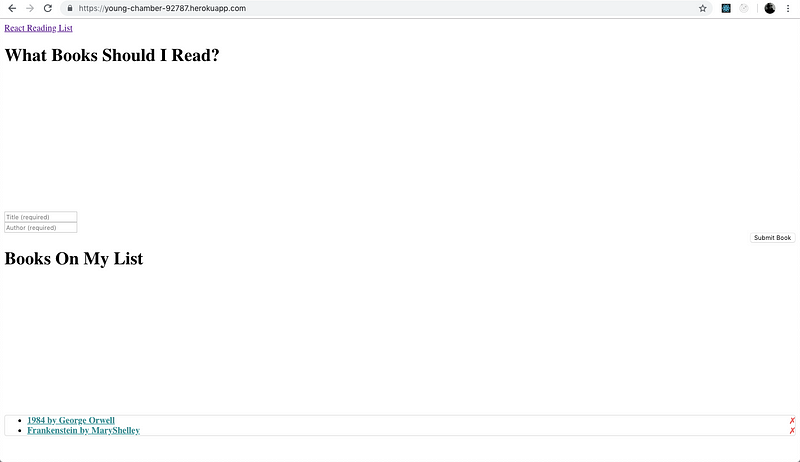
npm run startThis will trigger our server at url http://localhost:5000. Visit it using a browser and see your MERN stack app in action like below. For brevity, I haven’t much styled but go ahead and showcase your CSS skills.
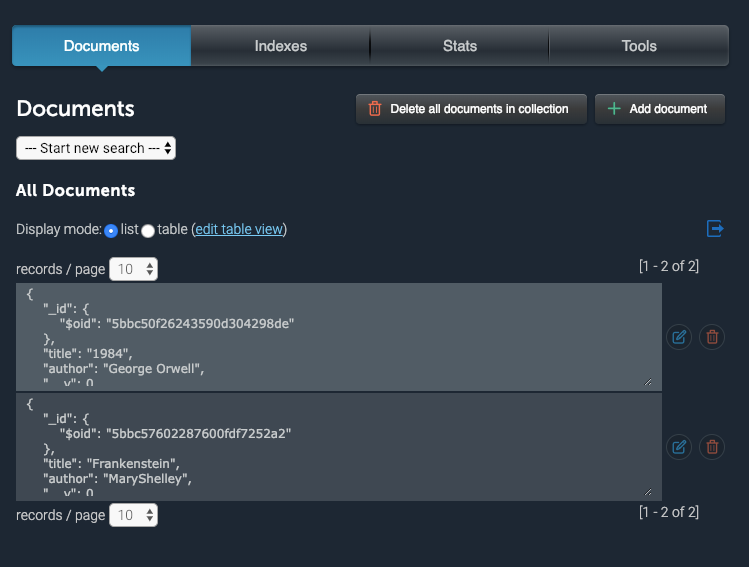
To verify that the data from our application is being added to the database, go to your mlab MongoDB deployment. You will notice a collection appearing with the name of books. Open it and you can see the data you have just submitted through the form. Here is how mine looks like.

I already have two records.
Since everything is running locally without any problem, we can move to the next part.
Deploying on Heroku
This is our final topic in this tutorial. Now, all you need is to have a free Heroku account and Heroku toolbelt to run the whole deployment process from your terminal.
The Heroku Command Line Interface (CLI) makes it easy to create and manage your Heroku apps directly from the terminal. It’s an essential part of using Heroku. ~ Official Documentation
To download the Heroku CLI interface visit this link. Depending on your operating system, you can download the packager. You can also choose a simpler method that is to install the cli interface using npm.
npm install -g heroku
After you go through the download and installation process, you can verify that everything has installed correctly.
heroku --version
# Output
heroku/7.16.0 darwin-x64 node-v8.12.0
Modify package.json by adding the following script.
"scripts": {
		"start": "node server.js",
		[...]
	}
Login to your Heroku account with credentials by running command heroku login like below.

Next, create a Procfile in the root folder with following value.
web: npm run startOnce you are logged in traverse to the project directory of your MERN stack application. Run the following command to create a Heroku instance of your app. Make sure you are in the main directory and not in the client folder.
Before we go on to prepare our project for Heroku, I am going to use git to push our current project. This is the most common and safe way to use it with Heroku cli interface. Run the following commands in the order described.
# initialize our project as git repository
git init

# prepare the stage
git add .

# Commit all changes to git
git commit -m "commit all changes"
Then run:
heroku createWhen this command runs successfully, it gives you an app id like this. Remember this app id as we are going to use it set our existing mlab MongoDB URI.

Next step is to connect the existing mlab deployment from our Heroku app.
heroku config:set MONGODB_URI=mongodb://
user:password@ds125453.mlab.com:25453/mern-example -a
damp-dusk-80048
You can also use the free tier of mlab provided by Heroku using the following command in case you haven’t deployed your database previously. This command must only be run in case you are not already using mlab for your Mongodb deployment.
heroku addons:create mongolabYou can verify that the configuration value has been set by running:
heroku config:get MONGODB_URI --app damp-dusk-80048

# Output

mongodb://user:password@ds125453.mlab.com:25453/mern-example
Note that user and password in above commands are your mlab credentials that have been discussed on how to set up them in previous sections of this article. Next step is to push the whole app to Heroku.
# Push to heroku

git push heroku master
This points to Heroku remote instead of origin. This above command sends the source code to Heroku and from then Heroku reads package.json only to install dependencies. That is the reason we defined start script rather using the than server one because Heroku or a deployment server has no use of development environment dependencies such as nodemon.
Finishing the building of your project may look similar to mine.
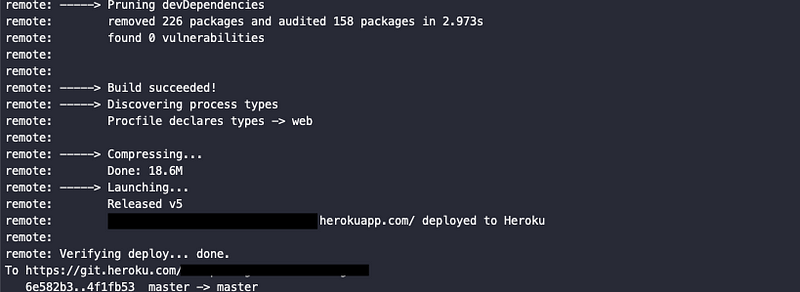
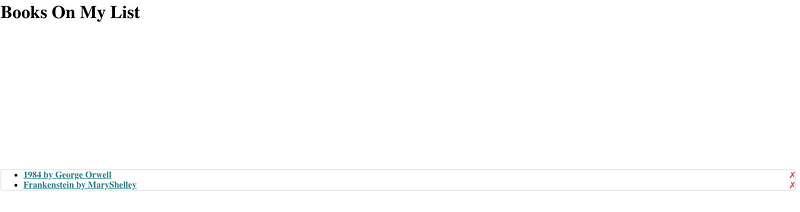
You can then visit the URL given by Heroku like below. Do notice the already existing data that we deployed using local server in the previous section.
Conclusion
There are many deployment techniques that you can try on Heroku. The technique described in this article is just one of them. I hope you have this article has helped you out.