
In part 3, we completed the task of integrating the Firestore to the current React Native app. The database now stores a chat room name. A new chat room can be created using a modal stack, only if the user is authenticated.
In part 4, let us proceed with further and a new screen that allows the user to send and receive messages as well as display those messages inside a chat room.
To fulfill this purpose, let us use an open-source library called react-native-gifted-chat. You are going to learn how to integrate it within the current React Native app and learn how to use its “out of the box” features as props to save saves a ton of development time.
To begin, make sure to install this module by executing the following command from a terminal window.
yarn add react-native-gifted-chatAdd a new screen to display messages
Start by adding a new screen file called RoomScreen.js inside src/screens/ directory. This file is going to be used to display messages inside each chat room.
Then, let us add a mock chat UI screen elements to this screen. This can be done in the following steps:
-
import
GiftedChatfromreact-native-gifted-chat. This component is going to be essential in adding UI and chat functionalities
-
Create a functional component
RoomScreen, inside it, define a state variable calledmessages. This variable is going to have an empty array as its default value. -
Add some mock message data objects. Display two types of messages in each object. The first object is going to be a system message which showcases information like “The following chat room was created at X time…”. The second object is going to hold a
textmessage that is going to have auserobject associated and contains user information, such as user name. Both of these messages are going to have a unique_id. -
Create a helper method called
handleSendthat is going to be used when sending a message in a particular chat room. -
Lastly, return the following code snippet. The
newMessageis concatenated with previous or the initial messages usingGiftedChat.append()method.
import React, { useState } from 'react';
import { GiftedChat } from 'react-native-gifted-chat';

export default function RoomScreen() {
  const [messages, setMessages] = useState([
    /**
     * Mock message data
     */
    // example of system message
    {
      _id: 0,
      text: 'New room created.',
      createdAt: new Date().getTime(),
      system: true
    },
    // example of chat message
    {
      _id: 1,
      text: 'Henlo!',
      createdAt: new Date().getTime(),
      user: {
        _id: 2,
        name: 'Test User'
      }
    }
  ]);

  // helper method that is sends a message
  function handleSend(newMessage = []) {
    setMessages(GiftedChat.append(messages, newMessage));
  }

  return (
    <GiftedChat
      messages={messages}
      onSend={newMessage => handleSend(newMessage)}
      user={{ _id: 1 }}
    />
  );
}
Change RoomScreen to stack Navigator
Each message thread is only going to be displayed when the user enters the chat room. Open src/navigation/HomeStack.js and add the RoomScreen component as the second screen to the ChatApp stack as shown below.
import React from 'react';
import { createStackNavigator } from '@react-navigation/stack';
import { IconButton } from 'react-native-paper';
import HomeScreen from '../screens/HomeScreen';
import AddRoomScreen from '../screens/AddRoomScreen';

// Add this
import RoomScreen from '../screens/RoomScreen';

const ChatAppStack = createStackNavigator();
const ModalStack = createStackNavigator();

function ChatApp() {
  return (
    <ChatAppStack.Navigator
      screenOptions={{
        headerStyle: {
          backgroundColor: '#6646ee'
        },
        headerTintColor: '#ffffff',
        headerTitleStyle: {
          fontSize: 22
        }
      }}
    >
      <ChatAppStack.Screen
        name="Home"
        component={HomeScreen}
        options={({ navigation }) => ({
          headerRight: () => (
            <IconButton
              icon="message-plus"
              size={28}
              color="#ffffff"
              onPress={() => navigation.navigate('AddRoom')}
            />
          )
        })}
      />
      {/* Add this */}
      <ChatAppStack.Screen name="Room" component={RoomScreen} />
    </ChatAppStack.Navigator>
  );
}

// rest of the code remains same
Then, open src/screebs/HomeScreen.js file, and make sure to pass the navigation reference as prop to the function component: export default function HomeScreen({ navigation }) {...}.
Each chat room is displayed as an item in the FlatList. You will have to make it pressable to allow the user to enter the chat room and display the RoomScreen component.
Each list item can be wrapped in the TouchableOpacity component such that using navigation prop reference as the value of onPress, the user is allowed to navigate to the next screen.
Here is the complete code snippet after the modifications.
import React, { useState, useEffect } from 'react';
import { View, StyleSheet, FlatList, TouchableOpacity } from 'react-native';
import { List, Divider } from 'react-native-paper';
import firestore from '@react-native-firebase/firestore';
import Loading from '../components/Loading';

export default function HomeScreen({ navigation }) {
  const [threads, setThreads] = useState([]);
  const [loading, setLoading] = useState(true);

  /**
   * Fetch threads from Firestore
   */
  useEffect(() => {
    const unsubscribe = firestore()
      .collection('THREADS')
      // .orderBy('latestMessage.createdAt', 'desc')
      .onSnapshot(querySnapshot => {
        const threads = querySnapshot.docs.map(documentSnapshot => {
          return {
            _id: documentSnapshot.id,
            // give defaults
            name: '',
            ...documentSnapshot.data()
          };
        });

        setThreads(threads);

        if (loading) {
          setLoading(false);
        }
      });

    /**
     * unsubscribe listener
     */
    return () => unsubscribe();
  }, []);

  if (loading) {
    return <Loading />;
  }

  return (
    <View style={styles.container}>
      <FlatList
        data={threads}
        keyExtractor={item => item._id}
        ItemSeparatorComponent={() => <Divider />}
        renderItem={({ item }) => (
          <TouchableOpacity
            onPress={() => navigation.navigate('Room', { thread: item })}
          >
            <List.Item
              title={item.name}
              description="Item description"
              titleNumberOfLines={1}
              titleStyle={styles.listTitle}
              descriptionStyle={styles.listDescription}
              descriptionNumberOfLines={1}
            />
          </TouchableOpacity>
        )}
      />
    </View>
  );
}

const styles = StyleSheet.create({
  container: {
    backgroundColor: '#f5f5f5',
    flex: 1
  },
  listTitle: {
    fontSize: 22
  },
  listDescription: {
    fontSize: 16
  }
});
Go to the simulator window and you are going to get the following result.

Great! The chat UI for each room is now accessible. Try to send a message, of course, it won’t get saved since there is no database connected yet.
Once the user exits the room and comes back later, only the mock message is displayed. Do notice that the system message New room created is displayed as well.
Display title of each room
When you enter the chat room, did you notice that the name of the room is not being displayed correctly? It just says Room whereas the complete name of the first room should be Room 1. Let us fix this in the current section.
Open HomeStack.js file and modify the route for the RoomScreen component by adding options to it. The value of the title for each chat room is going to be the name of that chat room.
This can be obtained using route props as shown below.
<ChatAppStack.Screen
  name="Room"
  component={RoomScreen}
  options={({ route }) => ({
    title: route.params.thread.name
  })}
/>
When using the react-navigation library for routing, each screen component is provided with the route prop automatically. This prop contains various information regarding the current route such as a place in navigation hierarchy the route component lives.
route.params allows access to a set of params defined when navigating. These sets of params have the name of the same chat room as stored in Firestore because in the previous section you did pass the object thread.
<TouchableOpacity onPress={() => navigation.navigate('Room', { thread: item })}>Here is the output you are going to get on the device.
Modifying the Chat screen UI: Changing the chat bubble
Gifted chat module gives an advantage for creating a Chat UI in a React Native app over building the UI from scratch. This advantage comes in the form of props available in this package.
Right now the chat bubble appears as shown below.
Let us change the background color of this bubble to reflect the same color as in the header bar (which is used at many instances in the app). This is going to be done in the following steps:
- Start by importing the
Bubblefrom the gifted chat module. - Create a helper method
renderBubbleinside function componentRoomScreen - Return the
<Bubble/>component from the helper function with new styles. The style properties are defined in the Gifted chat module so make sure to use the same property names. - Lastly, on the
GiftedChatcomponent, enter the proprenderBuble.
// Step 1: modify the import statement
import { GiftedChat, Bubble } from 'react-native-gifted-chat';
export default function RoomScreen() {
// ...
// Step 2: add a helper method
function renderBubble(props) {
return (
// Step 3: return the component
<Bubble
{...props}
wrapperStyle={{
right: {
// Here is the color change
backgroundColor: '#6646ee'
}
}}
textStyle={{
right: {
color: '#fff'
}
}}
/>
);
}
return (
<GiftedChat
messages={messages}
onSend={newMessage => handleSend(newMessage)}
user={{ _id: 1, name: 'User Test' }}
renderBubble={renderBubble}
/>
);
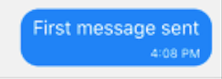
}With that done, here is the output you are going to get.
Adding other modifications to Chat UI
You can modify the placeholder text using the prop placeholder as shown below.
<GiftedChat
messages={messages}
onSend={newMessage => handleSend(newMessage)}
user={{ _id: 1, name: 'User Test' }}
renderBubble={renderBubble}
placeholder="Type your message here..."
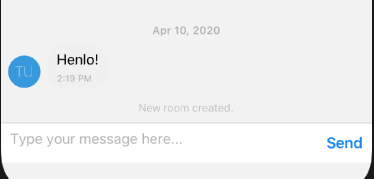
/>Previously the placeholder text says:

After adding the placeholder prop, it looks like:

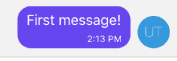
You can add the prop showUserAvatar to always display the user avatar of the current user.
<GiftedChat
  messages={messages}
  onSend={newMessage => handleSend(newMessage)}
  user={{ _id: 1, name: 'User Test' }}
  renderBubble={renderBubble}
  placeholder="Type your message here..."
  showUserAvatar
/>
Right now, the send button only appears when the user is typing a message. Add the prop alwaysShowSend to always show the send button to the current user.
<GiftedChat
  messages={messages}
  onSend={newMessage => handleSend(newMessage)}
  user={{ _id: 1, name: 'User Test' }}
  renderBubble={renderBubble}
  placeholder="Type your message here..."
  showUserAvatar
  alwaysShowSend
/>
Add a custom send button
You can also modify this send button to show a custom text or icon. Let us do that to show a custom send icon. This is going to be done in the following steps.
- Import the
Sendcomponent form Gifted chat API. - Import
IconButtonfromreact-native-paper. - INside the functional component
RoomScreen, add a helper methodrenderSendthat is going to return theIconButtoncomponent. - Add the prop
renderSendto<GiftedChat/>. - Add corresponding styles if any.
// Step 1: import Send
import { GiftedChat, Bubble, Send } from 'react-native-gifted-chat';
// Step 2: import IconButton
import { IconButton } from 'react-native-paper';
import { View, StyleSheet } from 'react-native';

export default function RoomScreen() {
  // ...

  // Step 3: add a helper method

  function renderSend(props) {
    return (
      <Send {...props}>
        <View style={styles.sendingContainer}>
          <IconButton icon="send-circle" size={32} color="#6646ee" />
        </View>
      </Send>
    );
  }

  return (
    <GiftedChat
      messages={messages}
      onSend={newMessage => handleSend(newMessage)}
      user={{ _id: 1, name: 'User Test' }}
      renderBubble={renderBubble}
      placeholder="Type your message here..."
      showUserAvatar
      alwaysShowSend
      // Step 4: add the prop
      renderSend={renderSend}
    />
  );
}

// Step 5: add corresponding styles
const styles = StyleSheet.create({
  sendingContainer: {
    justifyContent: 'center',
    alignItems: 'center'
  }
});
Here is the output you are going to get after this step.

Add a scroll to the bottom button
Right now, in the Chat UI, there is no way for the current user to scroll to the latest message. They have to manually scroll down to see the latest message in the thread. Here is a demo of the problem.
This can be solved by adding prop scrollToBottom.
<GiftedChat
  messages={messages}
  onSend={newMessage => handleSend(newMessage)}
  user={{ _id: 1, name: 'User Test' }}
  renderBubble={renderBubble}
  placeholder="Type your message here..."
  showUserAvatar
  alwaysShowSend
  renderSend={renderSend}
  scrollToBottom
/>
Take a look at the down caret sign at the right side of the app shown below.
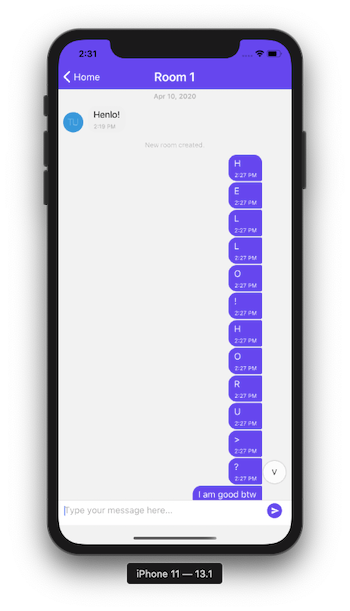
This is not pleasing at all with the current background of the screen. Let us modify this button with a custom background. This can be done in three simple steps.
- Add a helper method inside
RoomScreenfunctional component and call this helper methodscrollToBottomComponent(). UseIconButtoncomponent fromreact-native-paperto customize this button. - Add the prop
scrollToBottomComponentto<GiftedChat />. - Add corresponding styles to the
stylesobject.
export default function RoomScreen() {
  // ...

  // Step 1: add helper method

  function scrollToBottomComponent() {
    return (
      <View style={styles.bottomComponentContainer}>
        <IconButton icon="chevron-double-down" size={36} color="#6646ee" />
      </View>
    );
  }

  return (
    <GiftedChat
      messages={messages}
      onSend={newMessage => handleSend(newMessage)}
      user={{ _id: 1, name: 'User Test' }}
      renderBubble={renderBubble}
      placeholder="Type your message here..."
      showUserAvatar
      alwaysShowSend
      renderSend={renderSend}
      // Step 2: add the prop
      scrollToBottomComponent={scrollToBottomComponent}
    />
  );
}

// Step 3: add corresponding styles
const styles = StyleSheet.create({
  // rest remains same
  bottomComponentContainer: {
    justifyContent: 'center',
    alignItems: 'center'
  }
});
Here is the output.
Add a loading spinner when the room screen initializes
Initializing a new screen or in the current case, a chat room may take some time. It is good practice to add a loading indicator to convey the message to the user when they enter the chat room. This can be done by adding a prop called renderLoading which returns an ActivityIndicator from react-native core API.
- Import the
ActivityIndicatorfromreact-nativecore API. - Add helper method
renderLoading()to functional componentRoomScreen. - Add the prop
renderLoadingto<GiftedChat />. - Add corresponding styles.
// Step 1: import ActivityIndicator
import { ActivityIndicator, View, StyleSheet } from 'react-native';

export default function RoomScreen() {
  // ...

  // Step 2: add a helper method

  function renderLoading() {
    return (
      <View style={styles.loadingContainer}>
        <ActivityIndicator size="large" color="#6646ee" />
      </View>
    );
  }

  return (
    <GiftedChat
      messages={messages}
      onSend={newMessage => handleSend(newMessage)}
      user={{ _id: 1, name: 'User Test' }}
      renderBubble={renderBubble}
      placeholder="Type your message here..."
      showUserAvatar
      alwaysShowSend
      renderSend={renderSend}
      scrollToBottomComponent={scrollToBottomComponent}
      // Step 3: add the prop
      renderLoading={renderLoading}
    />
  );
}

// Step 4: add corresponding styles
const styles = StyleSheet.create({
  // rest remains same
  loadingContainer: {
    flex: 1,
    alignItems: 'center',
    justifyContent: 'center'
  }
});
On the current screen you might see a loading indicator when you refresh the app for the first time or when the screen initializes for the first time.

What’s Next?
In part 5 of this series, we are going to create messages in real-time using the Firestore database. We will be covering how using react-navigation you can get the current room’s id. Then, use it with the current user from the AuthContext we created earlier, to add real-time message information such as a text field and a timestamp associated with it.
We will then add another real-time feature to display the latest message on the home screen under each room name’s description using Firestore queries.
You can find the complete source code for this project at this Github repo.
👉 Here is a list of resources used in this tutorial:
