
React 16.8 welcomed the dawn of Hooks. This new addition is both a new concept and pragmatic approach that helps you use state and lifecycle methods behavior in functional React components, that is, without writing a class. The intention to implement this new feature in React ecosystem is to benefit all the community.
Whether you are a developer with a front-end role or write mobile apps using React Native, chances are that you are going to come across Hooks often enough in your working environment. Of course, you do not have to use them. You can still write class components, they are not going anywhere yet. However, I personally like to think it is an important part of being a developer and using something like React in our work/day-job/side-hustle projects by keeping up to date with these new features.
Following the footsteps of ReactJS, React Native community recently announced that they will be adding support for hooks shortly in the upcoming version 0.59. I have been waiting for them to officially make this announcement before I publish this tutorial, only to spike up your interest in Hooks.
In this tutorial, I will walk you through the steps on using Hooks in a React Native application by building a small demo app and understand the most common Hooks in detail before that. Moreover, I am going to briefly introduce you to the concept of flexbox and how is it significantly different in React Native than the web.
Tldr;
- Requirements
- Setting up Crowdbotics Project
- Setup a React Native app
- What are Hooks?
- Implementing Hooks in react native
- Building a Todo List App
- What is
flexbox? - Adding Hooks to the Todo List App
- Rendering the list
- Completing and Deleting an Item
- Conclusion
Requirements
In order to follow this tutorial, you are required to have the following installed on your dev machine:
- NodeJS above
8.x.xinstalled on your local machine - Know, how to run simple npm commands
- JavaScript/ES6 basics
watchmanthe file watcher installedreact-native-cliinstalled through npm
For a complete walkthrough on how you can set up a development environment for React Native, you can go through official documentation here.
Setting up a Crowdbotics Project
In this section, you will be setting up a Crowdbotics project that has React Native pre-defined template with stable and latest dependencies for you to leverage. However, at the time of writing this tutorial, the template does not use React Native version 0.59. So instead of going into too much hassle about upgrading this React Native app, I will be walking you through creating a new React Native project in the next section.
To follow along, setting up a new project using Crowdbotics app builder service is easy. Visit app.crowdbotics.com dashboard. Once you are logged in, choose Create a new application.
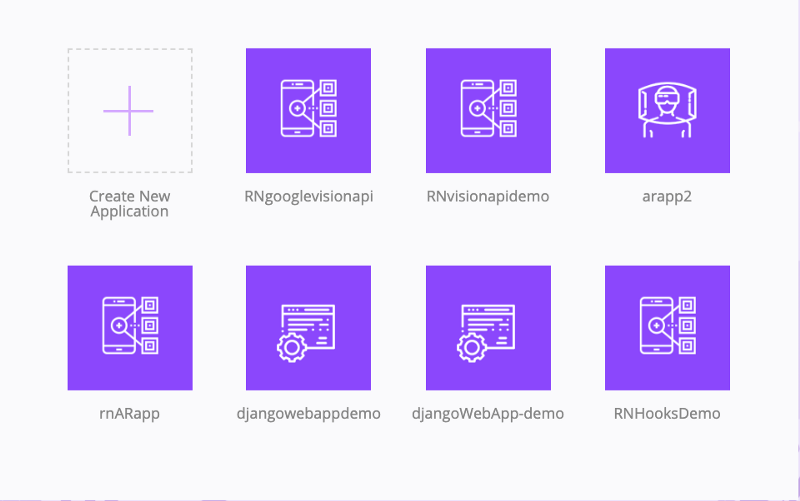
On Create an Application page, choose React Native template under Mobile App. Lastly, choose the name of your template at the bottom of this page and then click the button Create by app! After a few moments, your Crowdbotics project will be created. Upon creation, it will redirect you to the app dashboard, where you can see a link to GitHub, Heroku, and Slack. Once your project is created, you will get an invitation from Crowdbotics to download your project or clone the repository from Github either on them email you logged in or as a notification if you chose Github authentication.
Setup a React Native App
Once you installed `react-native-cli` you can begin by generating a React Native project. Run the below command to initialize a new React Native project. Also, note that you can name your React Native app anything.
react-native init RNHooksTODOAPP
Using this command, a new project folder will be generated, traverse inside it and you will be welcome by a slightly different file system (a new file that you might not have seen before is metro.config.js, which you can ignore it for now).
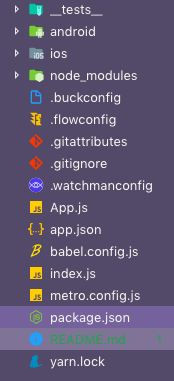
Also, note that RNHooksTODOAPP is the project and directory name, so in its place, you can enter anything. For more information on the current release candidate of React Native, you can visit their Github project.
facebook/react-native _A framework for building native apps with React. Contribute to facebook/react-native development by creating an account…_github.com
To run the mobile application in an iOS/Android simulator you can run the same old CLI commands like react-native run-ios or run-android.
What are Hooks?
Hooks in React have been available since the version 16.7.0-alpha. They are functions that allow you to use React state and a component’s lifecycle methods in a functional component. Hooks do not work with classes. If you are familiar with React, you know that the functional component has been called as a functional stateless component. Not any more.
Since previously, only a class component allowed you to have a local state. Using Hooks, you do not have to refactor a class component when using React or React Native into a functional component only because you want to introduce local state or lifecycle methods in that component. In other words, Hooks allow us to write apps in React with function components.
React provides a few built-in Hooks like useState and useEffect. You can also create your own Hooks to re-use the stateful behavior between different components.
Implementing Hooks in React Native
In the example below, let us take a look at how you will manage the local state of a component by using Hooks. Open up App.js file and paste this code.
import React, { useState } from 'react';
import { StyleSheet, Text, View, Button } from 'react-native';

export default function App() {
  const [count, setCount] = useState(0);

  return (
    <View style={styles.container}>
      <Text>You clicked {count} times.</Text>
      <Button
        onPress={() => setCount(count + 1)}
        title="Click me"
        color="red"
        accessibilityLabel="Click this button to increase count"
      />
    </View>
  );
}

const styles = StyleSheet.create({
  container: {
    flex: 1,
    justifyContent: 'center',
    alignItems: 'center',
    backgroundColor: '#F5FCFF'
  },
  welcome: {
    fontSize: 20,
    textAlign: 'center',
    margin: 10
  },
  instructions: {
    textAlign: 'center',
    color: '#333333',
    marginBottom: 5
  }
});
We will start by writing a basic old-fashioned counter example to understand the concept of using Hooks. In the above code snippet, you are starting by importing the usual along with useState from react library. This built-in hook allows you to add a local state to functional components. Notice that we are writing a functional component: export default function App(), instead of traditionally writing a class component we are defining a normal function.
This App function has state in the form of const [count, setCount] = useState(0). React preserves this state between all the re-rendering happening. useState here returns a pair of values. The first one being the count which is the current value and the second one is a function that lets you update the current value. You can call setCount function from an event handler or from somewhere else. It is similar to this.setState in a class component. In above, we are using the function inside the button component: setCount(count + 1)
useState(0) hook also takes a single argument that represents the initial state. We are defining the initial state as 0. This is the value from which our counter will start.
To see this in action, open two terminal windows after traversing inside the project directory.
# first terminal window, run
npm start

# second window, run
react-native run-ios
Once the build files are created, the simulator will show you a similar result like below.
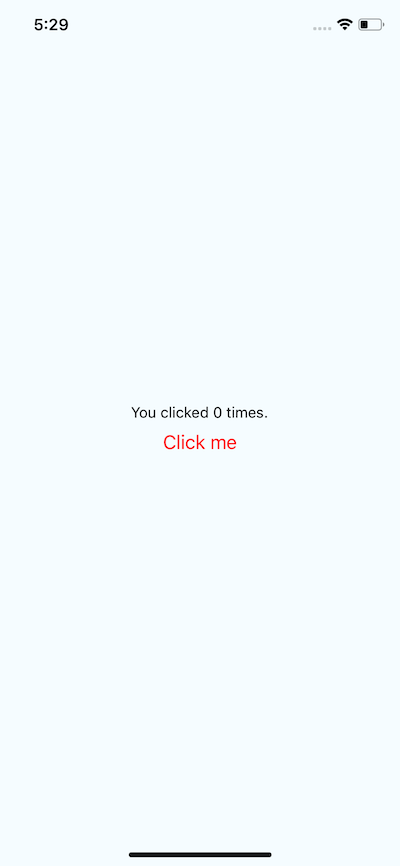
If you play around a bit and hit the button Click me, you will see the counter’s value is increased.
As you know by now, that the App component is nothing but a function that has state. You can even refactor it like below by introducing another function to handle Button click event and it will still work.
export default function App() {
  const [count, setCount] = useState(0);

  function buttonClickHandler() {
    setCount(count + 1);
  }

  return (
    <View style={styles.container}>
      <Text>You clicked {count} times.</Text>
      <Button
        onPress={buttonClickHandler}
        title="Click me"
        color="red"
        accessibilityLabel="Click this button to increase count"
      />
    </View>
  );
}
Building a Todo List app with Hooks
In this section, you are going to build a Todo List application using React Native framework and Hooks. I personally love building Todo list applications when getting hands-on experience over a new programming concept or approach.
We have already created a new project in the last section when we learned about Hooks. Let us continue from there. Open up App.js and modify it with the following code.
import React from 'react';
import {
StyleSheet,
Text,
View,
TouchableOpacity,
TextInput
} from 'react-native';
export default function App() {
return (
<View style={styles.container}>
<Text style={styles.header}>Todo List</Text>
<View style={styles.textInputContainer}>
<TextInput
style={styles.textInput}
multiline={true}
placeholder="What do you want to do today?"
placeholderTextColor="#abbabb"
/>
</View>
</View>
);
}
const styles = StyleSheet.create({
container: {
flex: 1,
justifyContent: 'flex-start',
alignItems: 'center',
backgroundColor: '#F5FCFF'
},
header: {
marginTop: '15%',
fontSize: 20,
color: 'red',
paddingBottom: 10
},
textInputContainer: {
flexDirection: 'row',
alignItems: 'baseline',
borderColor: 'black',
borderBottomWidth: 1,
paddingRight: 10,
paddingBottom: 10
},
textInput: {
flex: 1,
height: 20,
fontSize: 18,
fontWeight: 'bold',
color: 'black',
paddingLeft: 10,
minHeight: '3%'
}
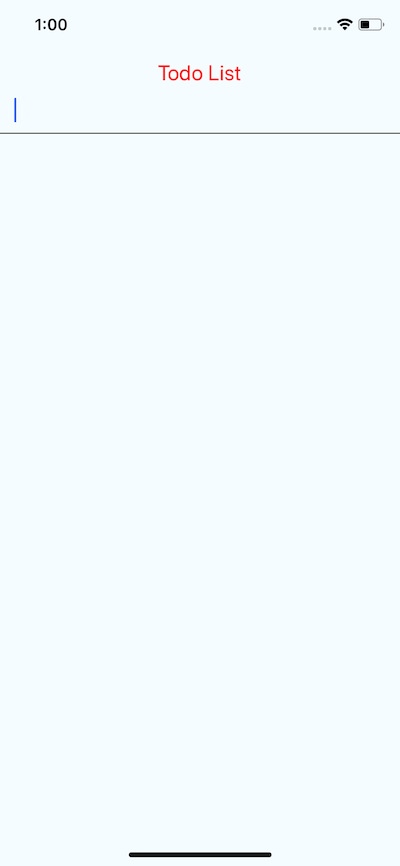
});We need a text input field to add items to our list. For that, TextInput is imported from react-native. For demonstration purposes, I am keeping styles simple, especially the background color. If you want to make the UI look good, go ahead. In the above code, there is a header called Todo List which has corresponding header styles defined using StyleSheet.create object. Also, take notice of the View which uses justifyContent with a value of flex-start.
What is flexbox?
Creating a UI in a React Native app heavily depends on styling with flexbox. Even if you decide to use a third party library kit such as nativebase or react-native-elements, their styling is based on flexbox too.
The flexbox layout starts by creating a flex container with an element of display:flex. If you are using flexbox for the web you will have to define this display property. In react native, it is automatically defined for you. The flex container can have its own children across two axes. The main axis and cross axis. They both are perpendicular to each other.
These axes can be changed as a result of property flexDirection. In the web, by default, it is a row. In React Native, by default, it is a column.
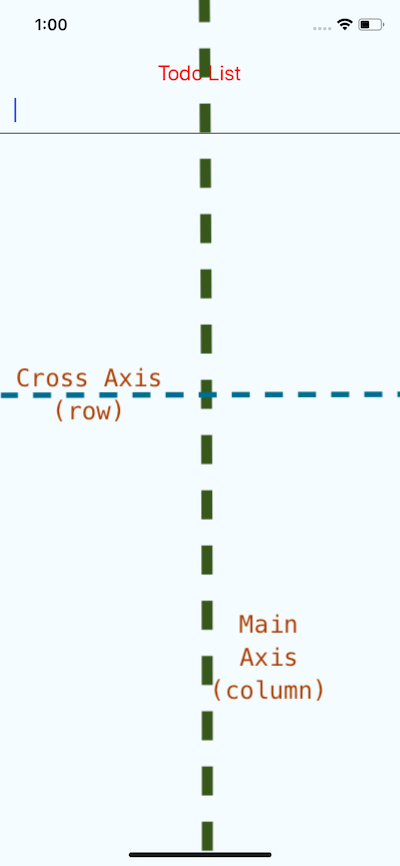
To align an element along the horizontal axis or the cross axis in React Native you have to specify in the StyleSheet object with the property of flexDirection: 'row'. We have done the same in the above code for the View that contains TextInput field.
Flexbox is an algorithm that is designed to provide a consistent layout on different screen sizes. You will normally use a combination of flexDirection, alignItems, and justifyContent to achieve the right layout. Adding justifyContent to a component’s style determines the distribution of children elements along the main axis. alignItems determine the distribution of children elements along the cross axis.
Back to our app. Right now, if you run it in a simulator, it will look like below.
Let us add an icon to represent a button to add items to the todo list. Go to the terminal window right now and install react-native-vector-icons.
npm install -S react-native-vector-icons

# Also link it
react-native link react-native-vector-icons
Now go back to App.js file. We have already imported TouchableOpacity from react-native core. Now let us import Icon from react-native-vector-icons.
import {
StyleSheet,
Text,
View,
TouchableOpacity,
TextInput
} from 'react-native';
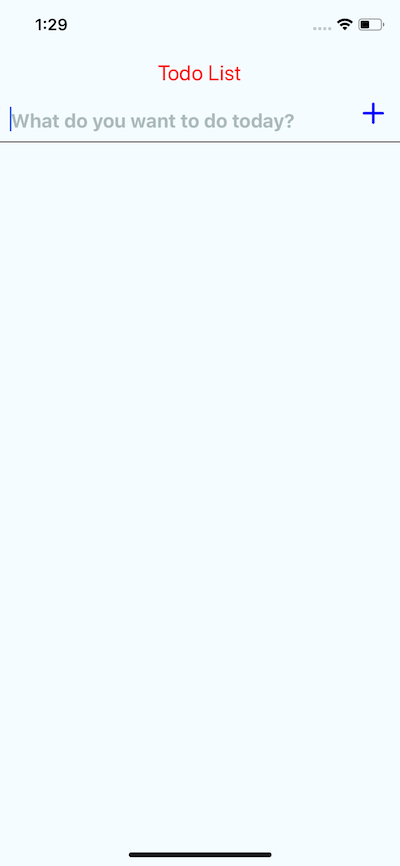
import Icon from 'react-native-vector-icons/Feather';Next step is to add the Icon element inside TouchableOpacity next to the TextInput. This means the plus to add an item to the list must be on the same line or axis as the text input field. TouchableOpacity makes the icon clickable and can have an event listener function (which we will add later) to run the business logic for adding an item to the list.
<View style={styles.textInputContainer}>
  <TextInput
    style={styles.textInput}
    multiline={true}
    placeholder="What do you want to do today?"
    placeholderTextColor="#abbabb"
  />
  <TouchableOpacity>
    <Icon name="plus" size={30} color="blue" style={{ marginLeft: 15 }} />
  </TouchableOpacity>
</View>
Now if you go back to the simulator you will have the following screen.
Adding Hooks to the App
In this section, you are going to add a local state to the component using Hooks. We will start by initializing the local state for the App component with the new hooks syntax. For that, you have to require useState from react core. Also, note that the initial state passed below is passed as an argument to the useState() function.
import React, { useState } from 'react';

// ...
export default function App() {
  const [value, setValue] = useState('');
  const [todos, setTodos] = useState([]);

  addTodo = () => {
    if (value.length > 0) {
      setTodos([...todos, { text: value, key: Date.now(), checked: false }]);
      setValue('');
    }
  };

  // ...
}
The first value is the value of TextInput and it is initially passed as an empty string. In the next line, todos are declared as an empty array that will later contain multiple values. The setValue is responsible for changing the value of value on TextInput and then initializing the empty value when the value from the state is assigned as an item to todos array. setTodos is responsible for updating the state.
The addTodo function we define is a handler function that will check if the TextInput field is not empty and the user clicks the plus icon, it will add the value from state to the todos and generate a unique key at the same time to retrieve each todo item record from todos array to display as a list. The initial value for checked is false since no todo item can be marked as completed by default, that is when adding it to the list.
Here is the complete code for App.js after adding state through Hooks.
import React, { useState } from 'react';
import {
  StyleSheet,
  Text,
  View,
  TouchableOpacity,
  TextInput
} from 'react-native';

import Icon from 'react-native-vector-icons/Feather';

export default function App() {
  const [value, setValue] = useState('');
  const [todos, setTodos] = useState([]);

  addTodo = () => {
    if (value.length > 0) {
      setTodos([...todos, { text: value, key: Date.now(), checked: false }]);
      setValue('');
    }
  };

  return (
    <View style={styles.container}>
      <Text style={styles.header}>Todo List</Text>
      <View style={styles.textInputContainer}>
        <TextInput
          style={styles.textInput}
          multiline={true}
          placeholder="What do you want to do today?"
          placeholderTextColor="#abbabb"
          value={value}
          onChangeText={value => setValue(value)}
        />
        <TouchableOpacity onPress={() => handleAddTodo()}>
          >
          <Icon name="plus" size={30} color="blue" style={{ marginLeft: 15 }} />
        </TouchableOpacity>
      </View>
    </View>
  );
}

const styles = StyleSheet.create({
  container: {
    flex: 1,
    justifyContent: 'flex-start',
    alignItems: 'center',
    backgroundColor: '#F5FCFF'
  },
  header: {
    marginTop: '15%',
    fontSize: 20,
    color: 'red',
    paddingBottom: 10
  },
  textInputContainer: {
    flexDirection: 'row',
    alignItems: 'baseline',
    borderColor: 'black',
    borderBottomWidth: 1,
    paddingRight: 10,
    paddingBottom: 10
  },
  textInput: {
    flex: 1,
    height: 20,
    fontSize: 18,
    fontWeight: 'bold',
    color: 'black',
    paddingLeft: 10,
    minHeight: '3%'
  }
});
Rendering the List
You are going to create a new component that will be responsible for displaying each task that a user adds. Create a new file called TodoList.js and add the following code to the file.
import React from 'react';
import { StyleSheet, TouchableOpacity, View, Text } from 'react-native';
import Icon from 'react-native-vector-icons/Feather';

export default function TodoList(props) {
  return (
    <View style={styles.listContainer}>
      <Icon name="square" size={30} color="black" style={{ marginLeft: 15 }} />
      <Text style={styles.listItem}>{props.text}</Text>
      <Icon
        name="trash-2"
        size={30}
        color="red"
        style={{ marginLeft: 'auto' }}
        onPress={props.deleteTodo}
      />
    </View>
  );
}

const styles = StyleSheet.create({
  listContainer: {
    marginTop: '5%',
    flexDirection: 'row',
    borderColor: '#aaaaaa',
    borderBottomWidth: 1.5,
    width: '100%',
    alignItems: 'stretch',
    minHeight: 40
  },
  listItem: {
    paddingBottom: 20,
    paddingLeft: 10,
    marginTop: 6,
    borderColor: 'green',
    borderBottomWidth: 1,
    fontSize: 17,
    fontWeight: 'bold',
    color: 'white'
  }
});
Now let us import this component in App.js to render todo items when we add them by clicking the plus sign button. Also, you are now required to import ScrollView in App component from react native core.
import {
  StyleSheet,
  Text,
  View,
  TouchableOpacity,
  TextInput,
  ScrollView
} from 'react-native';

// ...

import TodoList from './TodoList';

// ...
return (
  <View style={styles.container}>
    {/* ... */}
    <ScrollView style={{ width: '100%' }}>
      {todos.map(item => (
        <TodoList text={item.text} key={item.key} />
      ))}
    </ScrollView>
  </View>
);
The ScrollView is a component that renders all its child at once. A good case to use when you are not rendering a large amount of data or data coming from a third party API. Now, enter a new task (like below) and try adding it to the todo list.
Completing and Deleting an Item
This is the last section to complete our application. We need two handler functions to implement functionalities of checking a todo list item mark and deleting a todo list item.
Define two functions like below after addTodo.
checkTodo = id => {
  setTodos(
    todos.map(todo => {
      if (todo.key === id) todo.checked = !todo.checked;
      return todo;
    })
  );
};

deleteTodo = id => {
  setTodos(
    todos.filter(todo => {
      if (todo.key !== id) return true;
    })
  );
};
The first function checkTodo uses map function to traverse the complete todos array, and then check only that item that has been toggled by the user using its icon on the mobile app by matching its key (look at the addTodo function, we defined a key when adding an item to the todo list). The deleteTodo function uses filter to remove an item from the list.
To make it work, we need to pass both of these functions to TodoList component.
// App.js
<ScrollView style={{ width: '100%' }}>
  {todos.map(item => (
    <TodoList
      text={item.text}
      key={item.key}
      checked={item.checked}
      setChecked={() => checkTodo(item.key)}
      deleteTodo={() => deleteTodo(item.key)}
    />
  ))}
</ScrollView>
Now open, TodoList.js and these new props.
import React from 'react';
import { StyleSheet, View, Text } from 'react-native';
import Icon from 'react-native-vector-icons/Feather';

export default function TodoList(props) {
  return (
    <View style={styles.listContainer}>
      <Icon
        name={props.checked ? 'check' : 'square'}
        size={30}
        color="black"
        style={{ marginLeft: 15 }}
        onPress={props.setChecked}
      />
      <View>
        {props.checked && <View style={styles.verticalLine} />}
        <Text style={styles.listItem}>{props.text}</Text>
      </View>
      <Icon
        name="trash-2"
        size={30}
        color="red"
        style={{ marginLeft: 'auto' }}
        onPress={props.deleteTodo}
      />
    </View>
  );
}

const styles = StyleSheet.create({
  listContainer: {
    marginTop: '5%',
    flexDirection: 'row',
    borderColor: '#aaaaaa',
    borderBottomWidth: 1.5,
    width: '100%',
    alignItems: 'stretch',
    minHeight: 40
  },
  listItem: {
    paddingBottom: 20,
    paddingLeft: 10,
    marginTop: 6,
    borderColor: 'green',
    borderBottomWidth: 1,
    fontSize: 17,
    fontWeight: 'bold',
    color: 'black'
  },
  verticalLine: {
    borderBottomColor: 'green',
    borderBottomWidth: 4,
    marginLeft: 10,
    width: '100%',
    position: 'absolute',
    marginTop: 15,
    fontWeight: 'bold'
  }
});
Now run the app and see it in action.

Conclusion
This completes our tutorial. I hope this tutorial helps you understand the basics of React Hooks and then implement them with your favorite mobile app development framework, React Native.
You can extend this demo application by adding AsyncStorage or a cloud database provider and making this application real time. Also, do not forget to enhance the UI to your liking.
To read more about React Hooks check out the official Overview page here.
The complete code for this tutorial is available in the Github repository below.