Designing a REST API with Node.js and MongoDB Atlas

Nodejs is a remarkable technology for the fulfilling and developing web applications. Being open source and in the past few years, we have seen it rising. It might be a bit different from other traditional web technologies in terms of learning curve but I urge you to stick with it if you are getting in to web development and have opted Node.js ecosystem. In this tutorial, I will walk you through the basics of REST API design with using Node.js ecosystem.
I’d love if you follow along with me with snippets of code that are in continuation below. Before we begin, I want you to understand what is REST and how its beneficial to use it with server side JavaScript.
What is REST?
REST is an acronym for Representation State Transfer and is an industry standard (till Graphql conquers the world) for defining how an API and its endpoint (routes) should communicate with the server code of your web application. A REST API consumes HTTP methods such GET, POST, etc. with endpoints that are nothing but URLs that you can use to fetch some data or update/create new data in the database. In his whitepaper, Roy Fielding described the paradigms and practical use of REST. I am going to summarise points what he exactly says in that paper. The basis of a RESTful API depends on below:
- Client-Server
- Stateless
- Uniform Interface
- Cacheable
- Layered System
- Code-On-Demand style
To read about them in detail, please see Roy Fielding’s paper on the same here.
Applications that make use of REST APIs perform four basic operations that are known as CRUD.
- C: Creating data
- R: Reading data
- U: Updating data
- D: Deleting/removing data
Prerequisites
There are some things we need to go through this tutorial successfully.
- Node.js installed
- Access to MongoDB, a NoSQL database on your local machine or cloud
- IDE/Editor
- Postman, a REST client to test our API’s endpoints
If you do not have MongoDB installed on your local machine, do not worry. In the next step, I am going to walk you through setting up a free tier of MongoDB in the cloud.
Consuming MongoDB in Cloud
For the sake of brevity, I am going to use MongoDB Atlas a service that you can use to store data for your sample application. You can also use other popular database-as-a-service Mlab without any hassle.
I already have an account set up, so I’d suggest you sign up on MongoDB atlas site with your email. Once you have logged in, you will get the below screen:
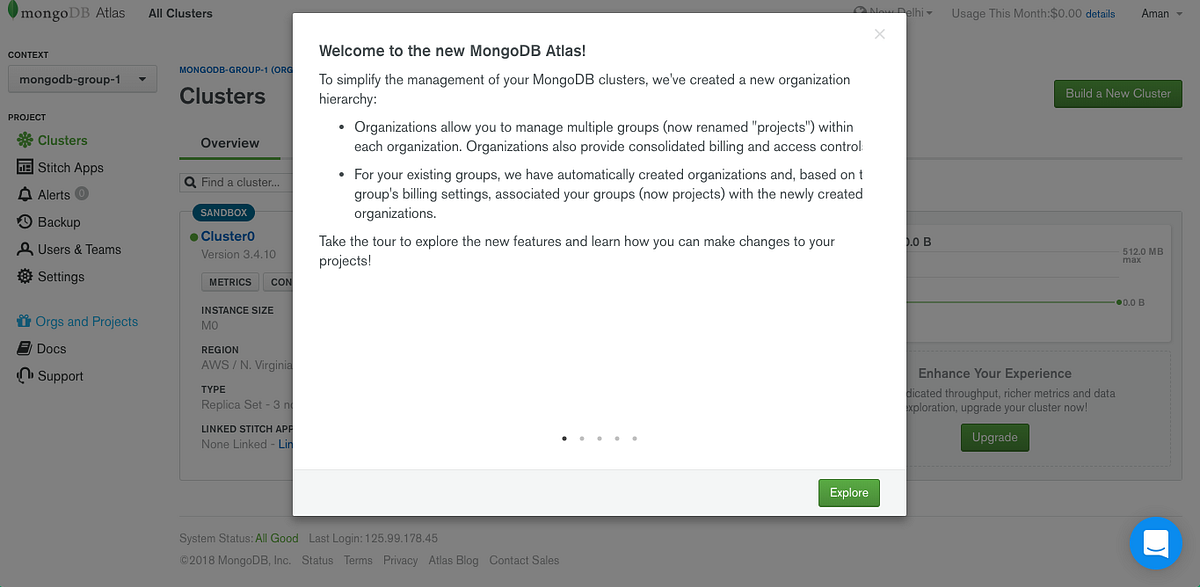
At this point, you can either take time to explore what MongoDB Atlas is or you can skip and together we will setup a Sandbox for our sample application. Click on the “New Project” button on the right side of the web page.
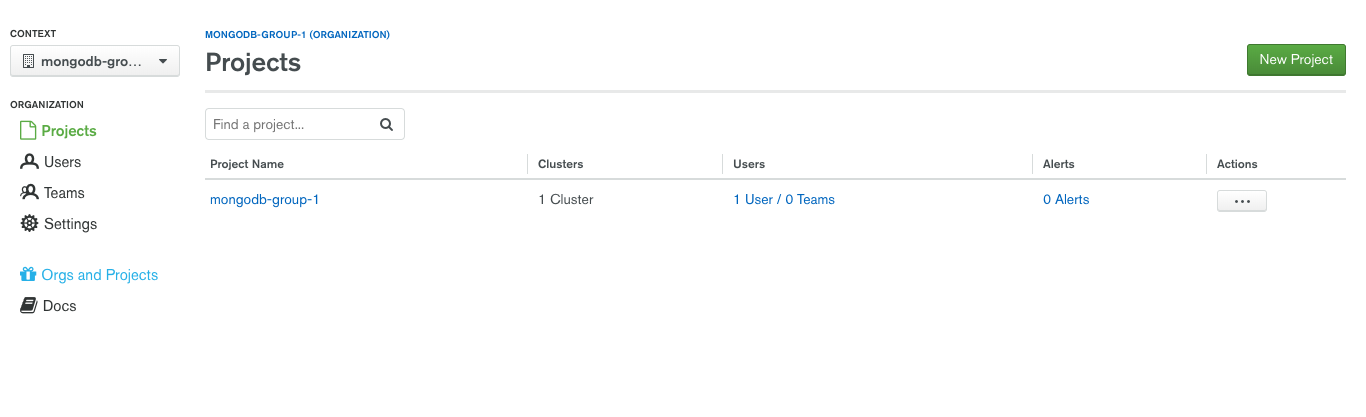

Then you will be prompted to fill in the details. See screenshots below, enter a name for your project and click “next” and then click “Create Project”. Per one account in MongoDB Atlas, you will get one free tier/cluster. Follow the steps below to setup one.

Click on the Build new Cluster button.

Scroll down a bit, and then select the free tier M0. Per free cluster, we get 512mb of space. More than enough for what we need for this tutorial.

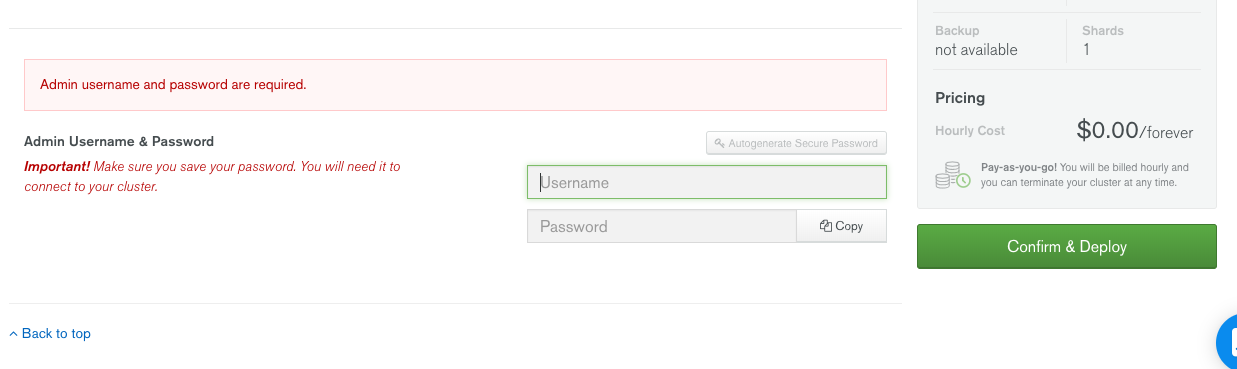
Then enter username and password for an Admin connection that we will use to connect to our database through our application. Make sure you remember both username and password and password must a bit strong. Lastly, click on confirm and deploy and the service will take at least 10 minutes to setup a database cluster.
That’s it. The database is now ready to be used. Now let us setup our application.
Configuring Server Side
🔗From your terminal:
# to initialize our node project, we need a package.json filenpm init --yes# install express frameworknpm install -S express mongoose body-parser
Mongoose is a client that helps us connect and communicate with our database. BodyParser is needed as a middleware to parse the data to be sent through HTTP requests. Express is the de-facto standard and is one of the reasons we will be using it.
Running the Server
🔗Let’s first the nitty gritty of our server. Create a file app.js in the root directory with the following code:
1// app.js23const express = require('express');45const app = express();67const port = process.env.PORT || 3301;89app.listen(port, () => {10 console.log(`Server running at http://localhost:${port}`);11});
The app is an object provided by Express API for the developer to communicate with the application and bootstrap a server. In Express application, it is that easy to write bare minimum server. There are different ways you can setup your server but the basics will remain same. For brevity, I am using app.js but you can take a look at Express generator that scaffolds a structure in a quick manner.
Now, add an npm script to package.json file to test and start our server.
1"scripts": {2 "start": "node app.js",3 "test": "echo \"Error: no test specified\" && exit 1"4 },
From terminal, npm run start or npm start and you should see the success message without any error.

Setting up Mongoose
🔗Mongoose is an ORM (Object Relational Mapper) that is used to interact with MongoDB database instance. We have already setup our instance using MongoDB atlas and installed mongoose as the project dependency. So let us start by defining a schema. Though, NoSQL database are schema less it is consider a best practice to define a schema to give some structure to the data that will be stored in our database.
A typical Express application follows MVC (model-view-controller) model to define a directory structure and that is what we are going to do. Create a directory models and inside it a file Task.js with following code:
1const mongoose = require('mongoose');2const Schema = mongoose.Schema;34const TaskSchema = new Schema({5 taskName: {6 type: String,7 required: true8 },9 createdOn: {10 type: Date,11 default: Date.now12 }13});1415module.exports = mongoose.model('Tasks', TaskSchema);
This schema does look like a JSON data and that is exactly what MongoDB stores or it appears to be for the developer to. Original format of data stored in MongoDB is called BSON (stands for _Binary JSON) and it converts JSON to BSON is handled by the dtabase itself. You can read more about it here in the official docs.
Mongoose allows us to create define a schema for our the document to be stored in our application via inside the application just by defining a model. You can think it of as a blueprint. All your tasks in the database collection, will have taskName and createdOn value. Lastly, we bind our schema with the name of our collection Tasks. The collection in MongoDB our by default plural since they tend to contain a number of documents. taskName and createOn are called fields in terms of MongodB terminology. Together they constitute a document inside the collection Tasks and each document will have a unique ID to identify them as a record in the database. This unique ID is stored in MongoDB database by default and is a 12 byte value made up of different things related to our database. You can read more about how this unique ID created by the database here.
Connecting Database To our Application
🔗Before we further go with the controller part, let us first connect the database to our server and see if everything is working A-OK.
I like to store all my application’s configuration in a config directory. Create a db.js file inside that directory.
1const mongoose = require('mongoose');23const dbURI =4 'mongodb://newuser:myNewPassword@cluster0-shard-00-00-gibou.mongodb.net:27017,cluster0-shard-00-01-gibou.5 mongodb.net:27017,cluster0-shard-00-02-gibou.mongodb.net:27017/test?ssl=true&replicaSet=Cluster0-shard-0&6 authSource=admin';78const options = {9 reconnectTries: Number.MAX_VALUE,10 poolSize: 1011};1213mongoose.connect(dbURI, options).then(14 () => {15 console.log('Database connection established!');16 },17 err => {18 console.log('Error connecting Database instance due to: ', err);19 }20);2122// require any models2324require('../models/Task');
To get the connection string you have to follow the following steps:
First click on the connect button on your MongoDB Atlas page the following screen will prompt.

Then, click “Allow Access from Anywhere” to white list our server URL.

Then, copy the URI string for version 3.4:
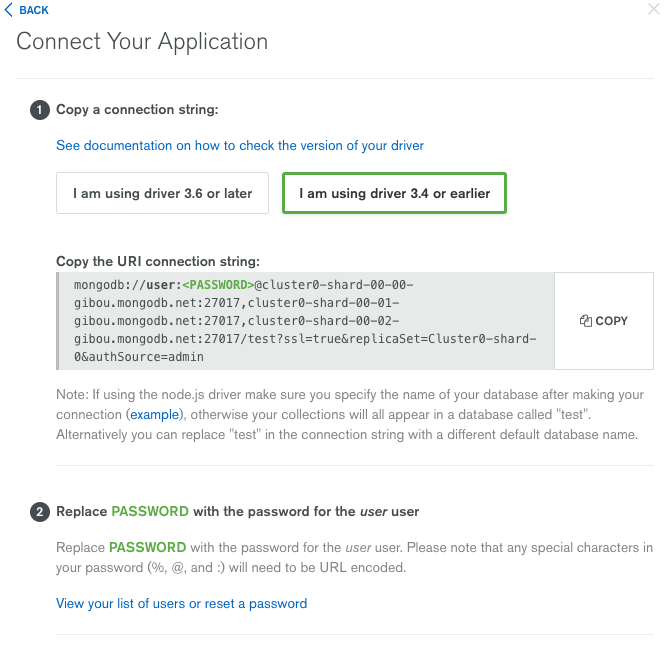
And enter the username and password you entered during the setup of our instance in place of username:<password> and remove the placeholders <>. I am using options variable to spike your curiosity such that you will explore about it and the power of mongoose. You can read more about connection options that provided by mongoose here.
Lastly, we use mongoose.connect() to establish a connection between server and the database instance and handle it gracefully using a promise. But wait, the connection won't be establish until we connect this config file with our application and for that we need to require this file in our main app.js file.
1const express = require('express');23// db instance connection4require('./config/db');56const app = express();78const port = process.env.PORT || 3301;910app.listen(port, () => {11 console.log(`Server running at http://localhost:${port}`);12});
Now restart our server from command line and you will see the success prompt:

Do you notice one thing here? For every change we make in our application, we have to restart our server from command line and to ignore this tedious process we can make use of a powerful utility called nodemon developed by Remy Sharp.
Enter Nodemon
🔗After we setup nodemon I promise we will be focusing on code of our API but making use of this utility will save tons of amount of time when working on an API yourself. Let's install nodemon as a dev dependency first.
npm install -D nodemon
After installing it, change the start script in package.json file to:
1npm install -D nodemon
Now if we start our server, nodemon will monitor for any changes made and restart the server when necessary on its own. We don’t have to worry about that anymore.
Back to our API code.
Setting up Business Logic
🔗To setup routes or endpoints of our application, we need to include body-parser in our app.js.
1const express = require('express');2const bodyParser = require('body-parser');34// db instance connection5require('./config/db');67const app = express();89const port = process.env.PORT || 3301;10app.use(bodyParser.urlencoded({ extended: true }));11app.use(bodyParser.json());1213app.listen(port, () => {14 console.log(`Server running at http://localhost:${port}`);15});
BodyParser parses incoming HTTP requests as middleware under req.bodybefore routes or API have access to them and perform any further actions on them. Very useful and essential step when using forms in a web application.
To define the business logic of our APIs endpoints, we are going to create a separate file TaskController.js under directory controllers.
For our API routes (I am going to call them route for brevity but they are same as endpoints) we are going to five different actions or operations or way to handle incoming requests. These tasks will cover our CRUD operations. Each route will have at least two parameters: req and res.
req: request, useful when creating or or updating a new task and read data from the body (this where BodyParser works like a charm).res: response to fulfill that incoming request with response.
1const Task = require('../models/Task');23exports.listAllTasks = (req, res) => {4 Task.find({}, (err, task) => {5 if (err) {6 res.status(500).send(err);7 }8 res.status(200).json(task);9 });10};1112exports.createNewTask = (req, res) => {13 let newTask = new Task(req.body);14 newTask.save((err, task) => {15 if (err) {16 res.status(500).send(err);17 }18 res.status(201).json(task);19 });20};2122exports.readTask = (req, body) => {23 Task.findById(req.params.taskid, (err, task) => {24 if (err) {25 res.status(500).send(err);26 }27 res.status(200).json(task);28 });29};3031exports.updateTask = (req, res) => {32 Task.findOneAndUpdate(33 { _id: req.params.taskid },34 req.body,35 { new: true },36 (err, task) => {37 if (err) {38 res.status(500).send(err);39 }40 res.status(200).json(task);41 }42 );43};4445exports.deleteTask = (req, res) => {46 Task.remove({ _id: req.params.taskid }, (err, task) => {47 if (err) {48 res.status(404).send(err);49 }50 res.status(200).json({ message: 'Task successfully deleted' });51 });52};
This completes our controller. The controller is the business logic that binds our endpoints/routes that we are going to define soon to what action or operation they will perform on an incoming request.
Each of the above operation when sending a response does send HTTP status code which clearly determines whether the incoming request was fulfilled or was there an error. This the part of REST paradigm and is best practice. You can read more about this here.
Setting up Routes
🔗1const express = require('express');2const bodyParser = require('body-parser');3const taskController = require('./controllers/TaskController');45// db instance connection6require('./config/db');78const app = express();910const port = process.env.PORT || 3301;11app.use(bodyParser.urlencoded({ extended: true }));12app.use(bodyParser.json());1314// API ENDPOINTS1516app17 .route('/tasks')18 .get(taskController.listAllTasks)19 .post(taskController.createNewTask);2021app22 .route('/tasks/:taskid')23 .get(taskController.readTask)24 .put(taskController.updateTask)25 .delete(taskController.deleteTask);2627app.listen(port, () => {28 console.log(`Server running at http://localhost:${port}`);29});
We setup our API’s endpoints by first requiring the controller and then passing on a specific endpoint it using the correct HTTP method. The endpoints can be elaborated as:
POST /tasks to create a new task
GET /tasks to get a list of all tasks
GET /tasks/:taskid to get a specific task by its unique id(the one mongodb creates for us)
PUT /tasks/:taskid to modify existing task
DELETE /tasks/:taskid to delete an existing task from our database instance
As a best practice, APIs routes should always use nouns for identifying resource.
Now let us test our API routes using Postman.
Testing our API
🔗Open postman and type http://localhost:3301/tasks and selct the POSTmethod. We will first use the POST request to create a new task since our database is currently empty and does not have any data. Use body to fill in the data which follows same schema we defined in our model.

Hitting the send button should respond with 200 status and the data we created structured exactly like our schema in JSON format.

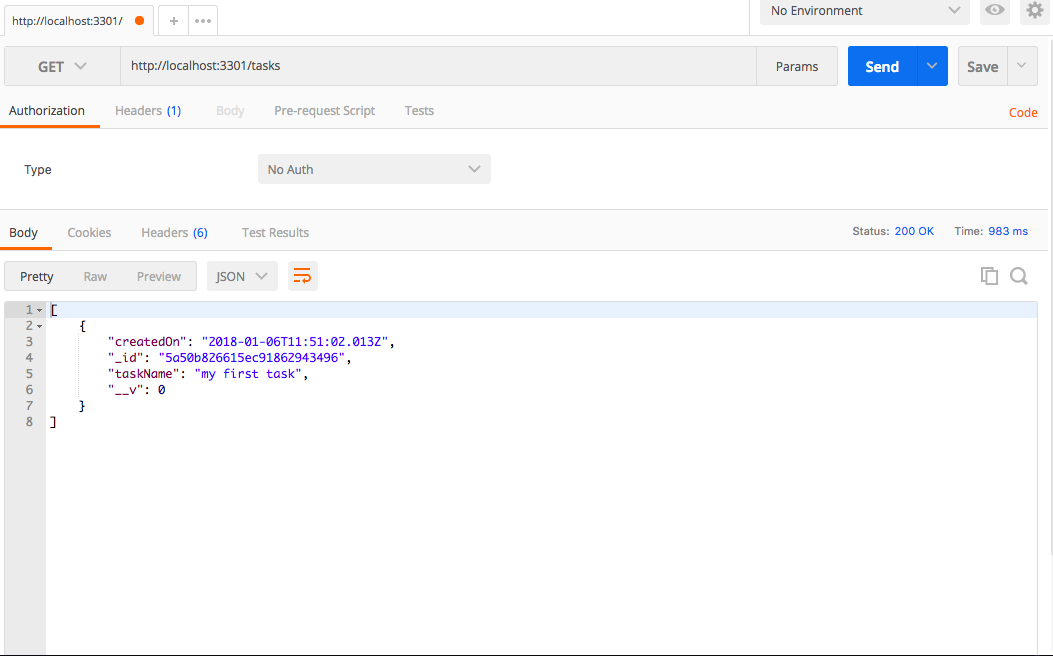
Similarly, we can test other endpoints of our API. Such as getting all tasks (so far we have so it will give only one task that we just created):
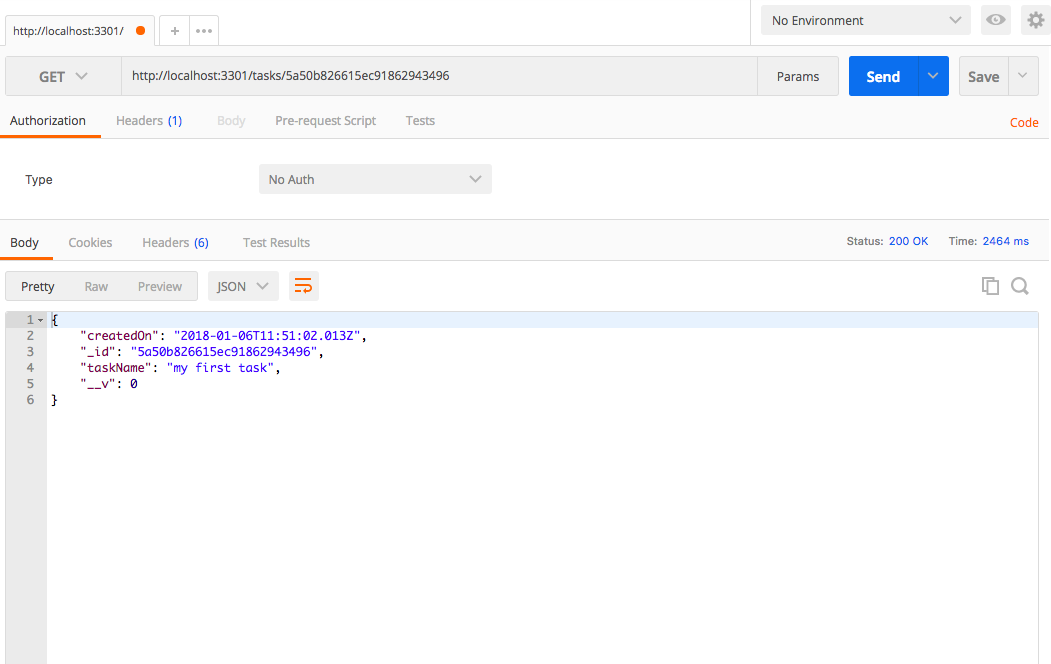
Getting the task by its _id:
Try updating the task or removing it by using the endpoints we defined earlier and changing the HTTP method from Postman yourself.
Hope you learned something valuable by reading this article.
You can find the complete code at this Github repository.
More Posts
Browse all posts
I'm a software developer and a technical writer. On this blog, I write about my learnings in software development and technical writing.
Currently, working maintaining docs at 𝝠 Expo. Read more about me on the About page.